Last year, for the late May bank holiday, I set myself the challenge of getting 100 SOTA points in the weekend in the Vosges area of eastern France, an area renowned for being an easy place to get lots of points fairly quickly.
This year, in May 2019, my challenge was to do 120 points in about two-and-a-half days. Because of flight availability, I flew into Frankfurt (about 3 hours’ drive from the Vosges), and then stayed the first night in Colmar. This gave me a good excuse to tackle five summits on the first day, which I hadn’t got to last year as I wasn’t so far north. In doing this, I was basically following the route in Luc, ON7DQ’s blog, with one additional hill.
FL/VO-007: Le Grand Brézouard
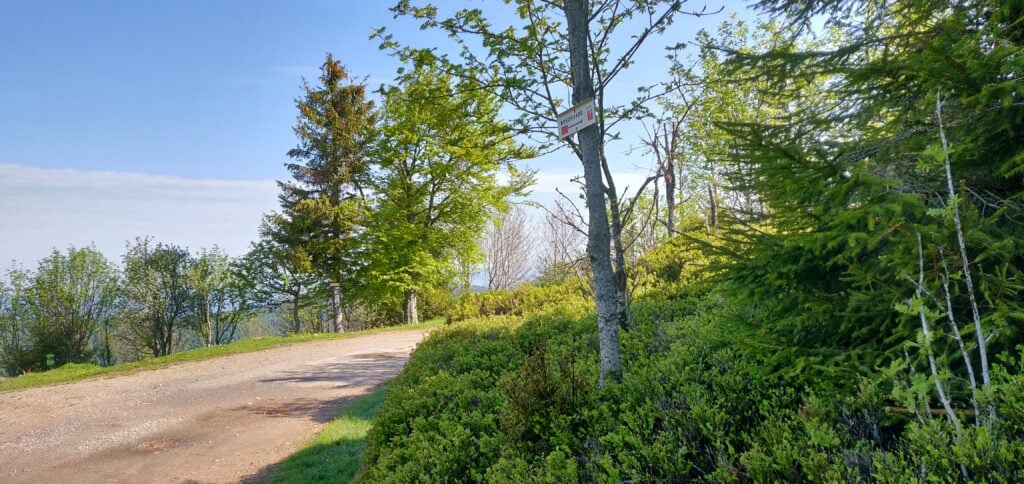
Driving a rental car, I didn’t want to take the risk of the gravel path taken by Luc, so I parked at the end of the tarmac road at the Auberge de Haycot, where there’s space for a few cars on the grass verge at 48.19652993, 7.139014. From here, you can simply follow the gravel road to the next bend, where a small track signposted ‘Brézouard GR 5’ cuts through the trees on your left. From here on, follow the signs marked with a red square.
The path is well-signposted
This is a pleasant forest trail, which brings you out to a clearing at 48.19311678, 7.146474. From here, you take the right-hand most (fairly steep) path up through the trees, which eventually leads to the summit.
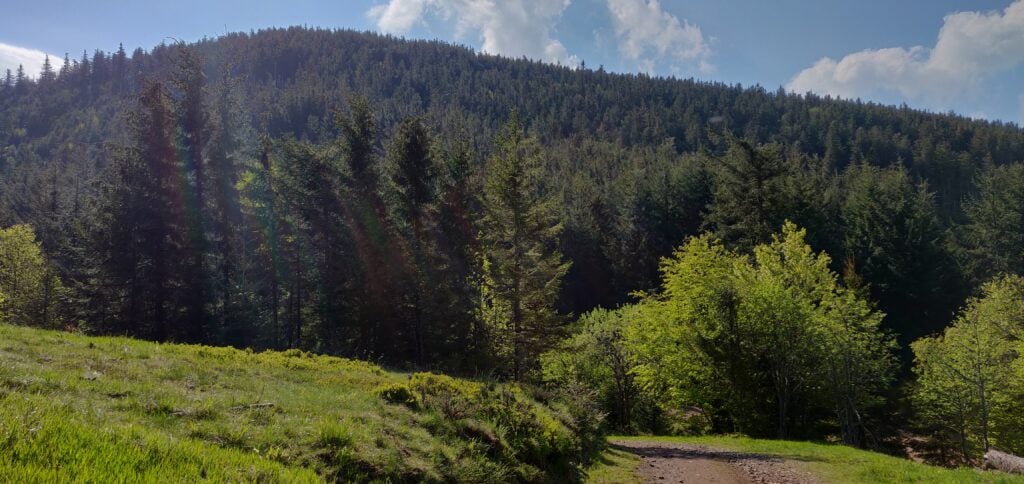
Le Grand Brézouard
Luc’s blog post mentions an aluminium flag pole at the summit, which can be used to attach an antenna to. That’s no longer there, having been replaced by a small Versatower section surrounded by trees and housing a solar panel and anemometer – not the sort of thing to hang antennas off!
The ascent and descent took about 30 minutes in each direction.
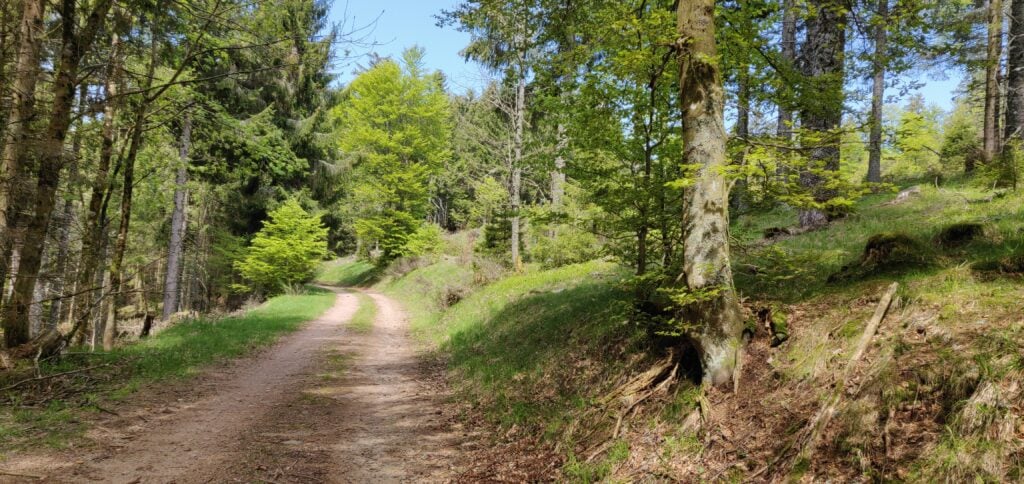
There’s really very little to say about Le Rossberg (not to be confused with VO-013 Rossberg). It’s a very easy little activation, starting from 48.18332998, 7.09295744 (about 13 minutes’ drive from Le Grand Brézouard) where you can park on the verge at the start of the track. From here, the path through the forest barely rises and the navigation is easy. The only thing to notes is that where the path splits you follow the cross-country ski path signed with the orange sign to the left (not the blue one to the right).
On reaching the highest point on the path, I made a little detour off the path to find a small clearing in the trees just to get myself easily into the activation zone.
The walk up Le Rossberg
The ascent took about 16 minutes and the descent took about 12 minutes.
Loading map…Scroll or tap to load the interactive map
Distance
—
Elevation gain
—
Elevation loss
—
Max elevation
—
Waypoints
—
Elevation profile
FL/VO-003: Gazon du Faing
About 40 minutes’ drive south from Le Rossberg is the Gazon du Faing ridge. This is a popular spot but there’s plenty of parking at 48.10897979, 7.06415083.
Luc’s blog post describes the (anti-erosion) wooden steps up the path to the summit and how annoying they are. You don’t have to take that main path, however, because the SOTA manual defines the summit of Gazon du Faing as being at 48.1138, 7.0795, which is to the north of the viewpoint the path goes to. Consequently, you can instead take the easier path marked with outlined blue circles, through the scrub to the top.
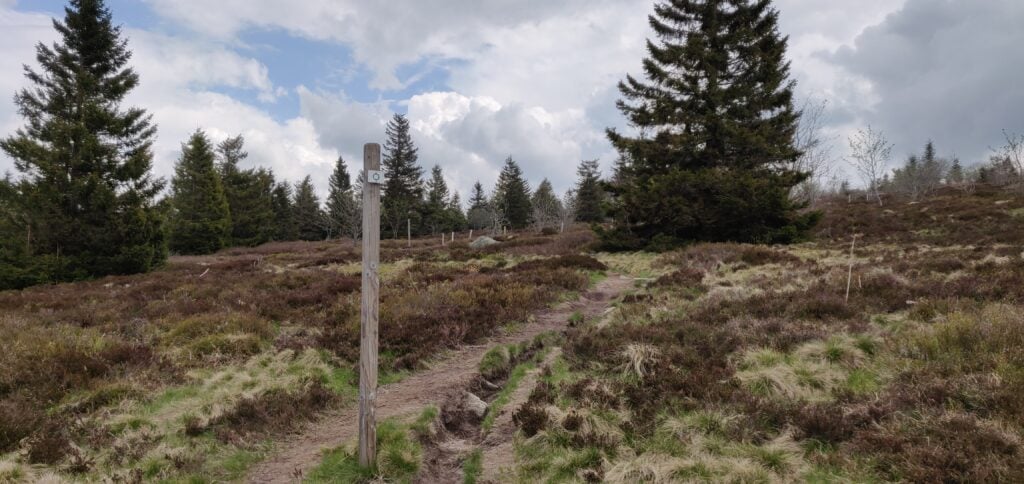
Take the path through the scrub to the top
Once at the summit, there’s very little here. No cairn or trig point, no marker of any sort. It’s just barren. With the main bulk of the tourists on the other peak, it’s also quite a peaceful spot with plenty of space to set up.
The ascent took me 28 minutes and the descent took 20 minutes. (Note that on the map below the summit marked is the southern summit, whereas I activated the northern summit as defined in the manual. It’s all the activation zone either way!)
Loading map…Scroll or tap to load the interactive map
Distance
—
Elevation gain
—
Elevation loss
—
Max elevation
—
Waypoints
—
Elevation profile
Back at the car a short, sharp hail shower set in. It was good timing getting back, but we sat it out for a few minutes before heading to the next summit, about 55 minutes’ drive away.
FL/VO-014: Chaume de Sérichamp
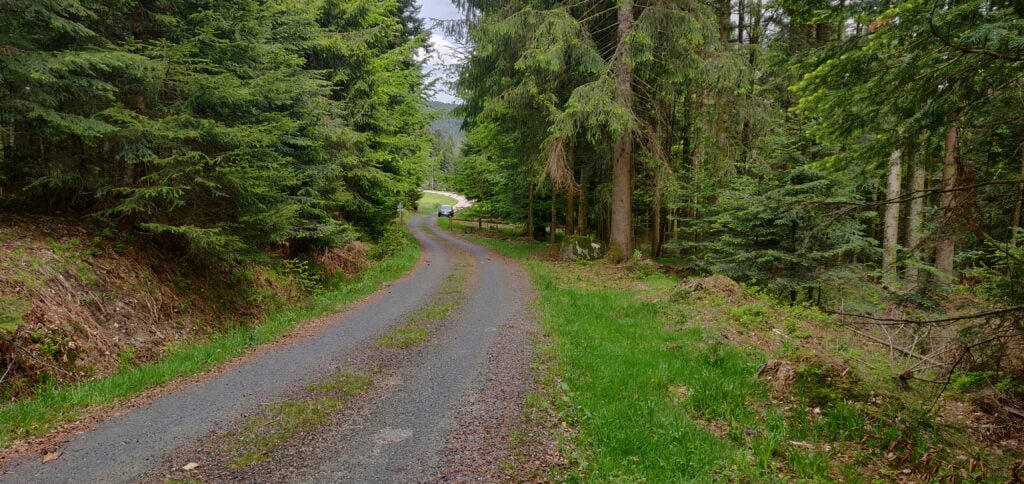
Luc’s blog post describes parking at 48.109832, 6.994016 on a ‘degraded’ road. Again, with the hire car, I opted for a slightly longer walk that didn’t risk any damage! To this end, we parked at 48.09950669, 6.99626895, at the end of the tarmac road. From here, there’s a steep gravel forestry path up the hill (motor vehicles are not permitted, except forestry workers). This road rises about 220m in 2km before coming out to the clearing where Luc parked.
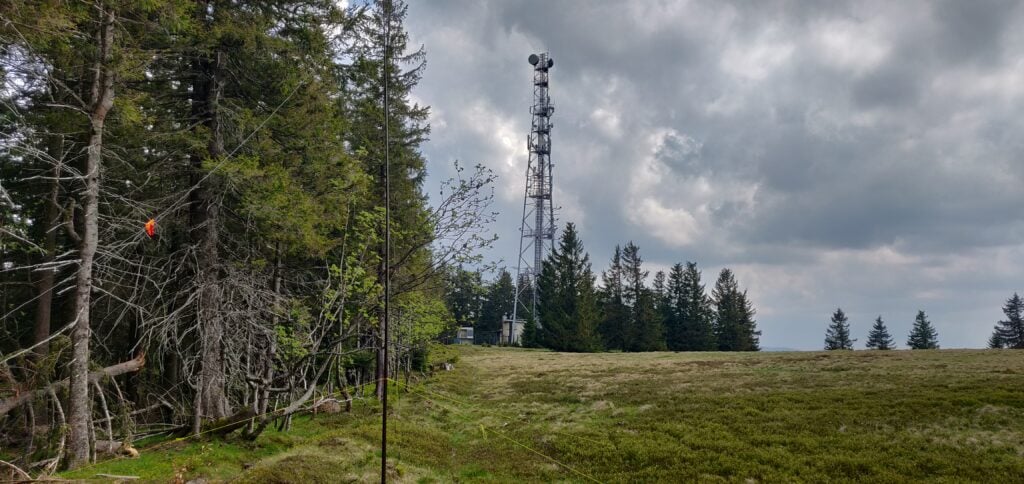
Once at the clearing, you can follow the road to the transmitter tower. Like Luc, I set up on the field boundary just behind the tower.
My antenna next to the transmitter tower
The ascent took 40 minutes and the descent took 23 minutes.
Loading map…Scroll or tap to load the interactive map
Distance
—
Elevation gain
—
Elevation loss
—
Max elevation
—
Waypoints
—
Elevation profile
FL/VO-089: Haut de la Pierre de Taille
With some time to fill, I could add another activation to Luc’s four-summit route. My backup plan was to tackle VO-020 Le Croix Hanzo, but that’s quite a hike from the outskirts of the village of Xonrupt-Longemer, and I didn’t quite have time for that one. Looking at the map, together with the SOTA Spotter app’s valuable ‘find nearby summits’ feature, I quickly realised that an activation of VO-089 Haut de la Pierre de Taille was more achievable in the time left before dinner.
I parked at the end of the road at 48.1021206, 6.89313458 on the verge just in front of the ‘no motor vehicles’ sign, and then walked up the track until it started going downhill again. It’s about a 1.5km walk each way, only rising by about 120m, so it’s another easy one.
Haut de la Pierre de Taille is another easy activation up a forest track
Once again, when I got to the top of the road, I went into the forest a little bit just to ensure I was easily into the activation zone, as the actual summit point is well into the woodland. As with all my operations this weekend, I quickly made a sufficient number of QSOs on 30m CW before heading back down again and into La Bresse for dinner.
The ascent took about 22 minutes and the descent took 16 minutes. In total, this gave me 50 points (all five summits are worth ten points) for the day – a good start towards my target of 120 points.
Loading map…Scroll or tap to load the interactive map
Distance
—
Elevation gain
—
Elevation loss
—
Max elevation
—
Waypoints
—
Elevation profile
The rest of the weekend
The rest of the weekend was formed of the following activations:
Monday was also made up of summits I did in 2018: Haut du Rouge Gazon (done on day three last year) and then Le Grand Ventron (also from day two last year), about 20 minutes’ drive from Rouge Gazon.
This gave me a total of 120 points from the weekend.
This week, I’m on the GT3PYE/P DXpedition to the Isle of Man
with the Camb-Hams. As part of the trip, Rob M0VFC, Colin G4ERO and I have been
activating all the SOTA summits on the Isle of Man.
It’s perfectly possible to do them all in a single day, amassing
18 points from the five hills, but we chose to split them over two days.
GD/GD-001 Snaefell
Our first stop was the highest point on the island,
Snaefell, worth 8 SOTA points. It’s a really easy walk starting from the car
park at SN 398 868 and then walking straight up on the obvious path. It’s only
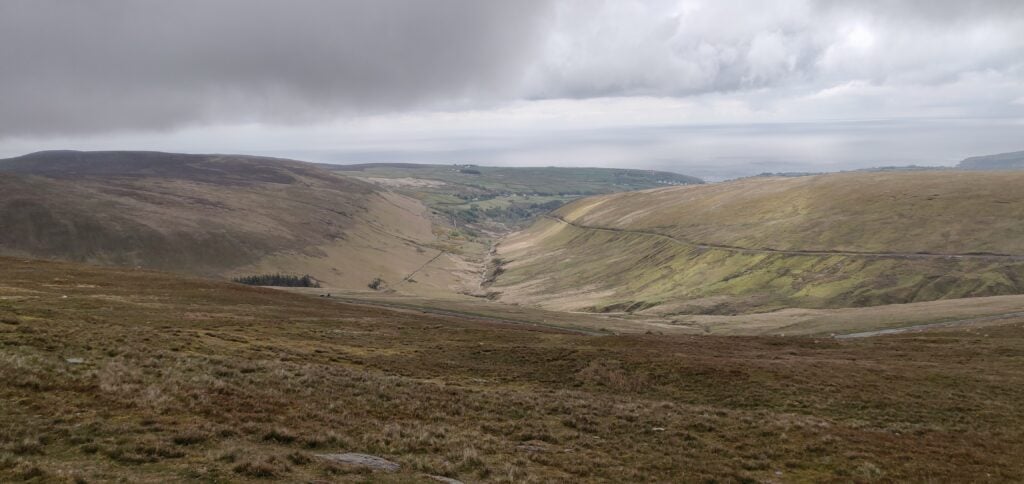
moderately steep, rising just over 200m in about a kilometre. The ascent has some views over the rest of the
island, although we did it in cloudy conditions and so we didn’t have the most
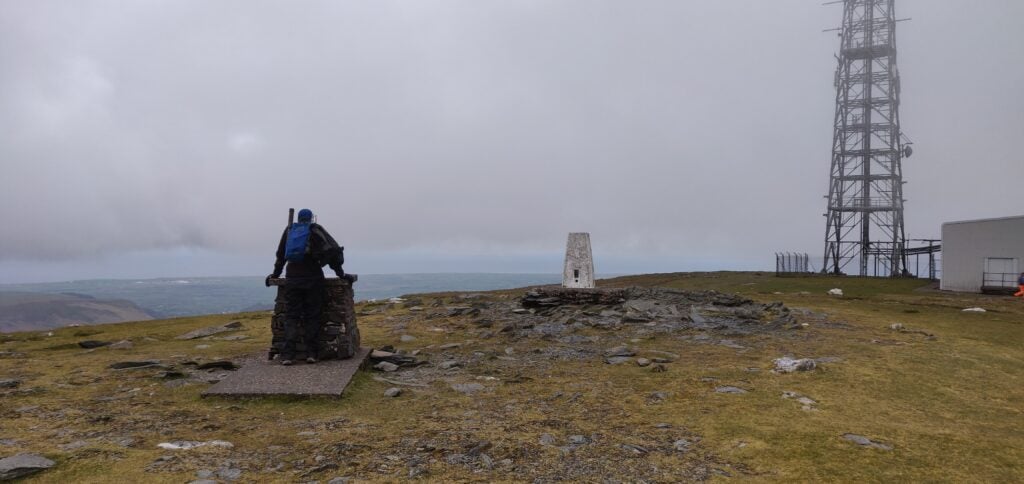
impressive sight. At the top, bear right behind the tram stop and there is
plenty of space to set up beside the transmitter masts. We didn’t notice any
significant QRM from the masts on HF, but 30m was certainly very slow and getting
the requisite four QSOs was a bit of a struggle. A strong northerly wind didn’t
make it any more comfortable.
From the ascent of SnaefellSnaefell Summit
The route up took 30 minutes, and the descent was about 20 minutes.
GD/GD-002 Slieau Freoaghane
After leaving Snaefell, we headed to Slieau Freoaghane, about 15 minutes’ drive away. This four-point summit is another approximately 200m ascent but over a slightly longer distance and it was a much more interesting walk than Snaefell.
Having parked at SN 342 867, you can walk up the ‘Green Way’
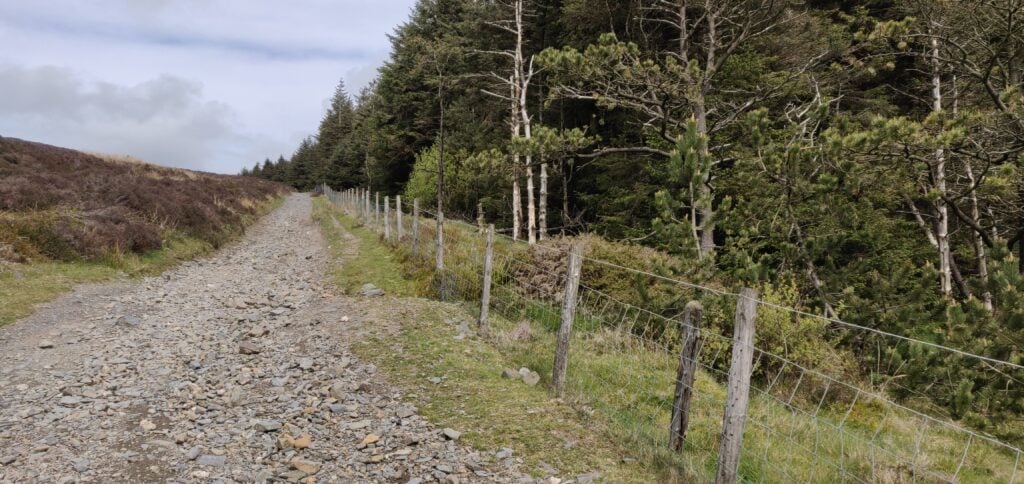
heading north alongside the plantation. The incline here is very slight. The
Green Way is a gravel ‘road’ suitable for motorbikes, mountain biking and the
like, although we only saw one such vehicle on our travel. There’s a gate at
the bottom of the Green Way to prevent car access.
The ‘Green Way’ alongside the plantation
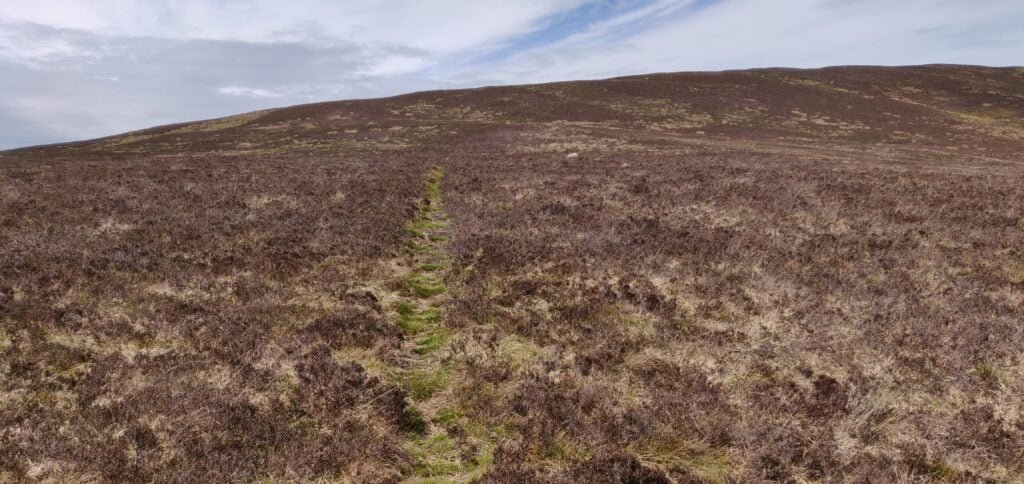
The OS map suggests there is a path to the left at SN 342 873: we saw no evidence of this, but you carry on the Green Way at this point anyway. The path you do want to take is at SN 244 877 and it’s a barely-visible sheep track heading up through the heather. This is the steepest part of the climb but it was without any major problems.
Track through the heather
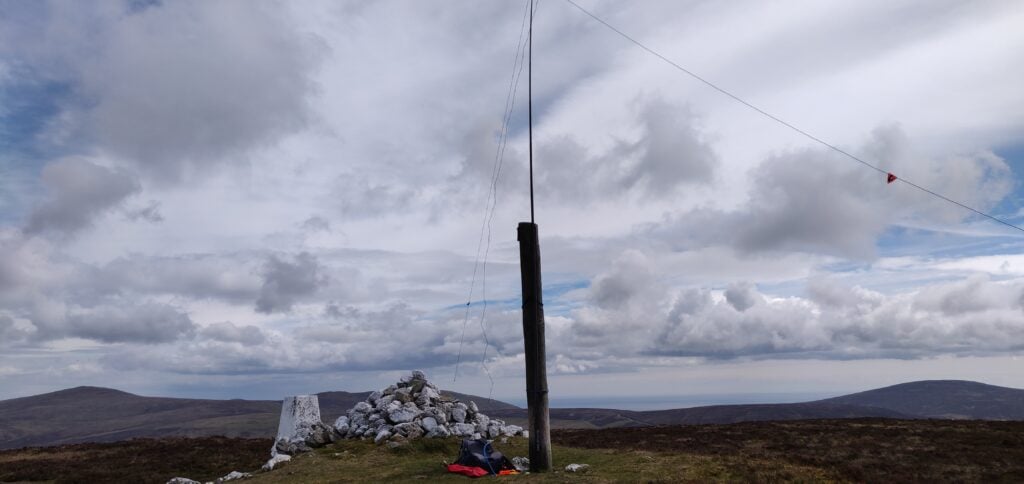
The top of the hill has a very useful wooden pole next to the cairn and trig point, so I bungeed my fibreglass pole to the wooden pole (which has some nails sticking out of it for extra ease-of-use!), so saving me getting out the guying kit.
Summit of Slieau Freoaghane
Again, HF was very slow and I had to make a couple CQs on VHF
to qualify. Luckily, these got me across to Northern Ireland and so we were all
able to qualify the summit.
This was a longer walk, taking 40 minutes for the ascent and 25 minutes back down.
GD/GD-003 South Barrule
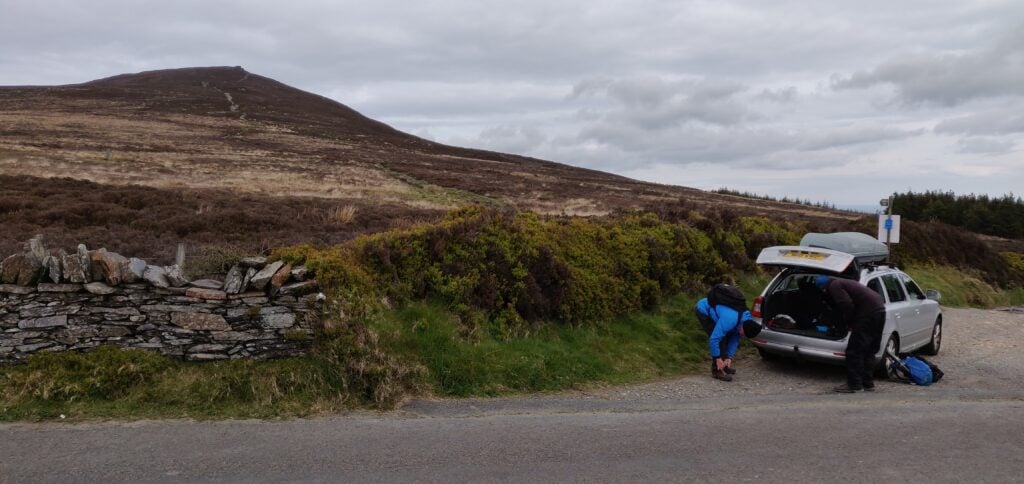
This is another four-point hill and about a 25 minute drive from GD-002. It’s also fairly easy to activate. You can park on the verge at the start of the track at SN 248 756 and again just follow the obvious grass path straight to the top. The ascent took about 20 minutes to climb 170m in about a kilometre. Incidentally, the transmitter mast shown on my 2015 OS map as being next to the path is no longer there.
South Barrule – park the car and head straight up!
The top of the hill is an iron-age hill fort and the trig
point is inside a cairn. Again, this is a fairly flat-topped hill, so there’s
plenty of space to set up. By now, it was much later in the afternoon and 30m
was performing a lot better than it had earlier in the day, which was a great
relief and led to a rather pleasant activation in slightly warmer sunshine than
we had had hitherto.
Summit of South Barrule
GD/GD-004 Bradda Hill
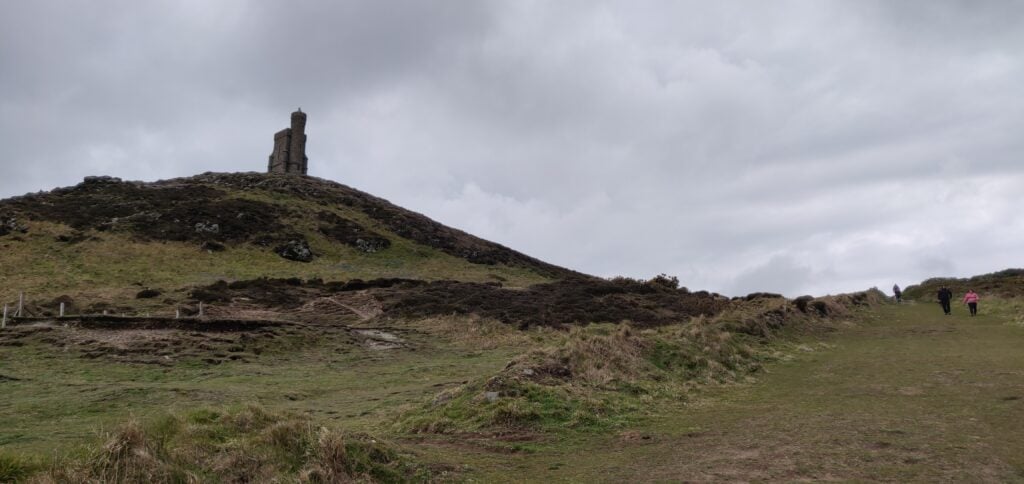
The following morning started sunny so we decided to make a decent circuit of the walk to Bradda Hill, a one-point summit near Port Erin on the south-west coast. We parked in the large carpark at SH 192 698, and then followed the nice, mostly concrete, path around to Bradda Head tower.
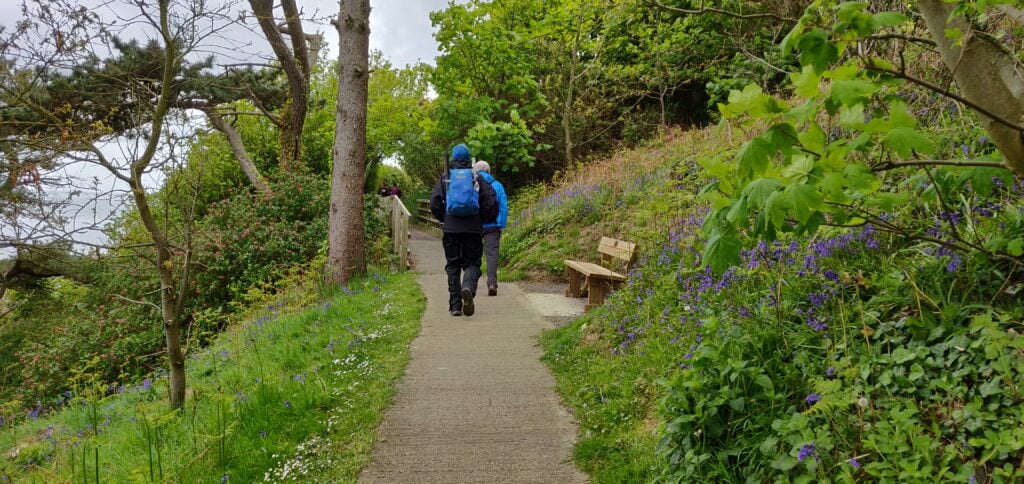
Path to Bradda Tower
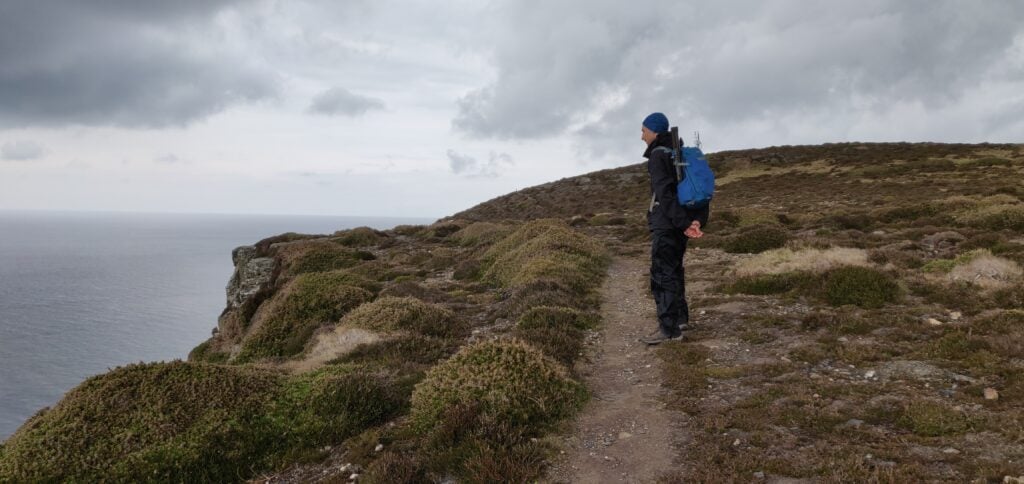
Just before the tower, stay on the main path to go behind the tower. The path in front of the tower along the cliff has eroded into the sea. Once you have past the tower, a grass path re-joins the coastal path hugging the cliffs until you are nearly at Bradda Hill. There is a substantial drop down the cliff but the path is mainly set a little back from the edge, and so it didn’t feel especially dangerous but you might need care in some places in slippery conditions.
The grass path behind Bradda TowerHeading along the coastal footpath
There’s nothing particularly at Bradda Hill. It’s just a
lump of heather sticking out from the coastal farmland but there is a stone
wall near the cairn which can provide some shelter from a southerly wind. HF
conditions were again very difficult and I had to give up on 30m after one call
and lots of CQing to borrow Rob’s rig on 40m instead.
Once we had finished operating, we continued east on the path along the plantation. The path down to Ballaglonney is a little steep and we were glad we hadn’t come up that way. I needed to get my walking poles out to improve my balance, although some steps have been cut into the earth.
Downhill to Ballaglonney in the valley
From the farm buildings, you can follow the main track alongside the wood to meet the main road at Bradda East and then go back to the carpark.
The total circuit, including 1 hour of operating time, took 2h45.
Loading map…Scroll or tap to load the interactive map
Distance
—
Elevation gain
—
Elevation loss
—
Max elevation
—
Waypoints
—
Elevation profile
GD/GD-005 Mull Hill
Mull Hill is another one-point hill, about 15 minutes’ drive
from Bradda Hill on the other side of the Port Erin bay. It’s possible to drive
to the top but it’s also a very easy walk from just outside of the activation
zone to the summit.
We parked in the large carpark at Cregneash and then followed the road west for a little bit before coming to a turning, with the obvious grass path up the hill. Mull Hill is an old Chain Home RADAR site from World War 2 and there are still a few concrete pillboxes and the like on the summit. The rubble-strewn ground made getting tent pegs for the guys in a little bit difficult but we got the stations running in the end. Initially, we just operated on 70cms to get some summit-to-summit contacts with other members of our group on Snaefell, but then we set up the HF stations. In the course of this I managed to break my trusty guying ring for my SOTA pole, so some careful use of cable ties was required to get the mast upright. 30m was again almost useless, but a change to 20m was much more profitable.
The path up Mull Hill from the road below
We took a slightly different route for our descent but it was still only about 15 minutes’ walk each way. By the way, there are some nice views of the VOR/DME (VHF Omnidirectional Range / Direction Measuring Equipment) site for aircraft navigation on the adjacent hill. The VOR sends ‘IOM’ on 112.2 MHz but wasn’t detectable on 2m.
After tackling Pen Llithrig on a less-than-successful day yesterday, it was now Easter Sunday. Knowing the traffic would be bad on Monday, I wanted to get in a quick morning walk before heading back to Cambridge in the afternoon, ahead of most of the cars.
Cadair Berwyn (GW/NW-012, worth 8 points) fitted the bill perfectly. It’s not technically in Snowdonia but it is located in north-eastern Wales, not far from the English border at Oswestry. It was about 40 minutes’ drive from my campsite, so I’d get some of the journey home done early too.
The starting point for this walk is at the Pistyll Rhaeadr waterfall, which is a well-known tourist spot in its own right. The only road to the waterfall is a single-track road with passing places from the village of Llanrhaeadr-ym-Mochnant. There is a large car park (£4 for the day) at the end of the road at SJ074295 but, not knowing this, I parked in the layby at SJ076293.
Once you have parked, you need to walk back down the road to pick up the path at SJ079290 – failure to do this will result in you being on the wrong side of the valley; a mistake I almost made! The path is stony and wide, only rising gently to the lake at Llyn Lluncaws. Just before the lake you need to cross the stream twice. The stream itself is narrow and easy to step over, but the surrounding area is a bit boggy. I can only imagine it is worse in wetter weather.
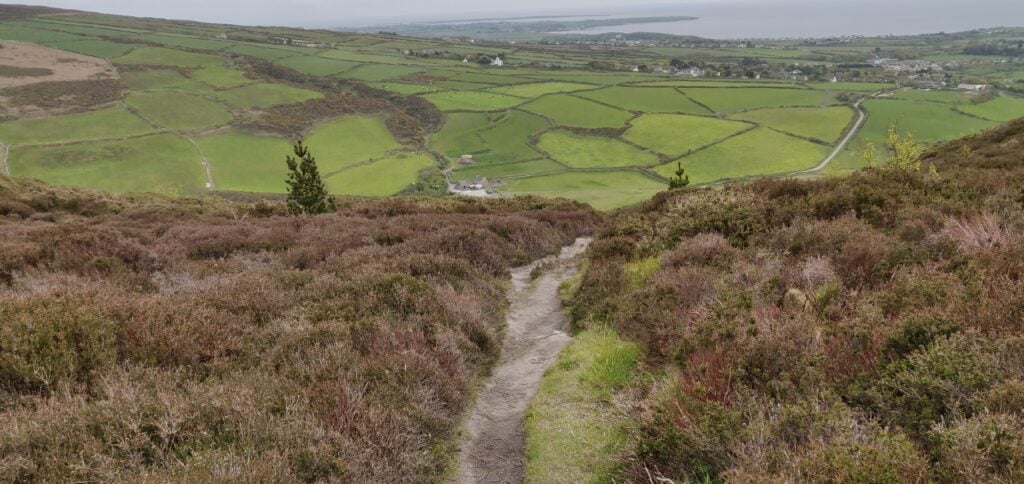
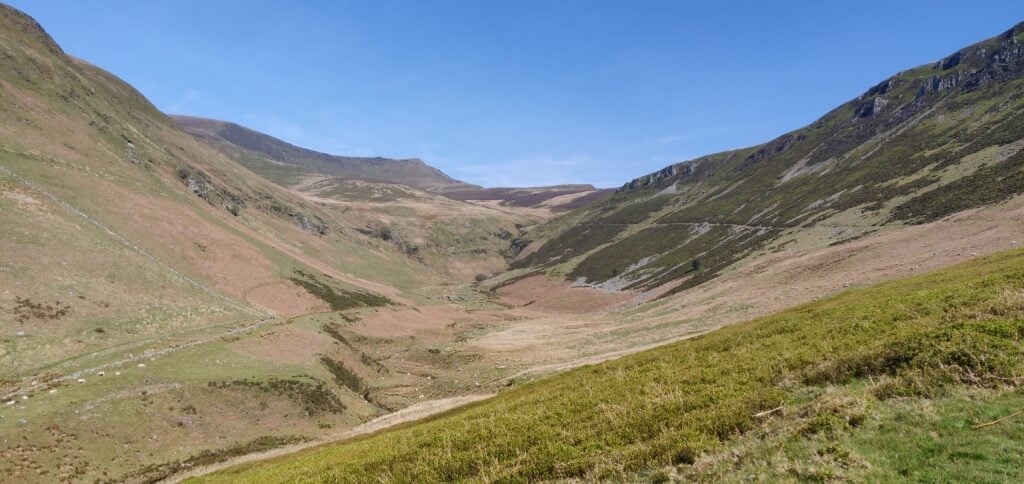
The obvious path rises gently along the right-hand (eastern) edge of the valley; Cadair Berwyn is on the horizon at the end of the valley
Once at the lake, the path runs on some slightly boggy terrain along the southern edge and then heads steeply uphill along the side of the escarpment. The path is generally fine but it does get a little close to the edge at a couple points around 700m ASL, so you need to watch your footing. Once you have reached the top, there’s a short walk along the grassy top of the hill to get into the Activation Zone.
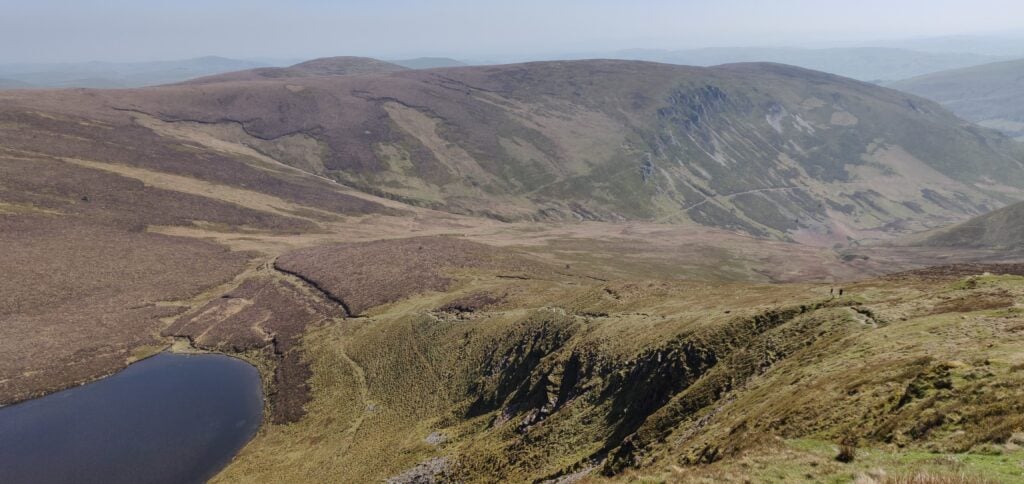
The path climbs along the side of the hill from the lake
Cadair Berwyn has two summits. The northerly one has the trig point and was previously thought to be the highest point. At 827m ASL, however, it is beaten by 3m by the southern summit.
There’s plenty of room here to set up but I was able to do a quick activation on 2m from my handheld only, which enabled me to get back to the car for the drive home. The ascent took me 1 hour 55 minutes and the descent took 90 minutes. This was a very pleasant summit to activate and I’ll certainly be back, especially as it’s only 3.5 hours’ drive from Cambridge.
The only problem was on returning to my car to find that the single-track road from the village had become full of cars, including cars parked in the passing places and along the side of the road. This made actually driving the first mile a very slow experience with lots of very careful passing needed. For this reason, I wouldn’t recommend doing it on a hot bank holiday weekend!
Loading map…Scroll or tap to load the interactive map
I was up early, despite the long walk around Y Garn and Glyder Fawr yesterday, ready to head on another double-hill day, walking around Carnedd Llewelyn and Pen Llithrig y Wrach.
The car park for this one is in the entrance to the campsite at SH685602. The campsite allows non-residents to park in the layby at entrance for £2/day; payment is taken at the campsite reception.
After parking, walk a little bit along the pavement beside the A5 then head up the steep tarmac private road all the way to Ffynnon Llugwy reservoir. Just before the reservoir, the path splits away from the road and you see the route up the side of Bwlch Eryl Farchog ahead of you.
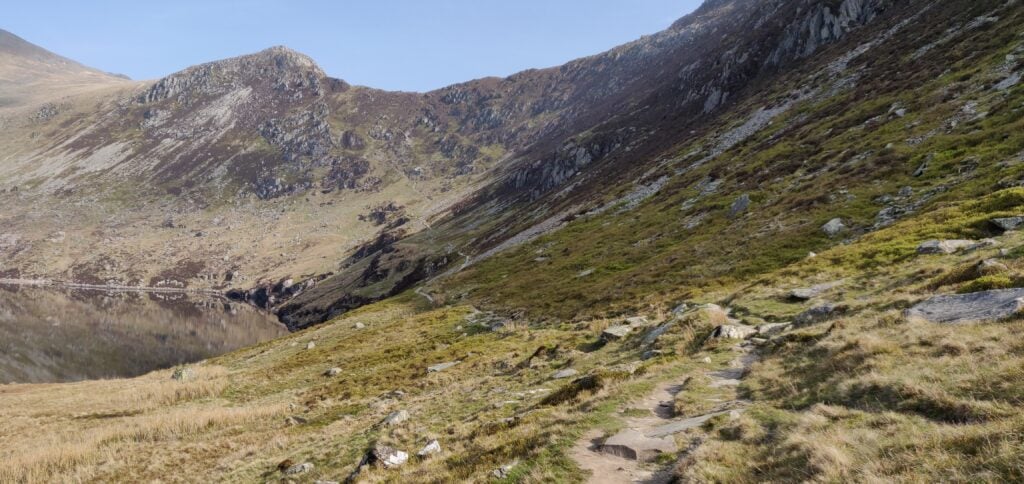
From the lake, the path leads up the hill straight in front of you
The path up here is hard work. It’s narrow and steep and I had to pull myself up in a couple of places. There were only a couple times that I felt concerned about tackling the route on my own but it needed a lot of care and I would probably think twice about doing it without a companion in the future.
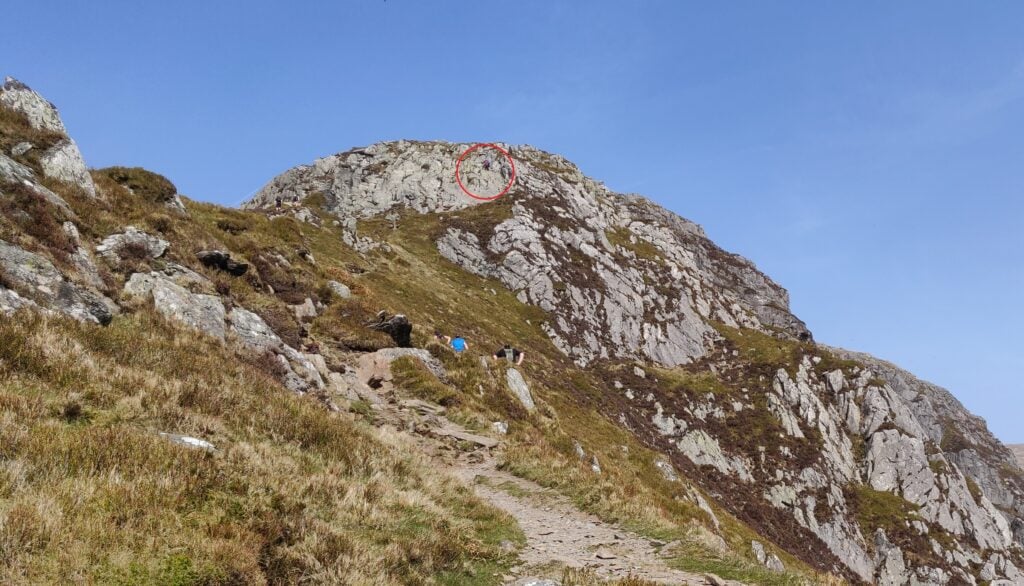
Once you are on top of the ridge, you can turn left (north-west) for Carnedd Llewelyn or right (south-east) for Pen Llithrig. I duly turned left towards the first hill of the day, which lies beyond the Craig yr Ysfa rocks. On the OS map, it looks as though this is a perfectly reasonable path and indeed a couple behind me did make it through… For me, however, I didn’t feel comfortable continuing. Perhaps it was the hot day or the fact that I was still slightly worried by how much harder the route up to the ledge had been than I had anticipated, or a combination of both, but I didn’t feel safe to climb over the rocks with a steep drop below on my own (and then to return via the same route).
The point where I gave up… I got as far as the area circled red but unlike the gentleman in the photo, I couldn’t then continue over the rockface
So, Carnedd Llewelyn remains on my to-do list, probably next time taking the longer walk in from the north-east. Instead, I headed back along the ridge towards Pen Llithrig.
Around SH696630, the path follows a contour line but it also requires a lot of care (although I felt it a better option than trying to descend back down to the valley below). You are walking on loose slate fragments on a narrow path only maybe a foot wide. Already feeling concerned that I had bitten off more than I could chew, I put all my effort into watching my steps and forgot to navigate, thereby taking myself further away from the route to Pen Llithrig than I had planned. For the same reason of concentration, I don’t have any photos of this part of the route. Once I had realised what I had done, I had to continue until the slate face above me gave way to less steep grass sides of the hill (at SH697626) that I could clamber up and get myself back on track.
Soon enough I was back in more comfortable territory on the flat grassy top of Pen yr Helgi Du (not a SOTA summit). From here, the walking was much easier: there’s a slightly faint path that leads east from the hilltop down to the col and across to Pen Llithrig.
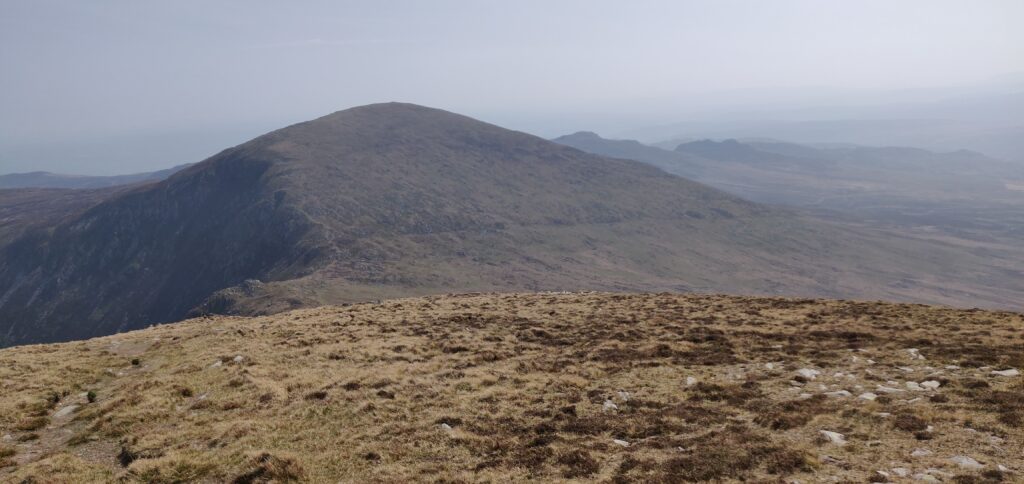
Looking down from Pen yr Helgi Du towards Pen Llithrig
As the photo above suggests, the top of Pen Llithrig is flat and uninspiring, meaning it has a large Activation Zone for SOTA purposes. Exhausted from the grueling walk, I spent an hour here to have lunch and make a number of QSOs both on 2m FM and 30m CW (the only HF activation of the weekend). On 30m, I found the Swiss SOTA crowd were out in force with 3 HB summit-to-summit contacts in succession! By the way, Pen Llithrig y Wrach is GW/NW-013 and is worth 6 points.
From the top of Pen Llithrig, I returned to the car by heading straight down the south-eastern side of the hill (there is no path), until I intersected the leat at SH704615. A path runs alongside the leat all the way back to meet the road at SH690609, although be aware that it has a number of stiles along the path, many of which are in a state of disrepair.
Were I to do Pen Llithrig on its own again (without attempting Carnedd Llewelyn), there is a safer, simpler route heading up Y Braich from SH700607. This would then join up with my route on top of Pen yr Helgi Du, and form a nice circuit that way.
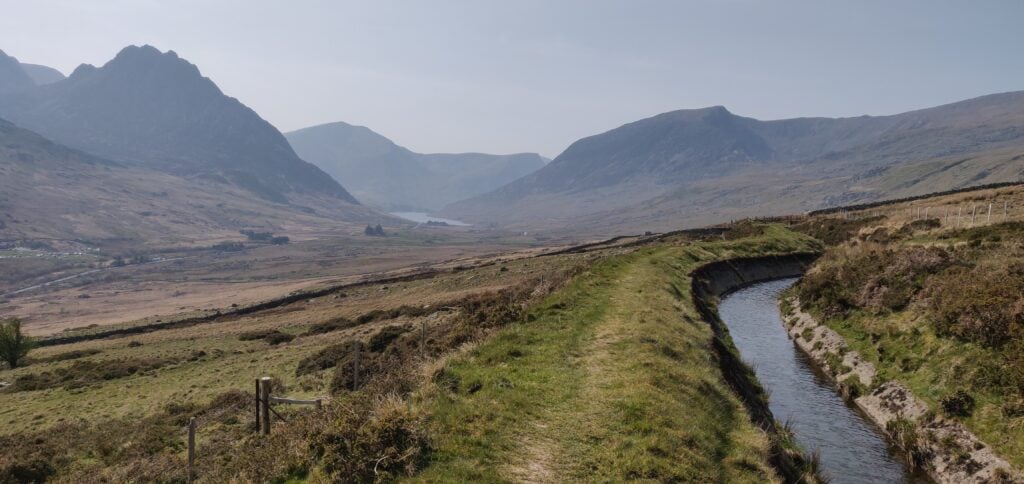
The path along the leat, with Tryfan in the far left and Y Garn behind it.
With my inefficient route, this walk totalled 9.5 miles with 4612 feet of ascent (no wonder I was tired!). It took me 4 hours and 10 minutes to reach the top of Pen Llithrig and 1 hour 50 minutes to get back down to the car park. I’d have an easier walk, fortunately, on Cadair Berwyn tomorrow.
Loading map…Scroll or tap to load the interactive map
I’ve recently returned from what has become an annual tradition of spending Easter weekend away climbing hills for SOTA. Last year (and admittedly Easter was earlier), the Beast from the East had just hit and I was walking through snow on Pen-Y-Fan. This year, the weather was completely different with bright sunshine, hardly any wind, and 20C temperatures.
Having driven to Wales after work on Maundy Thursday evening, I stayed the night in the Premier Inn at Llandudno Glan-Conwy, which is ideally situated on the A55. This was a deliberate choice as I knew the carpark at my first target fills up quickly, so I wanted to make an early start on Friday morning. The target was to do the circuit up Y Garn (8 points) and along the ridge to Glyder Fawr (10 points), then descending on the Devil’s Kitchen path.
Car park to Y Garn (GW/NW-004)
As was my intention, I was lucky to be early enough to get one of the last few spaces in the car park near Ogwen Cottage on the A5 (Currently £6 for the day or £3 for four hours, proceeds going to the National Park.) Having said that, there is ample parking along the A5 if the car park is full.
From here, the route from the car park to the summit of Y Garn is an obvious one. The well-made stone path rises slightly to Llyn Idwel lake. At this point, the route splits and the main path goes along the left (Eastern) side of the lake. You will be coming back that way, so you need to follow the fainter track, initially along the north shore of the lake.
The well-made path from the car park to Llyn Idwel
Once the path has left the lake, it soon starts to rise along the edge of Y Garn. The route is steep in several places but not especially dangerous or difficult and the path is clear.
The path up Y Garn
From the ascent, you can look down to the Ogwen valley floor where you started. It’s a fantastic view.
The Ogwen valley from the ascent of Y Garn
The ascent of Y Garn from the car park took me exactly two hours, having started at 9am. It’s a 2.17 mile / 3.5km walk, ascending 647 metres (and most of this ascent is after Llyn Idwel).
On this Good Friday morning. the summit was quite busy and so I quickly made a eight contacts on 2m FM from just my handheld and left it there without unpacking the HF gear. On such a nice Easter weekend, I probably shouldn’t have been surprised that there were lots of SOTA activators around but I made 3 summit-to-summit contacts from here – a theme that was to continue through the rest of the weekend.
Y Garn to Glyder Fawr (GW/NW-003)
Y Garn is connected to Glyder Fawr by a ridge, so you only have to drop 250m from the summit of Y Garn to a lake on the col (Llyn y Cwn at 710m ASL) before climbing back up 300m to the 10-point Glyder Fawr. You don’t have to go all the way back down to the valley!
From the summit of Y Garn is just a matter of walking downhill over the grass towards Glyder Fawr. There are a few paths to choose from. The path up Glyder Fawr is somewhat more strenuous, as it climbs steeply over loose slate and other rubble.
Down Y Garn to Llyn y Cwn, then back up Glyder Fawr The ascent of Glyder Fawr is slightly harder work over loose stone
This section of the walk took me 70 minutes to walk the 1.7 miles / 2.73 km between the hills. Unfortunately, somewhere approaching the summit I lost my sun hat, which was annoying in the hot weather.
In trying to retrace my steps to locate – in vain – my hat and also with some slight concern about the descent of Devil’s Kitchen (which I’d forgotten since I last did it over 10 years ago), I decided to make this a quick activation as well and just made six QSOs on 2m from the handheld before heading back to the valley floor.
Glyder Fawr to the car park
From Glyder Fawr’s summit, you descend to Llyn y Cwn via the same stony path you used for the ascent but at the lake you turn north-west, following the obvious path towards Devil’s Kitchen.
The Kitchen itself is a flat face of rock used by rock-climbers which, on some days ‘steam’ can be seen emanating from. Luckily, us walkers don’t have to cope with such things as there’s a path that runs alongside the Kitchen, known as the Devil’s Kitchen path. It’s a little narrow in places and I had to use my hands to ease myself down in a couple places but it’s perfectly manageable and, on a day like today, well-frequented.
Once you are down the path from the Kitchen, you can follow the obvious route around to the right-hand side of Llyn Idwel and the back to the carpark.
The descent from the summit to the car park took me 2 hours 45 minutes for the 3.87 miles / 6.22 km, losing 627 metres (mainly through the Kitchen).
Loading map…Scroll or tap to load the interactive map
Distance
—
Elevation gain
—
Elevation loss
—
Max elevation
—
Waypoints
—
Elevation profile
By now, it was late afternoon and so I headed to the Dolgam campsite, where I have stayed before, to pitch my tent for the next two nights. It’s a beautiful location on the A5 near the foot of Moel Siabod (a SOTA which is still on my to-do list). I wanted to be up early to attempt Carnedd Llewelyn and Pen Llithrig y Wrach tomorrow.
Enthused by a fairly easy 18 points yesterday on Pico Ruivo and Pico do Arieiro, I aimed to do two one-point hills today, but Penha de Aguia is a much more difficult hill, and so I only had time (and energy!) to do this one. This replan while walking meant that I accidentally ended up sending a SOTAWatch alert for the wrong reference. For the avoidance of doubt, I was on CT3/MI-011, not MI-010. I did send the right reference with the QSOs.
Pico Penha de Aguia (CT3/MI-011)
The start of the walk is at the café at Aguia de Baixo, just outside Faial (32.7888N, 16.8473W). There’s no particular parking here but there are a few opportunities to park at the side of the road. The start of the path is literally along the café’s side wall, even if it feels as though you are going into a private back garden. On the ascent, I was unsure about this so I went a little further up the road to take the ‘agricultural road’, which is a slightly longer way around but also brings you out onto the walking route.
Faial from the start of the walk
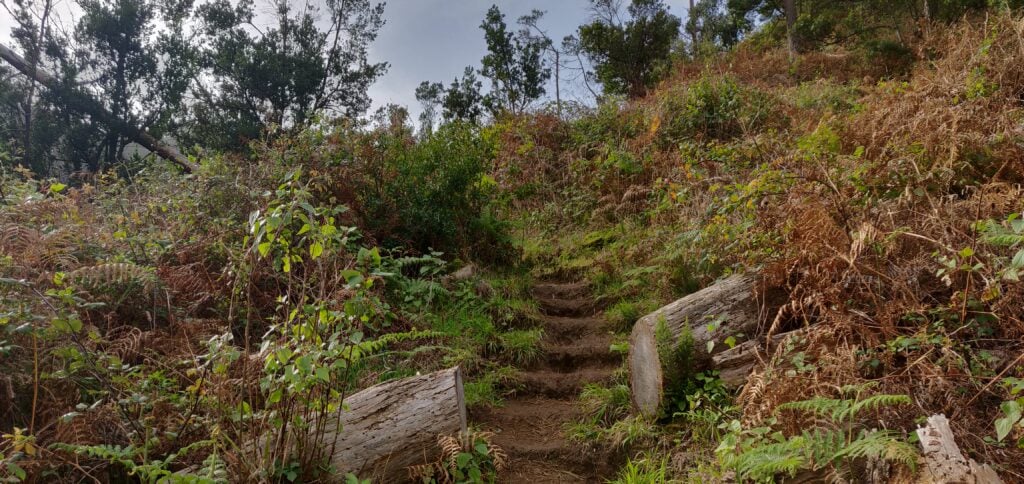
The path is defined but less obvious than the others I had encountered on Madeira. It’s just a thin path of dust and mud through the vegetation but at times it does have steps cut into it to assist on the steepest bits.
The steps cut in the earth path
The path itself starts out in fairly open land, twisting along a cliff face (but there are no significant drops to worry about). It then enters woodland, and stays in the trees for the majority of the ascent. Even the top is entirely wooded. One of the more minor factors that made the walk hard work was that near the summit the path was completely carpeted in damp pine needles, making it incredibly slippery.
There were other major two factors that made the ascent so difficult. The first is the steepness. It’s a 2.3km distance for about 450m ascent. That’s a 20% average incline, with parts between 50-60%, especially near the top. Again, it wasn’t impossible and it wasn’t a scramble at any point but I certainly needed my walking pole on the way down.
The other issue was the wind. From about 400m elevation, there was an incessant strong wind coming from the coast, with a few stronger gusts in it. On the most exposed bits of path, where the trees give way to a ledge, I had to time my crossing of the ledge a little carefully.
On top of Penha de Aguia
Once at the summit, I was able to bungee my SOTA pole to an olive tree and take out the dipole legs along the length of the path. There’s not a lot of room but it worked. I made 10 QSOs around Europe and didn’t stay any longer as I could hear some trees below me crashing down as they fell in the wind.
The ascent took 70 minutes and the descent about 50 minutes. Having done this one, I certainly felt justified claiming the 29 points for the trip! Be aware that the GPS track below isn’t completely accurate as I kept losing GPS lock in the trees.
Loading map…Scroll or tap to load the interactive map
Continuing my SOTA trip to Madeira, and following on from yesterday’s activations of Pico Ruivo do Paul and Pico Chao dos Terreiros, today I did two of the larger summits on the island.
Pico Ruivo (CT3/MI-001)
The highest point on the island, Pico Ruivo (not to be confused with Pico Ruivo do Paul, which I climbed yesterday) is a ten-point summit, which is easily accessed. Unfortunately, this also makes it very popular with visitors, and coaches from hotels drop off their passengers for the walk, so you are strongly advised to start this one early.
The starting point at Teixeira is about 50 minutes’ drive from Funchal, along some very twisty mountain roads. There’s nothing really at Teixeira, which is also the end of the road, except a large carpark.
The car park at Teixeira, seen from the start of the walk
From there a wide, paved path hugs a ridge with some spectacular views for the 3.3km journey each way to the summit. Along the path there are three small stone shelters, which could be useful in the foggy conditions that can apparently occur in the area, but which I think are more likely to be used as picnic benches. One slight surprise on the walk was that in a couple places we encountered ice, even though it was about 15C and sunny. Clearly it can get very cold by night.
The wide, paved, path leads as far as the Casa do AbrigoMy parents at one of the small stone shelters
Just under 500m before the end of the walk (which has hitherto been fairly flat), there’s a more substantial ‘Casa do Abrigo’ (Shelter House) with toilets and a café. This also marks the start of the slightly steeper climb to the top. It’s not a difficult climb but it’s about 100m of ascent for the 450m of distance on a dusty path that twists up the mountain side. As I say, this is a fairly easy 10 points, and it was easy enough for my parents (who aren’t in the best of health) to make it to the Casa do Abrigo with me, before I continued to the summit alone.
At the summit, there’s not a huge amount of space and it’s made more difficult by the number of people there. On the other hand, the mountain does have a double-peak: the main one with the trig point and another viewpoint, which is still easily in the activation zone. Since it was quieter there, I set up at the viewpoint, leaving everyone else to take photos at the trig point in peace. The available space didn’t allow me to stretch out the dipole legs fully but I did the best I good, having again been able to bungee my SOTA pole to the fencing at the top.
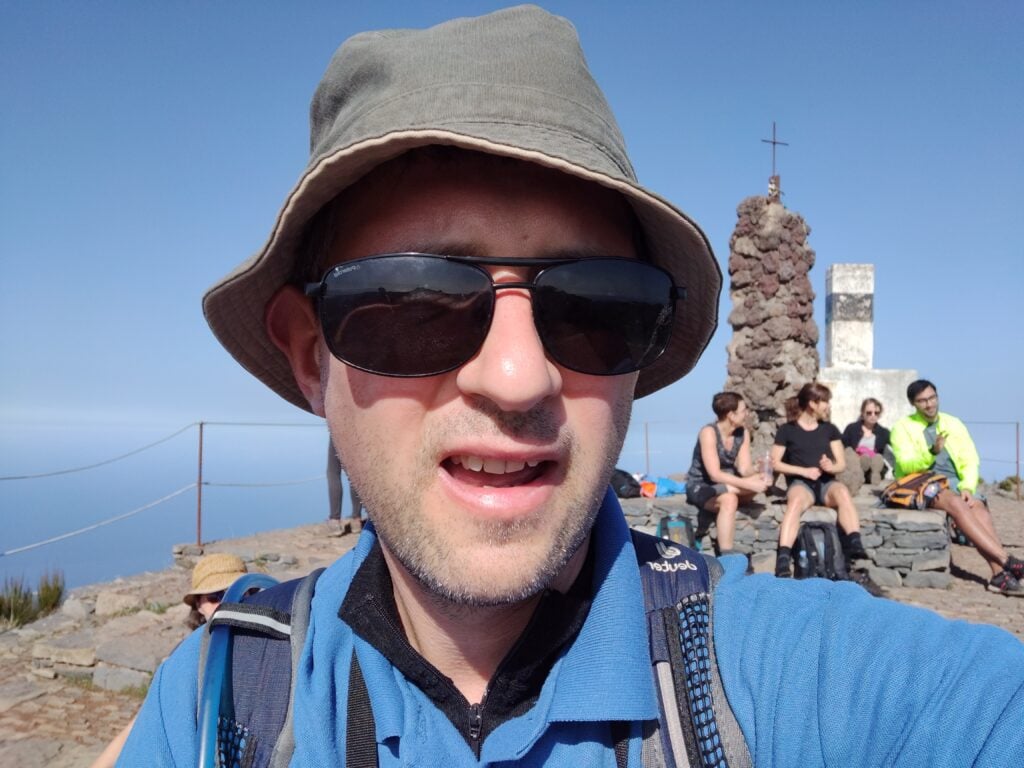
Selfie on top of Pico Ruivo
I didn’t spend too long up here but managed five QSOs including, incredibly given the aerial’s haphazard installation and the fact it was still morning, one American. It was also nice to make a QSO with G4OBK, whose writeups of these hills had formed the basis of my own trip. In fact, I contacted Phil four times on the trip, just missing him on Pico Ruivo do Paul.
The ascent for this one took about 90 minutes (allowing for my slightly slower parents), and the descent took an hour. We started the walk at about 09:30, about an 90 minutes after sunrise, and I wouldn’t have wanted to leave it any later given how busy the carpark was by the time we returned.
Loading map…Scroll or tap to load the interactive map
Distance
—
Elevation gain
—
Elevation loss
—
Max elevation
—
Waypoints
—
Elevation profile
Pico do Arieiro (CT3/MI-004)
It’s possible to walk from Pico Ruivo to Arieiro on a 6.7km path, which also takes you beneath the summit of the currently unactivated Pico des Torres. I, however, went for the easier option of driving between the peaks. It’s a long way around, however, taking nearly an hour on some fairly twisty roads.
Once you’re there, however, Arieiro is possibly the easiest 8 points ever. It’s the site of a large military raydome, and so not only has an access road to the summit but it also has a large carpark and café. Despite the substantial carpark, however, it was running out of space by the time we arrived in the early afternoon.
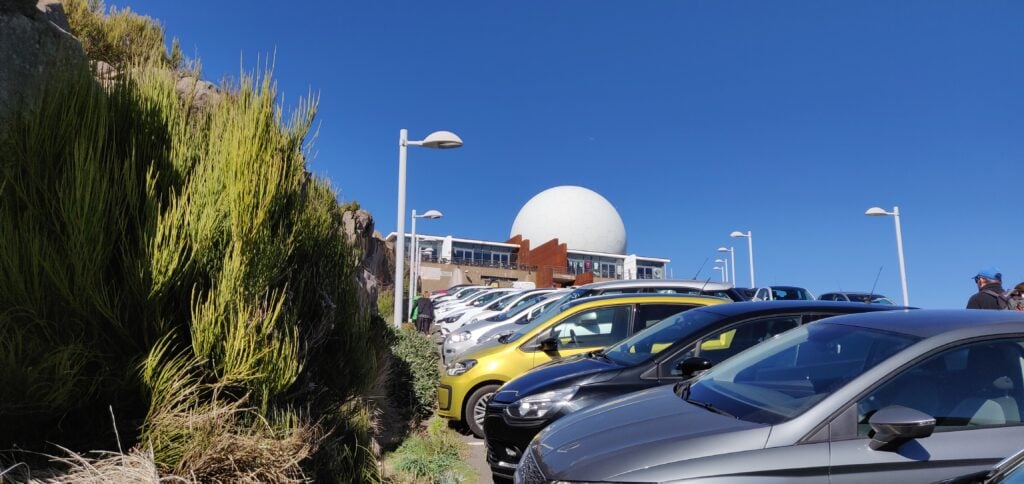
The carpark at Pico do Arieiro
The summit itself is located behind the café, and there’s a few steps up to a trig point, near where the path from Pico Ruivo joins. There’s really not that much else to say about it. Since the actual platform with the trig point was busy, I found a spot just off the carpark but within the activation zone to operate from, and managed 9 QSOs including five Americans. It was also good to speak to Martin G3ZAY at the G6UW shack (where I often operate from) – he had also found me from GB2IWM at the Imperial War Museum, Duxford, when I was on Ruivo this morning.
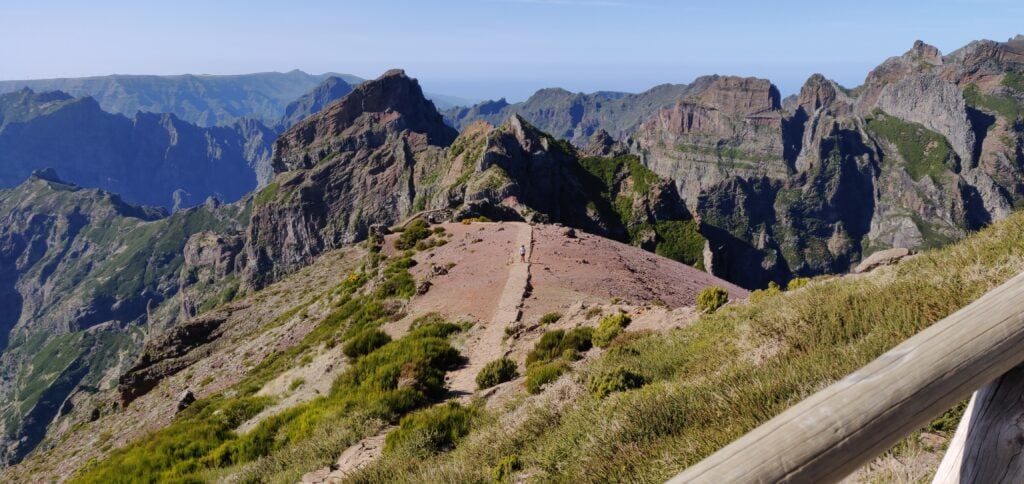
The view from the trig point at Pico do Arieiro, including the path back to Pico Ruivo
Not a bad day for earning 18 points all-in-all, but I’d have to pay for it with a cruel 1-pointer tomorrow!
Last week I spent some time on a family holiday in Madeira, during which I also spent three days in the hills doing SOTA activations.
The first thing to know about Madeira from a radio perspective is that although the DXCC prefix is CT3, that prefix is reserved for residents. The prefix authorised for CEPT visitors is CT9.
Pico Ruivo do Paul (CT3/MI-006)
The six-point Pico Ruivo do Paul is about 45 minutes drive from Funchal, along fairly quiet roads. I parked our hire car at the parking space off the road at 32.7699N, 17.0782W. Nobody else was around, as this isn’t the most frequented area of the island.
The carpark at the bottom of Pico Ruivo do Paul
From the carpark, the walk is a fairly simple matter of following the obvious path, which starts on the opposite side of the road, up to the summit. The ascent took me 40 minutes (partly as I had to wait for my parents, who are somewhat older) and about 20 minutes down. The path is almost exactly a kilometre in length for 130m ascent, the steepest bit coming just before the summit, but at no point is it hard. On the top, there’s a fairly large area of flat ground where you can set up, which has wooden fencing around it – perfect for attaching a SOTA pole with bungees!
I set up on 20m CW and fairly quickly had made 7 QSOs, enough to qualify the hill.
Me with Pico Ruivo do Paul in the background
This was a lovely start to the activation, and a fairly enjoyable easy hill.
Loading map…Scroll or tap to load the interactive map
Distance
—
Elevation gain
—
Elevation loss
—
Max elevation
—
Waypoints
—
Elevation profile
Pico Chao dos Terreiros (CT3/MI-008)
Update February 2020: I returned to this hill a year after writing this post and a lot had changed. At Boca de Corrida, the path had a chain and padlock across it and there were no indications as to whether only vehicle movement is restricted, or whether pedestrians should keep out too. The latest satellite imagery shows that the clearance I witnessed in 2019 had been extended and there is now a maze of paths in place of the old track. Given this exploitation, I decided to head north on the steep, paved path signposted to Encumeada. OpenStreetMap indicated that this would be a useful diversion, and that it is possible to turn left at around 32.7253N, 16.9938W along a track to bring you back towards Terreiros. I couldn’t see the track at this location however – I suspect it has become overgrown. With my parents in tow and nowhere else to leave them, I abandoned my trip in 2020. I suspect next time, I’d approach from Fontes, to the west, even though the route is longer and steeper. Anyway, back to 2019…
On the map, Terreiros (4 points) is not far from Pico Ruivo do Paul but the geography of the island means it’s a pretty decent drive between the two places. To make the most of the day, we drove from Pico Ruivo do Paul to the ‘skywalk’ at Cabo Girão (a glass platform overhanging the cliff), where we had lunch at the café, before heading up to Terreiros. A tip for anyone following our route: use the toilets at the café before eating – the €0.50 you pay for the toilets can be discounted against your café order. Not knowing this, we did everything in the wrong order.
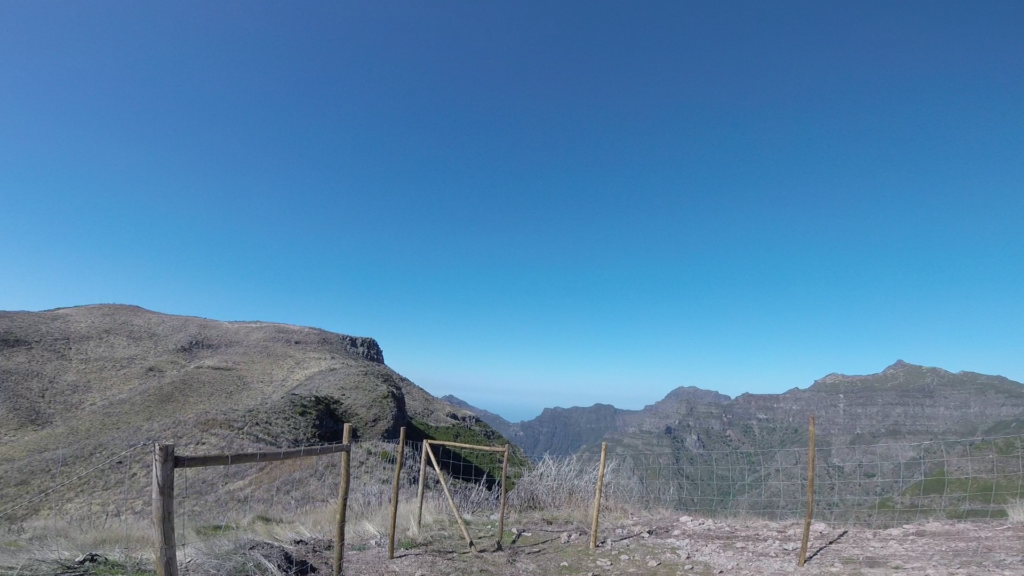
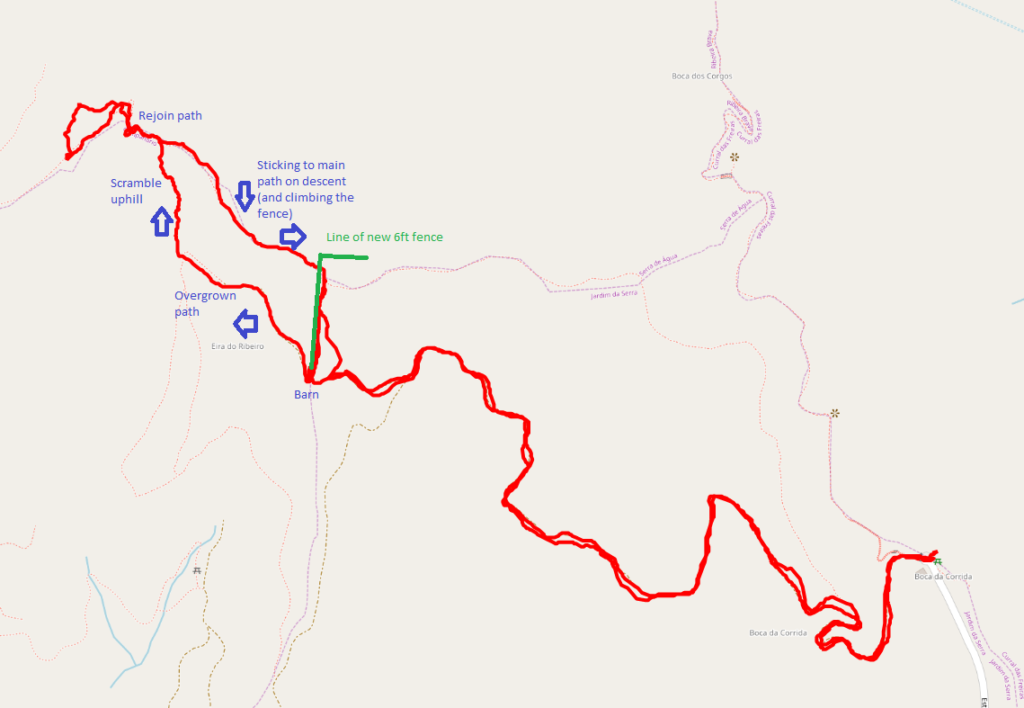
The drive to Terreiros from Cabo Girão looks really bad on the map but it’s actually fine and my TomTom got us there fine. The path starts from the end of the road at Boca da Corrida, where there’s a small car park and chapel (32.7110N, 16.9869W). At least on the map, the path is, again, obvious and wide and twists its way around the hill over the course of about 2.7km. The ascent is about 200m. It was easy enough for my parents to do with me for the first about three quarters of the walk. One note on my map indicated the path was overgrown and impassable. That was definitely not the case and in fact there were people working clearing trees on the hillside above us. And then I had a problem. At the barn at 32.7139N, 16.9970W the path divides and it isn’t clear what you are meant to do. The track continues up a steep hill, with a newly made fence on your left, but when you get to the top, you realise you need to be on the other side of the very tall (maybe 6ft) chicken wire fence. But there’s no major path from the barn on the other side of the fence. Yes, the fence has been built right across the path. It had taken me 40 minutes to get this far, and I wasn’t proposing to give up, so I left my parents somewhere safe and set out to find my own path, keeping the new fence on my right. This was a mistake. It involved fighting through some very overgrown plants, and then scrambling up a steep grassy bank with plenty of opportunity to lose your footing. It was really hard work. After maybe 15 minutes of this, I eventually came out to the path I should have been on, and continued to the summit.
The fence newly-erected across the pathThe GPS track caused by negotiating the new fence
The activation zone of Terreiros is nice and large and, again, this isn’t a well-frequented hill, so it was nice and quiet. The view is also spectacular. I made 10 QSOs from here, including two Americans which was a nice surprise for 10W into a simple linked dipole.
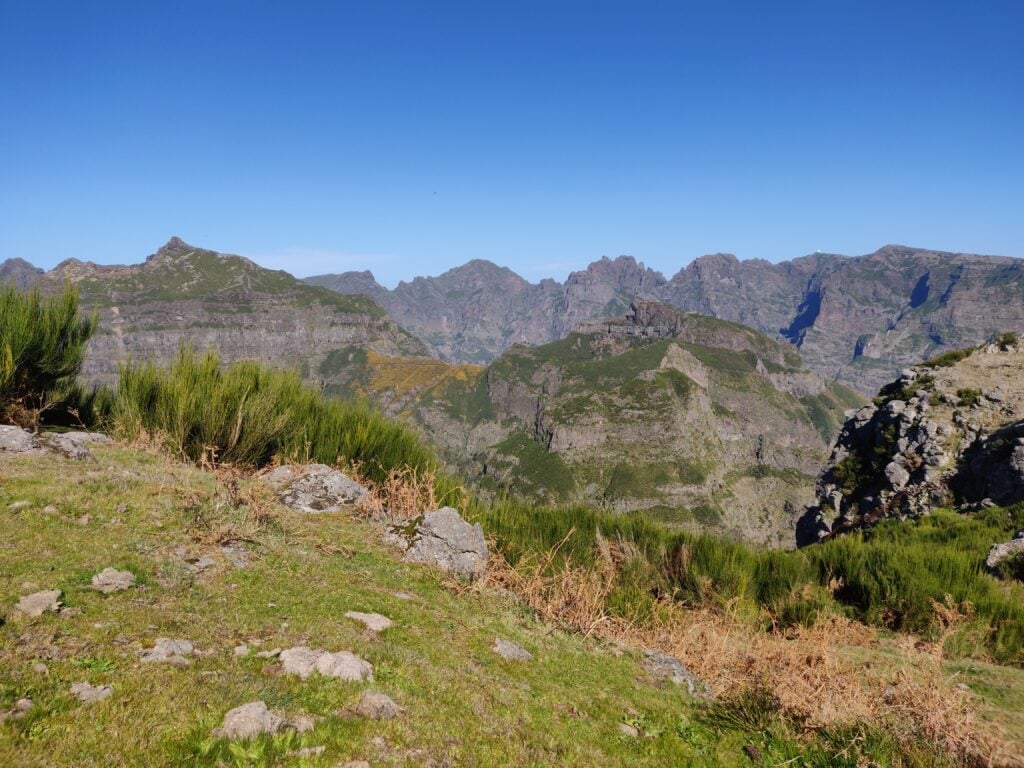
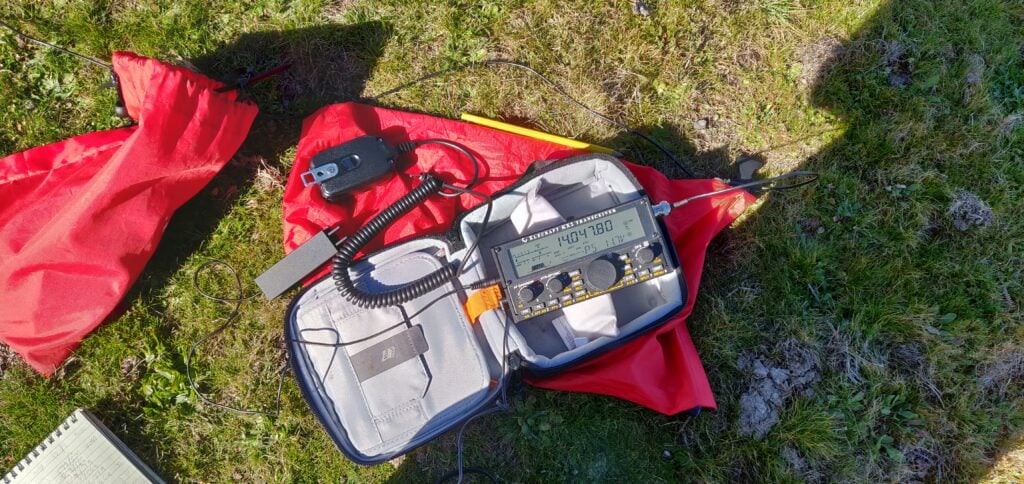
The view from Pico Chao dos Terreiros, looking towards the hills I did the following dayMy Elecraft KX2 on Pico Chao dos Terreiros
On the way back, I stuck to the path and managed to climb over the fence, rather than taking the ‘cross country’ route I had used on the ascent. This turned out to be much better. The descent, including recovering my parents from where I had left them, took just about 35 minutes.
Loading map…Scroll or tap to load the interactive map
Distance
—
Elevation gain
—
Elevation loss
—
Max elevation
—
Waypoints
—
Elevation profile
One word about the journey back to Funchal – G4OBK has mentioned how useless his TomTom was on Madeira. I didn’t have as many problems as he seemed to have but the journey back was an exception, with it continually insisting I needed to take very minor one-way streets down steep hills that were about the same width as the car. No damage was done, but it wasn’t the easiest driving.
I’ve spent the last week with Rob M0VFC and Dan M0WUT on a DXpedition to Montserrat as VP2MUW. This post is part-diary, part-informative for anyone who wishes to follow in our footsteps.
Plymouth, Montserrat
Travelling to Montserrat
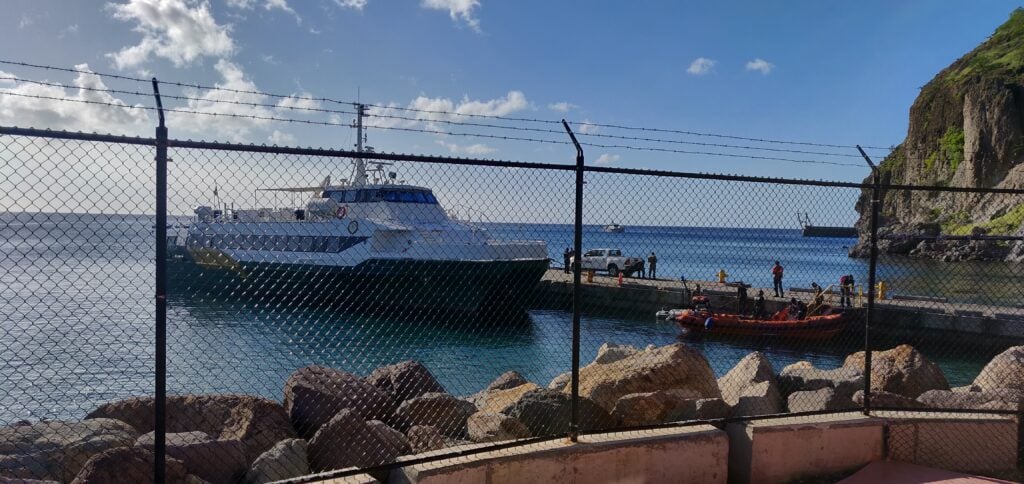
Montserrat’s main airport was destroyed by the volcano eruptions in 1997 and 2010. Today, there is just a small airstrip on the island, but it can only support small planes, so luggage allowances are limited. Instead, we flew to the neighbouring island of Antigua, took a taxi across the island, and then onto the Jaden Sun ferry (actually a catamaran) from Antigua to Montserrat. This allowed us to take all our equipment without any hassle.
Our British Airways flight from Gatwick arrived at about 3pm. It then took about 30 minutes to get through Antiguan immigration and customs before we could get into the taxi. The airport has a very efficient taxi rank, which includes giving a guaranteed price for the taxi. For the three of us with our luggage, it cost US$14 for the 25 minute journey across the island to St John’s harbour. (Note that in both Antigua and Montserrat, prices may be quoted in either East Caribbean Dollars (XCD) or US Dollars (USD). Both currencies are widely accepted, however things tend to be more expensive in USD.)
The ferry port was a fairly disorganised place. There are two separate booths, one to collect the ferry ticket and register for the crossing, and the other to go through emigration formalities. There is also a further customs booth for paying Antiguan departure tax if you are eligible to pay it (see below). You have to check in 90 minutes before the sailing but, even having done all these bits of paperwork nice and early, we still had to wait as disembarking passengers coming from Montserrat had to go through similar formalities before we were allowed to board… and Customs hadn’t turned up to process them!
The ferry crossing takes about 1.5 hours and we arrived in Montserrat at 9:30pm – half an hour late because of the Customs delay in Antigua and it then took another 30 minutes or so for us to clear immigration into Montserrat. Luckily, David from Gingerbread Hill was there to pick us up and was prepared for the wait.
A quick word about how immigration and departure tax works: in Antigua, we indicated on our landing cards that we were in transit, and we got special visas accordingly, marked MNI on the way out and LGW on the way back (airport codes for Montserrat and Gatwick respectively). You are exempt from Antiguan departure tax if you have been in Antigua for less than 24 hours and so having these special visas saved us that cost. On the return journey we did need to show our BA boarding passes in order to get the LGW visa (we had already checked in for the flight online); on the outbound journey I had printouts of the ferry reservation available but these weren’t required.
The return journey was the same but in reverse, although timings were slightly more critical. We took the risk of getting the evening ferry from Montserrat at 5pm, arriving into Antigua at 6:30pm. This didn’t leave a huge amount of time for clearing customs and making it across the island in time to check in for our flight at 7:50pm. (Especially as Friday evening is the time that Antiguans like to go en masse to the KFC drive-through, I kid you not! This led to an extra traffic jam around the restaurant, adding about 5 minutes to the taxi journey.) It all worked out fine, however, and we were glad to take the risk as the alternative would have been to get the 6am ferry and wait around in Antigua with our luggage all day. Incidentally, departure tax is also payable when leaving Montserrat. This was EC$45 each plus a EC$10 security charge. The only thing to note is that the PeliCases containing the two amplifiers were sent to outsize baggage at Antigua airport where they were manually checked thoroughly, and we did need to show our radio licences.
We flew in British Airways ‘World Traveller Plus’ (their marketing name for Premium Economy). While not the most economical use of the Avios points (the International Airlines Group marketing name for air miles) we were burning, it gave extra baggage allowance, and the extra comfort and legroom were particularly welcome on the overnight flight back to the UK.
Jaden Sun
Radio from Gingerbread Hill
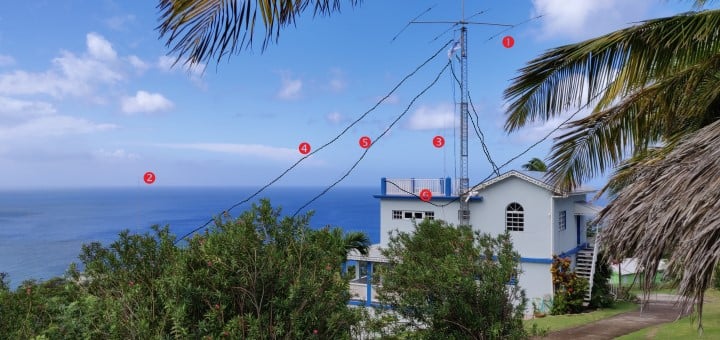
We stayed at Gingerbread Hill, well known among radio amateurs for the fact that the villas contain a ham station, tribander yagi and mast. It also has a fantastic sea-path take-off to the US and a reasonable take-off to Europe. We rented both the Heavenly Suite and Two Bedroom Villa (the suite being the upper floor of the same building as the villa). Both the suite and villa have double bedrooms, and the villa also has a room with two single beds. Amateurs take the Heavenly Suite as that provides roof access to the mast, but it’s strongly recommended you also book the villa – as we did – to prevent disruption to any non-ham guests in the same building.
From the equipment at Gingerbread Hill, we used the tribander and mast, some coax, 80m and 40m dipoles, and the rotator. Everything else we brought ourselves, including 3xK3s, KPA500, Juma amp, CW keys, power supplies and other wire antennas. Massive thanks, of course, to K2DG who keeps his equipment at Gingerbread Hill and makes it available to other visitors. There’s some slightly outdated information on his website, but I’d recommend anyone else emails him directly before travelling to get the latest information about the condition of the gear.
On the topic of power supplies, Montserrat uses two electrical standards and Gingerbread Hill is no exception. There are both 110V American style plug sockets, and 240V (we measured 238V) British three-pin sockets. This obviously makes using amps easier than in most other parts of North America. On the other hand, Montserrat does suffer from regular powercuts, as the entire island is apparently serviced by just one 1.5MW diesel turbine, although some experimentation with geothermal energy in association with an Icelandic company is also in progress. We had three or four powercuts over a couple of days, each lasting around 30-90 minutes. We did have a 5000mAh LiPo battery with us, so we could continue making some contacts on one station during one such event. By the way, a very modest extra charge for electricity is added to the Gingerbread Hill bill for ham operations. We were charged EC$27 per day.
Licences need to be applied for, ideally about 3 months in advance of the trip. The instructions and application form are on the MCIA website. The MCIA office is very close to Gingerbread Hill and Clover (David’s wife) kindly offered to collect the licences for us and to add the licence fee to the credit card she was already holding for the room booking, making the licensing process very easy.
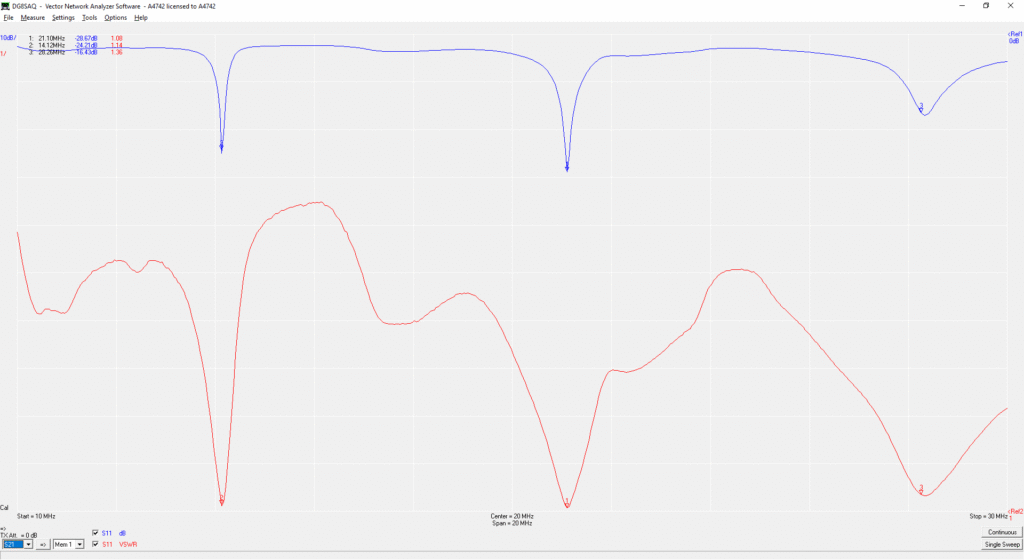
On our arrival, David from Gingerbread Hill kindly showed us where the beam (Mosley C-33-M) is kept in the store, provided tools to build it and also gave us a couple folding tables to use in the shack. We found the beam easy to assemble, although a dodgy bolt badly affected SWR at first. After replacing the bolt and liberally applying tape to the joint, the VNA plot looked like a great antenna:
VNA plot for the triband yagi
The beam is very easy to mount on the tower, because when down, the tower is at the height of the Heavenly Suite roof. It’s worth nothing that the beam is very much either on CW or SSB. With the beam tuned for the CW ends of the bands, SWR on 20m SSB was above 2:1, causing the KPA500 to complain. We therefore used a separate 20m vertical for 20m SSB, which also gave us the ability to be on 15m and 20m simultaneously. The tower itself has an electric motor, powered from outside the Two Bedroom Villa. We found it useful to use a couple UHF handhelds to talk from the rooftop to the person controlling the motor.
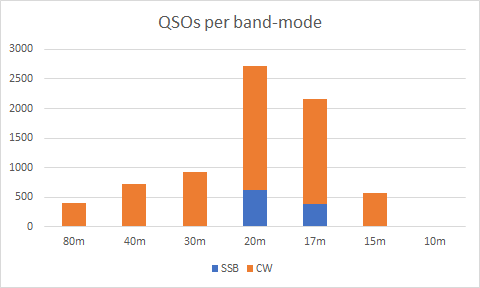
At this poor stage of the sunspot cycle, we made about 7500 contacts in the 5 days of operating between the 3 stations, mainly in CW with some SSB on 20m and 17m. We expected some backlash against publicising that we would not operate on FT8, but we actually only received positive comments about that decision.
VP2MUW QSOs per band / mode
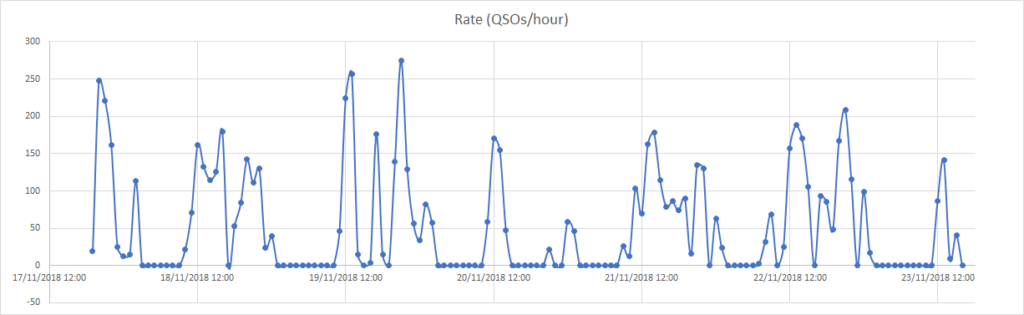
Despite the adverse conditions, we had several hours with over 150 contacts/hour, even reaching about 270 contacts/hour at the peak:
QSO rate at VP2MUW
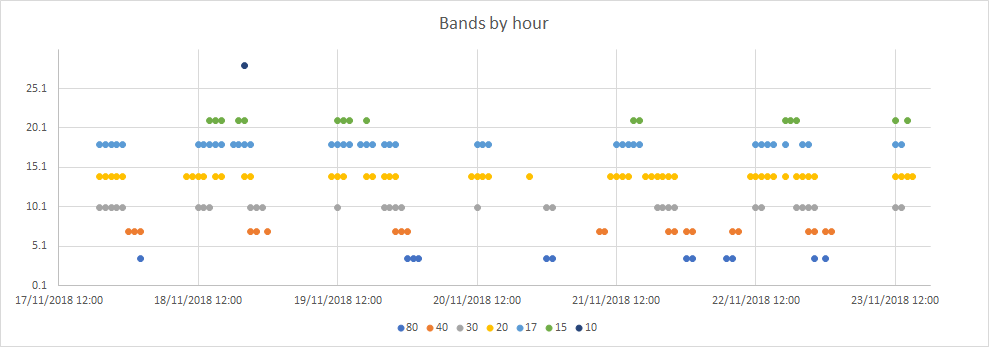
With the three stations, we seemed to be able to make the most of the bands that were open at any given time we were active. In the graph below, a dot appears for the band if we made at least one QSO on the band in the hour:
Bands we used over time
In terms of openings, we were very conscious of a good greyline path to Japan on 18MHz, 14MHz and 10MHz at our sunset, Japan’s sunrise. This was a great contributor to getting 223 JA stations in the log. We also ensured we were up at our sunrise to get the European opening on 40m in addition to the late-evening our time opening to EU on 80m. One morning, I also woke at 3:30am for the Europeans on 80m.
Into the Exclusion Zone
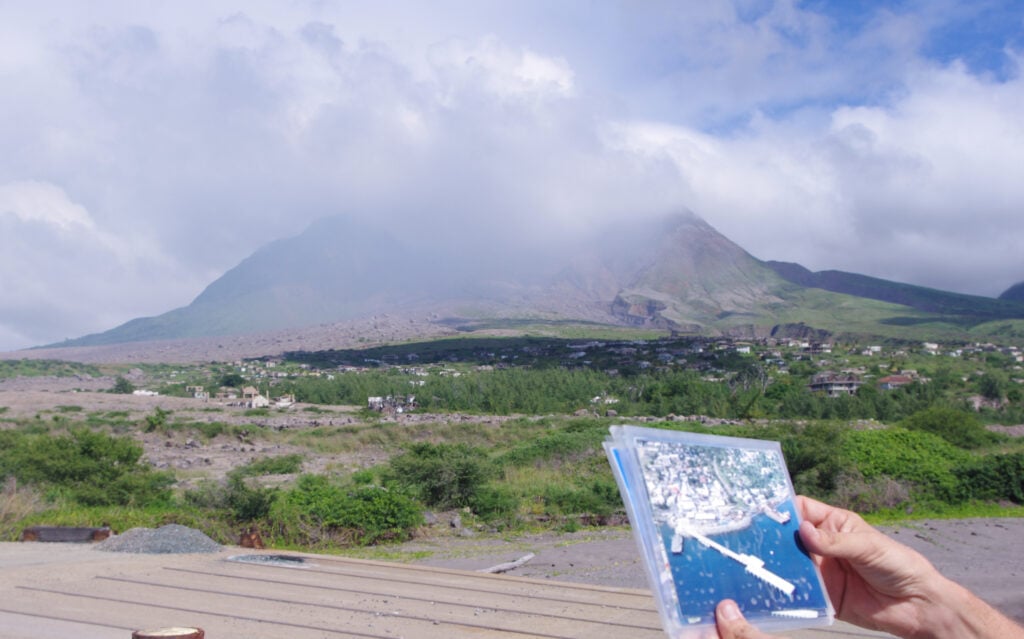
One of the things Clover arranged for our visit was a day-trip with Montserrat Island Tours around the island and into the Exclusion Zone. (Our tour guide was her son, Sunny.) This was well worth it. The morning tour included going to Jack Boy Hill to look out over the site of the former airport, now a flat plain of ash. We also visited a steam-powered sugar mill. (This is believed to have been an experimental feature, as most sugar mills operated fine with wind power.) After lunch at The Attic in Salem, we met with our police escort to enter the Exclusion Zone, the part of the island which is restricted due to continuing danger from the volcano. It should be noted that entry to the Exclusion Zone is not to be taken for granted. Just because you have arranged it doesn’t mean it will happen. It is only possible if the current Alert level is 0 or 1 (out of 5), and there have not been any heavy rains which could have flooded the roads in ‘mudslides’ of ash. The current Alert Level is posted on the Montserrat Volcano Observatory website.
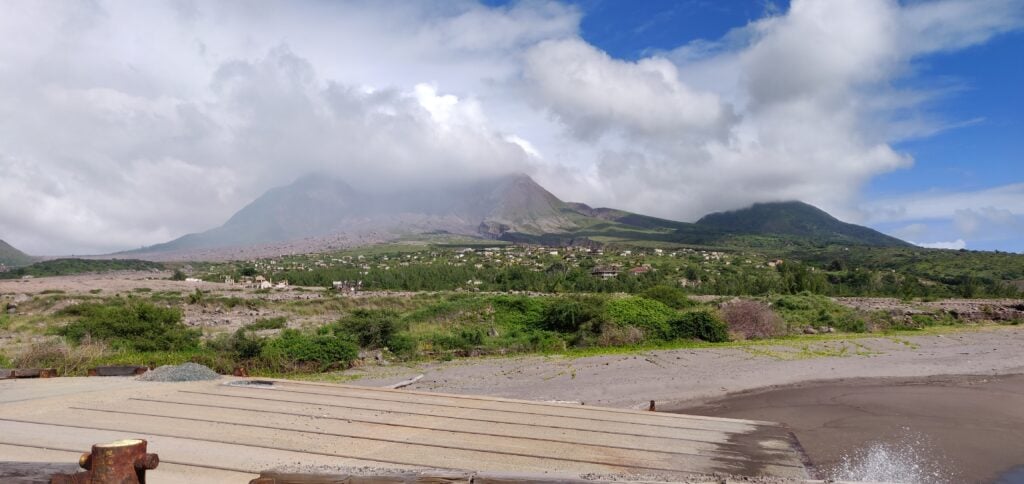
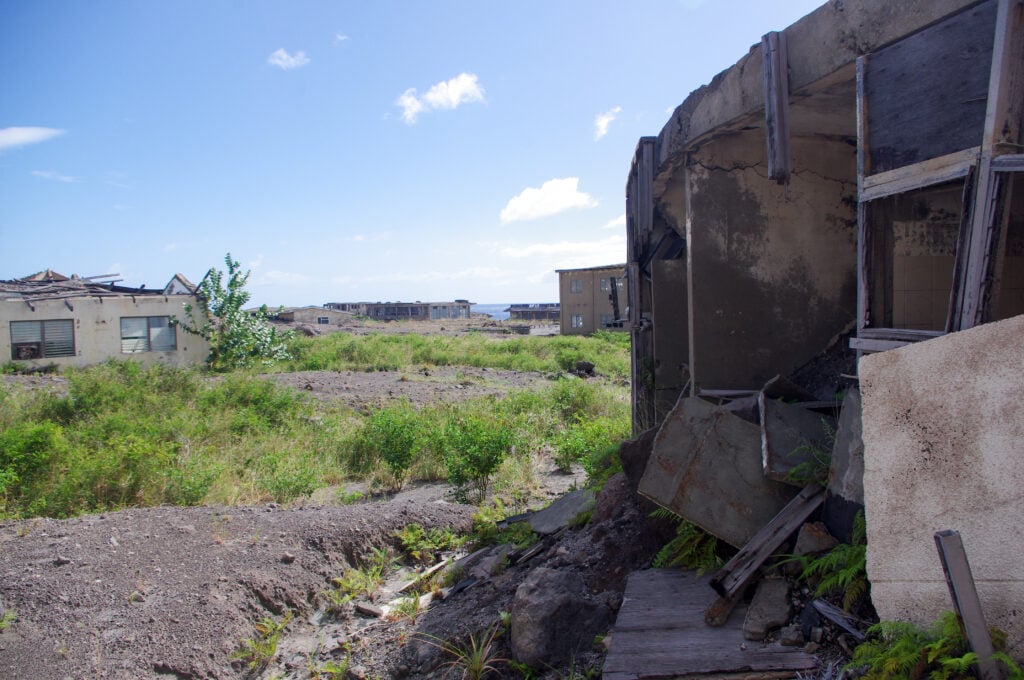
The volcanic eruption which caused the evacuation and eventual abandonment of the capital, Plymouth, happened over 20 years ago in 1997, but the island is still far from recovering from it. Besides the lack of airport and insufficient electricity supply, hospitals and schools are also somewhat limited according to our guide. Heading into Zone ‘V’ (the most restricted area), the scale of the devastation was clear.
Plymouth: Before and After
Even with our police escort, continual radio contact with the Montserrat Volcano Observatory, and experienced local guide, we were still limited in where we could go within Plymouth. With so many buried buildings, many parts of the former town haven’t yet been mapped for any voids that might be under the ash, which you could fall into. Furthermore, there was a requirement to keep the car engine running while we were there and to not venture too far from the car, in case a speedy exit to the escape route were to be required.
It was amazing just how much deterioration has happened in the last 20 years. Compared to photos of Pripyat (the abandoned town near Chernobyl), which has been empty since 1986, the buildings in Plymouth have obviously been affected by the salt water and hurricanes in the much shorter timeframe. It’s especially heartbreaking to realise that when the volcano struck the town had only just finished rebuilding itself following the devastation of Hurricane Hugo in 1989.
Abandoned buildings in Plymouth
While in Plymouth, our guide told us a couple anecdotal stories from the evacuation period. The first was the raid on the Barclays Bank vaults, with EC$1 million in brand new notes stolen from the branch. All that remains of the branch – and indeed the bank’s presence on the island today – is a light-blue painted fascia board rising above the ash and rubble. (Read an Associated Press report on the heist)
We were also told the story of one inhabitant of Plymouth with learning problems, who refused the order to evacuate and lived for several weeks with the whole town to himself before he was eventually caught up in a pyroclastic flow. It is believed that he was responsible for the pile of glass baby-food jars piled up in the corner of what was once the supermarket warehouse – he was eating his way through the stock while nobody was around.
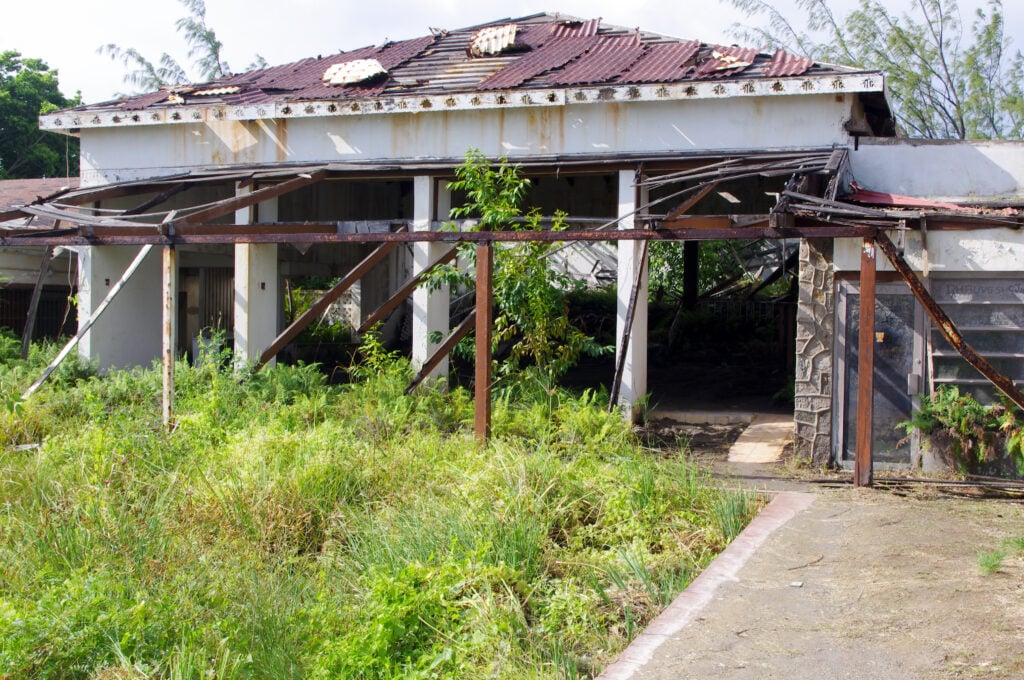
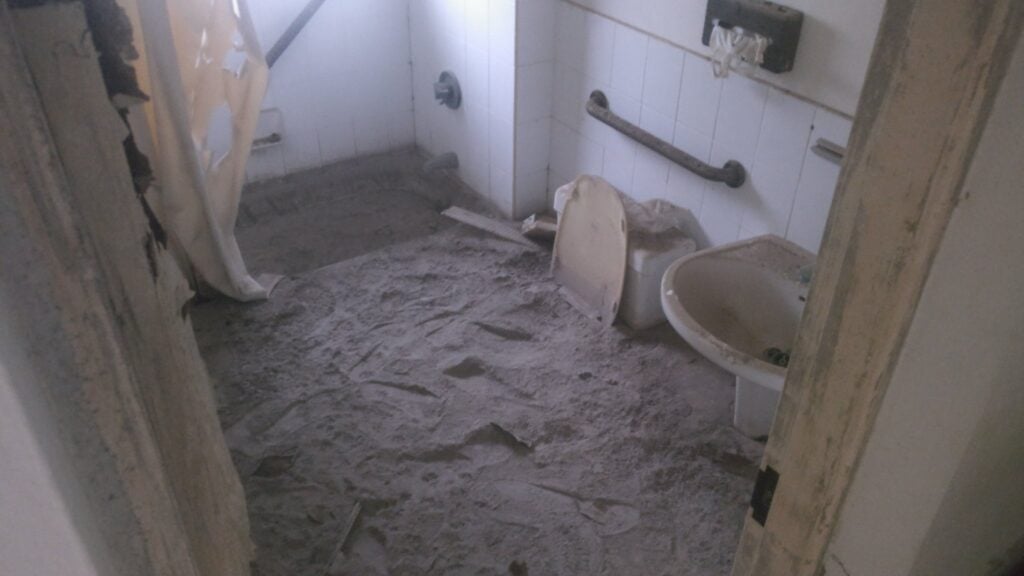
After an hour or so in Plymouth, we went to the nearby settlement of Richmond Hill, also abandoned, where the former four-star Montserrat Springs Hotel stands. We had more freedom to wander around the hotel and to see the volume of ash which has invaded the bedrooms, as well as the destruction to the exterior of the building,
Outside bar and swimming pool at the abandoned Montserrat Springs HotelVolume of ash in the bedrooms at Montserrat Springs Hotel
Other tips for Montserrat
This is an assortment of other stuff I might have wanted to know before we went:
As you’ll have gathered, David and Clover, the owners of Gingerbread Hill, were excellent in recommending arrangements for our stay. One added bonus was that they arranged a hire car for us and, after we arrived on the boat, David took us to the police station in Brades to get our driving licences – and yes, the police station was open for business at 10pm! (There’s no automatic reciprocity for driving licences in Montserrat, but a trip to the police station, showing your home driving licence and paying EC$50 gets you a Montserrat driving licence.) This was absolutely invaluable. The shops in Brades are about 8 minutes’ drive from Gingerbread Hill down twisty, hill roads. As a result, everyone drives everywhere. The video below shows a sped-up version of this journey.
Similarly, the supermarket in Brades stays open late into the evening, and David also took us there to get immediate essentials once we had got off the boat on our arrival. It’s not fantastically well-stocked (by British standards it’s more like a corner shop than a supermarket) but it has enough to get by on. The owners also make their own curries, which are kept in the freezers in the shop in unlabelled containers. They are very nice indeed!
Water at Gingerbread Hill is potable, and very nice (it’s been filtered through volcanic rock, of course!). David provides water bottles in the fridge that you can keep cool.
David and Clover have recently completed building a small open-air swimming pool at Gingerbread Hill, which is a perfect way to cool off after lunch, when the bands have closed as they tend to do at midday near the equator. It has a lovely view out over the Caribbean.
The oven and hob in the accommodation are gas-powered (fed from gas bottles), meaning you can cook during powercuts. We didn’t use the microwave oven, but there is one in both kitchens. There’s also some emergency lighting (torches) in the Heavenly Suite but I found it useful to supplement this with the headtorch I had bought with me.
Gingerbread Hill has decent fast WiFi for internet access, however outside the villa you don’t want to even consider using data on a British mobile phone. Rates are in the region of £4-£6 per MB. Instead, Rob got a Transatel DataSIM for data in Antigua and Montserrat.
As well as Gingerbread Hill, David also helps run the Hilltop Café, a community café not far from Gingerbread Hill. Opening hours are limited but the Saturday morning Belgian Waffles with tropical fruit toppings are not to be missed. The Hilltop is also fascinating for containing many relics rescued from Plymouth during the evacuation period, including road signs from outside Government House, shop signs and even a TV camera from the local TV station, which closed down after the loss of their studios.
Montserrat is a windy place! Wind was a regular feature throughout our stay but it was unexpected. There were also some heavy rain showers at the start of the week, which kept the air quite humid, but they were short-lived and not too much of an inconvenience. You soon dried off in the heat naturally.
Costs
One of the most common questions on these trips is, how much did the trip cost?
The flight was, of course, the most expensive part of the trip but was paid for using Avios points and a British Airways 2-for-1 voucher. By way of a tip, if you are a UK-based DXpeditioner – or any other regular long-haul traveller – and you don’t currently hold a British Airways Premium Plus AmEx credit card, you’re missing out. (Standard disclaimer: I am not a financial adviser. These cards may not be suitable for everyone. They have a high annual fee, currently £195, and a representative APR of 76.0%. If you want to apply for one of these cards, I can provide a mutually-beneficial referral code.)
The rest of the trip came in at about £1000 each. This includes about £595 for Gingerbread Hill, £90 each for the return ferry, £80 for our rental car, £75 for the tour, £55 for groceries (we ate fairly frugally), £20 for the radio licences, £15 for parking at Gatwick, and £15 for eating out. We took £400 as East Caribbean Dollar cash between us, which was almost exactly what we needed after the villa, ferry, rental car, tour and radio licences had been paid by card.
We’ve had some generous donations with requests for QSL cards, which help offset the cost of printing the cards. Thank you to those donors.
This weekend saw the annual SSB Field Day event and once again I took part with the Camb-Hams at G3PYE/P.
For the past couple of years, we’ve entered with a checklog because frankly life is too short for QRP and we got a lot more enjoyment from the contest by using an amp. This time, however, we decided to stick to the rules and use 100W only, so we could put in an entry.
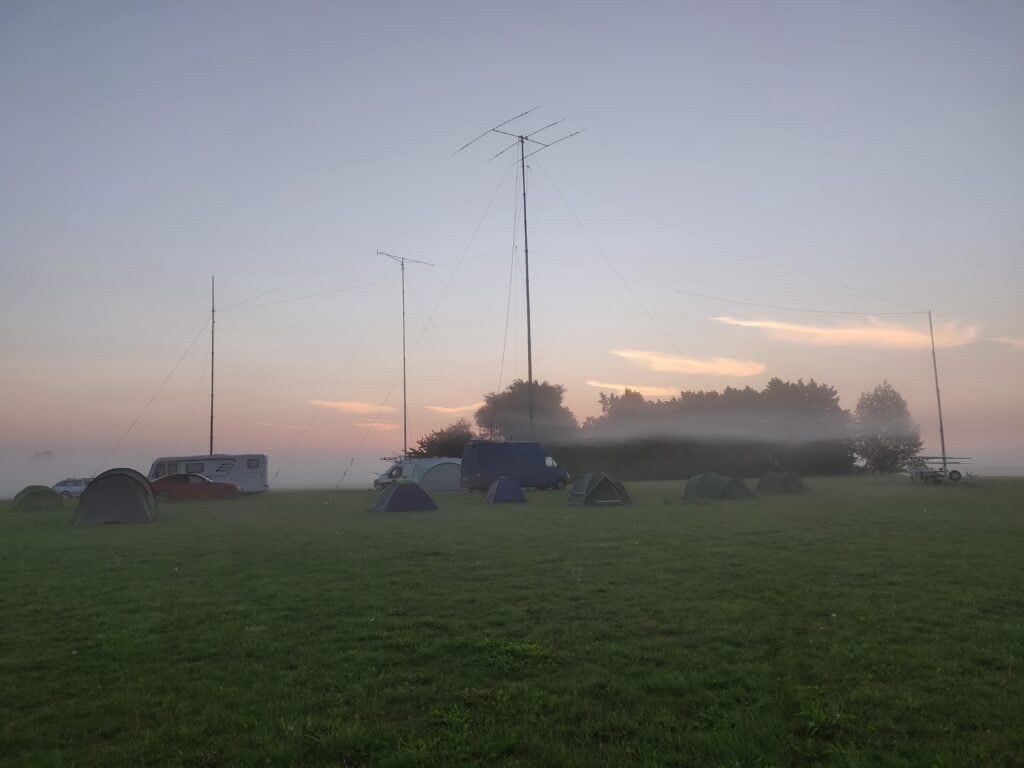
Early morning at G3PYE/P. A3S on Amy (also the centre of two dipoles), and 17-ele for 2m on Flossie. The trailer mast and campervan are just dipole supports.
On the Thursday evening before the contest, we got some bad news: our normal operating location wouldn’t be available and so massive thanks need to go to M0VFC, M0ZXA and many others who spent Friday trying to secure an alternative field at one day’s notice. Amazingly, they found a location to the north of Cambridge, only 4m ASL, but surrounded by flat fen land. On the Friday evening, we gathered at our newly-found location to start setting up some of the equipment.
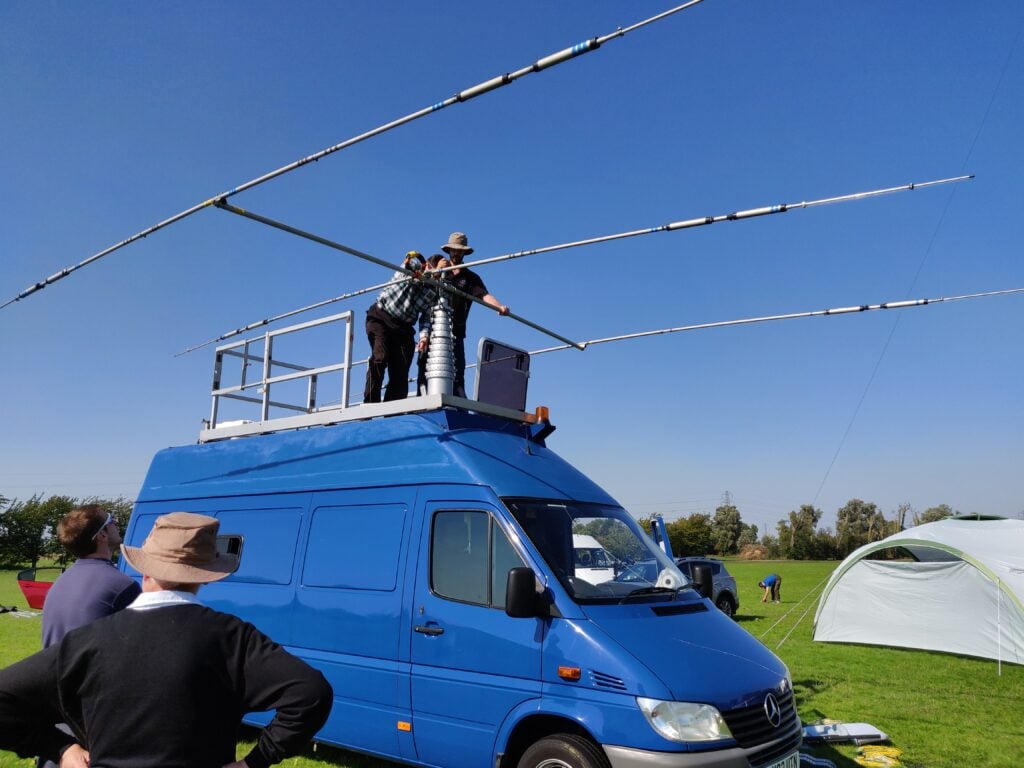
Most of the set-up, however, was done on Saturday morning. We actually weren’t only operating in SSB Field Day but also in the 144MHz Trophy contest (although given our low location and the fact we only had a single 17-ele beam, we knew we wouldn’t win on 2m). We soon had the 2m beam mounted on the Camb-Hams van, Flossie. Shortly afterwards, Flossie’s sister, Amy, arrived courtesy of G4CWH, and we installed an A3S beam for 20m-10m and dipoles for 40m and 80m on Amy’s more substantial mast.
A3S going onto Amy’s roof
I didn’t operate on 2m, but our setup there was an Elecraft K3 with XV144 transverter and a Beko amplifier.
On HF, we also used two Elecraft K3s straight into the antennas. With the K3’s clean signals, there was no need for bandpass filters. This was as well, because, in order to comply with the rule that you can only have one signal at a time, we needed to use the ACC port on the K3s for a hardware interlock (see the TX INH menu item in the K3 manual for details on how this works).
Although I’ve tried interlocked multi-station operation before, this was the first time M0VFC and I actually got it to work. The theory is straight-forward enough: each station interleaves their overs such that one station is hearing a reply while the other calls someone. It takes a lot of timing, and awareness of the stage of the other operator’s QSO, and above all competent operators on the other end of the QSO(!) but it can give some fantastic rates.
I don’t have a copy of the log to give a final summary (yet) but QSO total was in the region of 700 QSOs. We were very pleased with this, especially given the hastily found location.