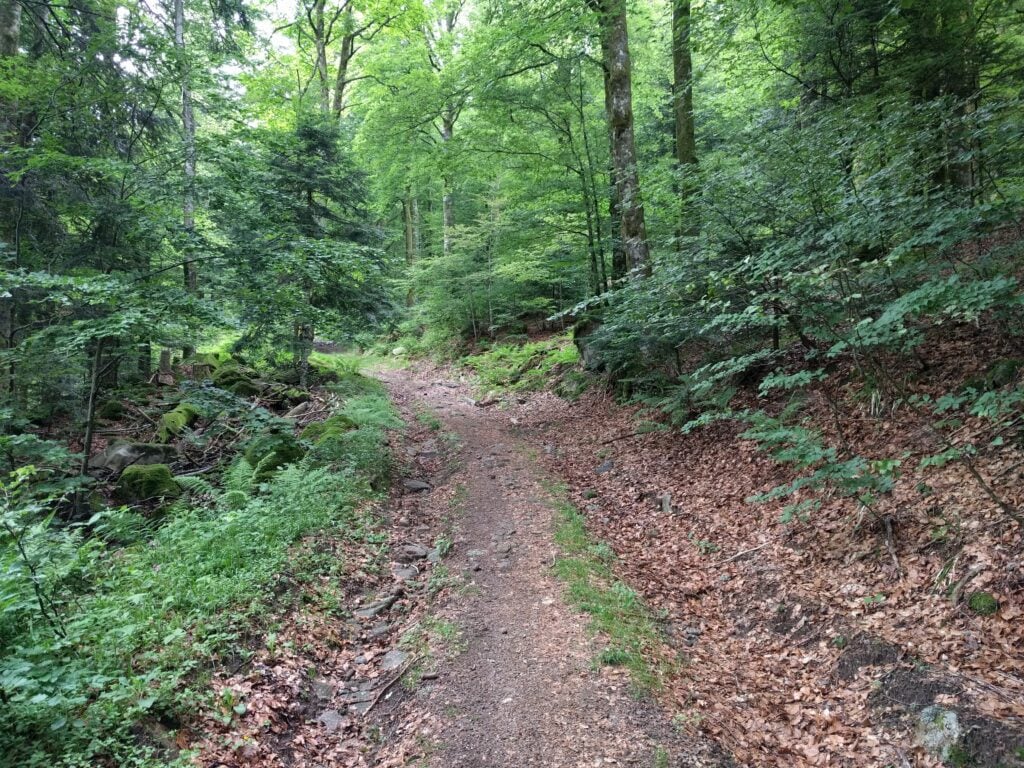
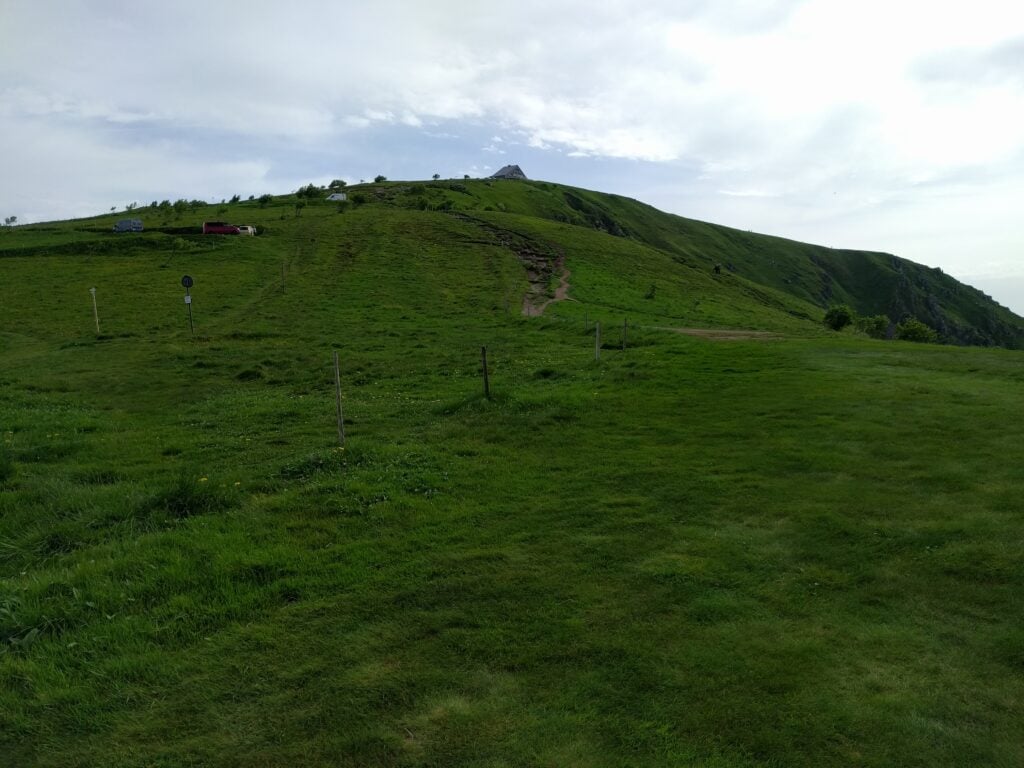
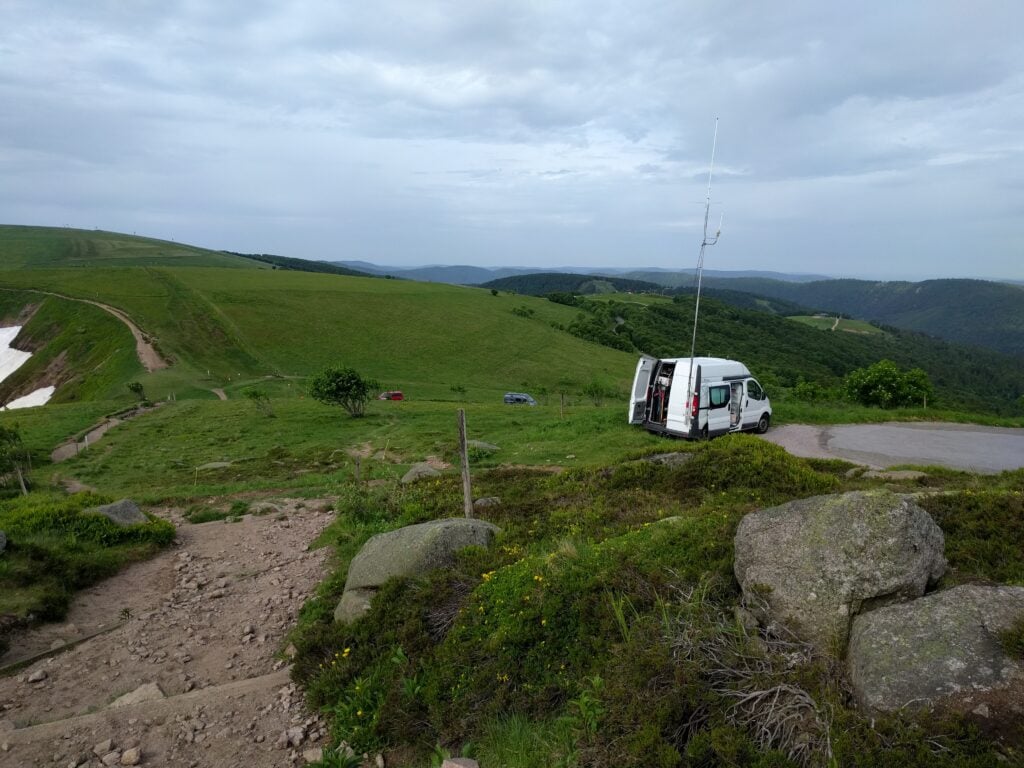
Continuing my SOTA trip to Madeira, and following on from yesterday’s activations of Pico Ruivo do Paul and Pico Chao dos Terreiros, today I did two of the larger summits on the island.
Pico Ruivo (CT3/MI-001)
The highest point on the island, Pico Ruivo (not to be confused with Pico Ruivo do Paul, which I climbed yesterday) is a ten-point summit, which is easily accessed. Unfortunately, this also makes it very popular with visitors, and coaches from hotels drop off their passengers for the walk, so you are strongly advised to start this one early.
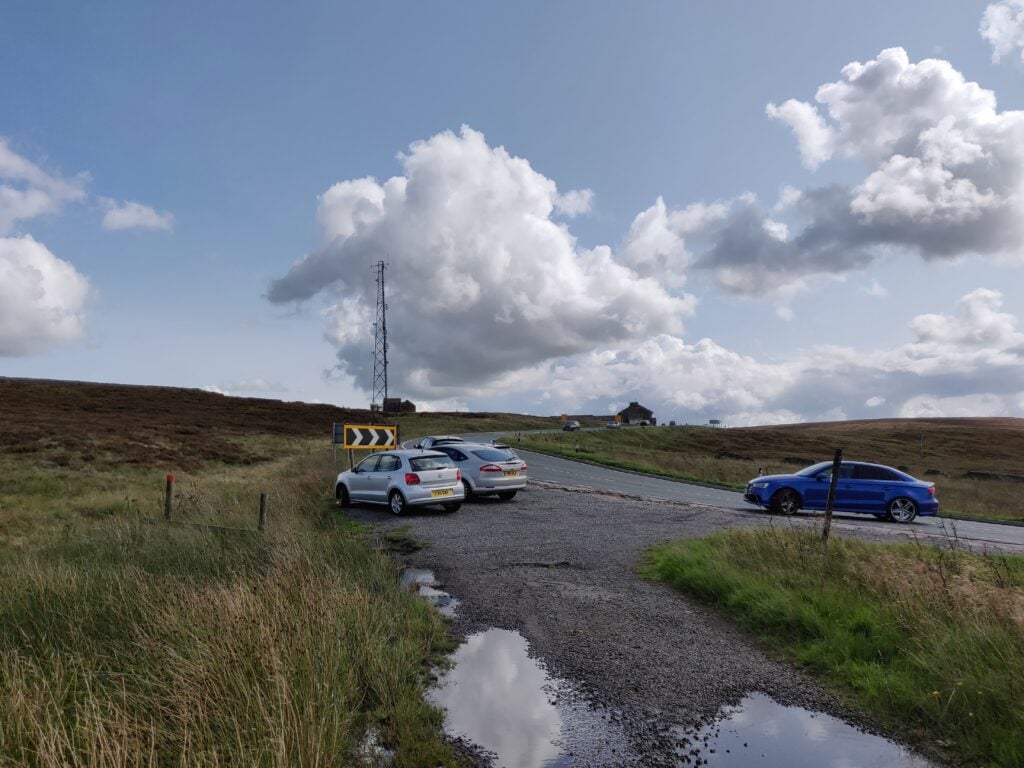
The starting point at Teixeira is about 50 minutes’ drive from Funchal, along some very twisty mountain roads. There’s nothing really at Teixeira, which is also the end of the road, except a large carpark.
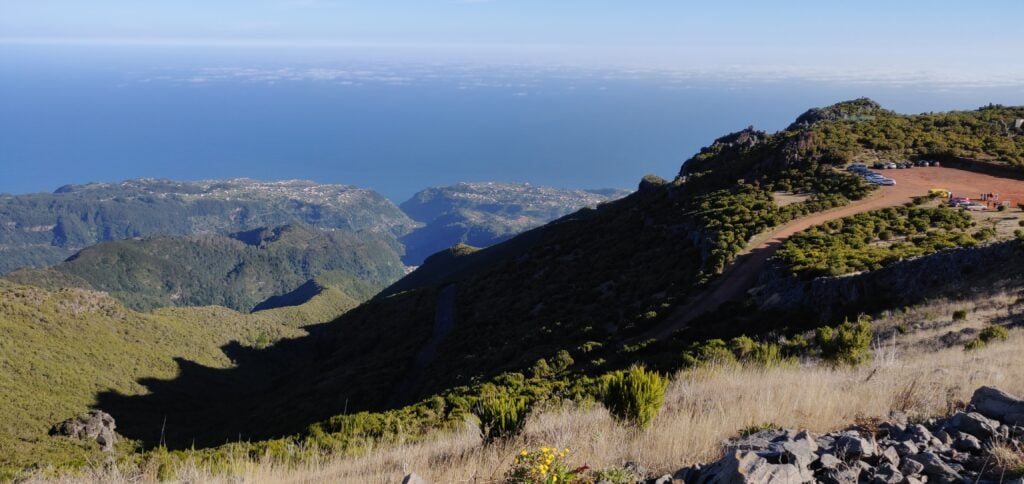
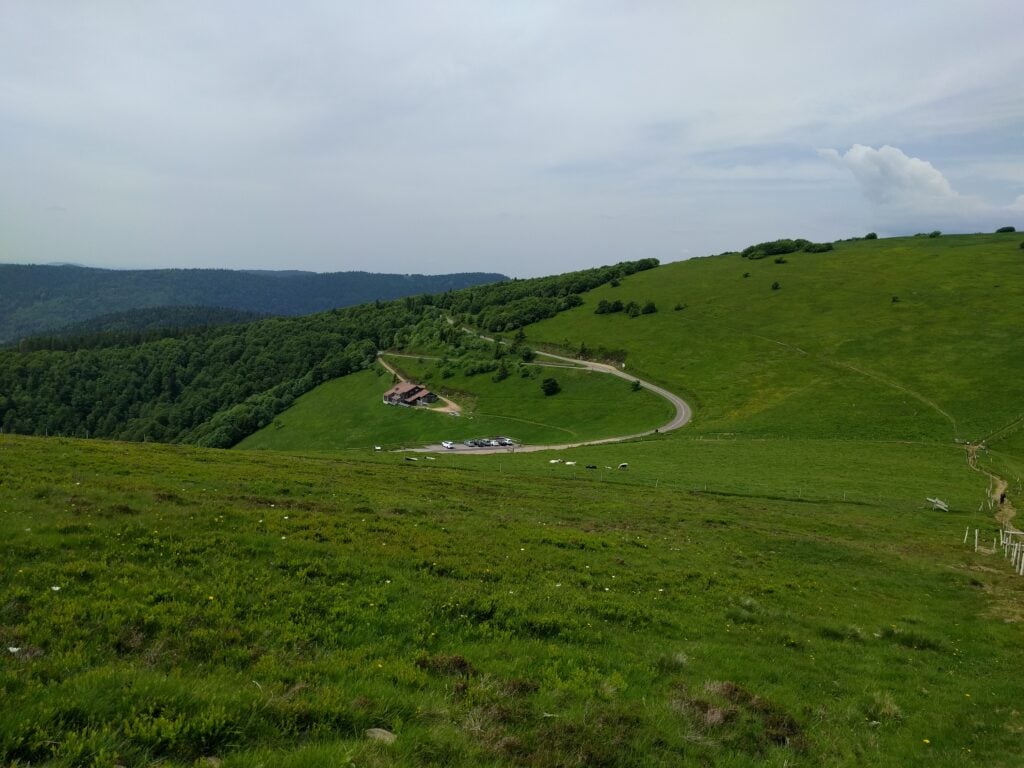
The car park at Teixeira, seen from the start of the walk
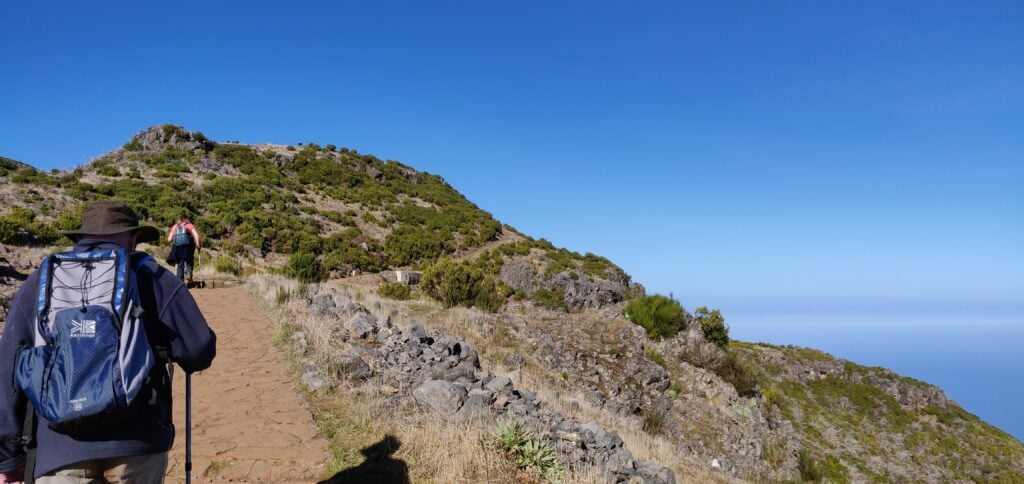
From there a wide, paved path hugs a ridge with some spectacular views for the 3.3km journey each way to the summit. Along the path there are three small stone shelters, which could be useful in the foggy conditions that can apparently occur in the area, but which I think are more likely to be used as picnic benches. One slight surprise on the walk was that in a couple places we encountered ice, even though it was about 15C and sunny. Clearly it can get very cold by night.
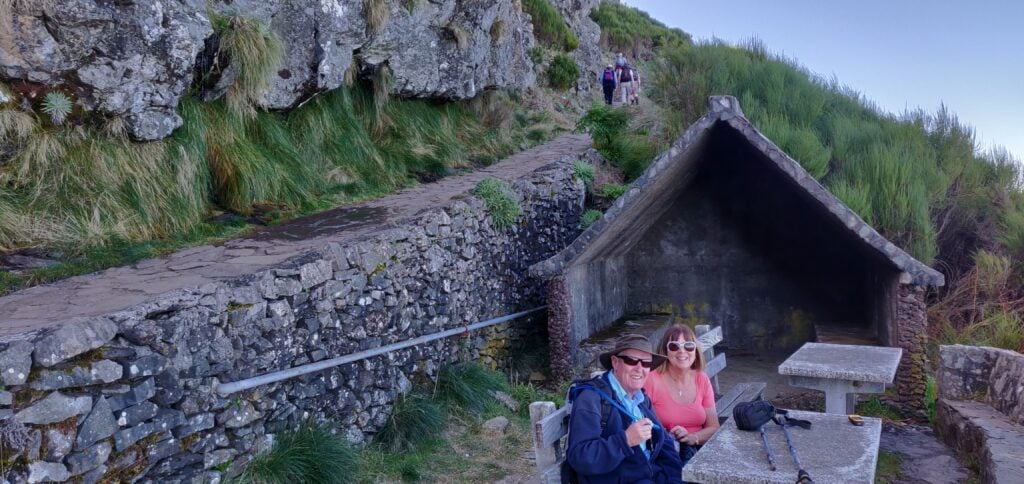
The wide, paved, path leads as far as the Casa do AbrigoMy parents at one of the small stone shelters
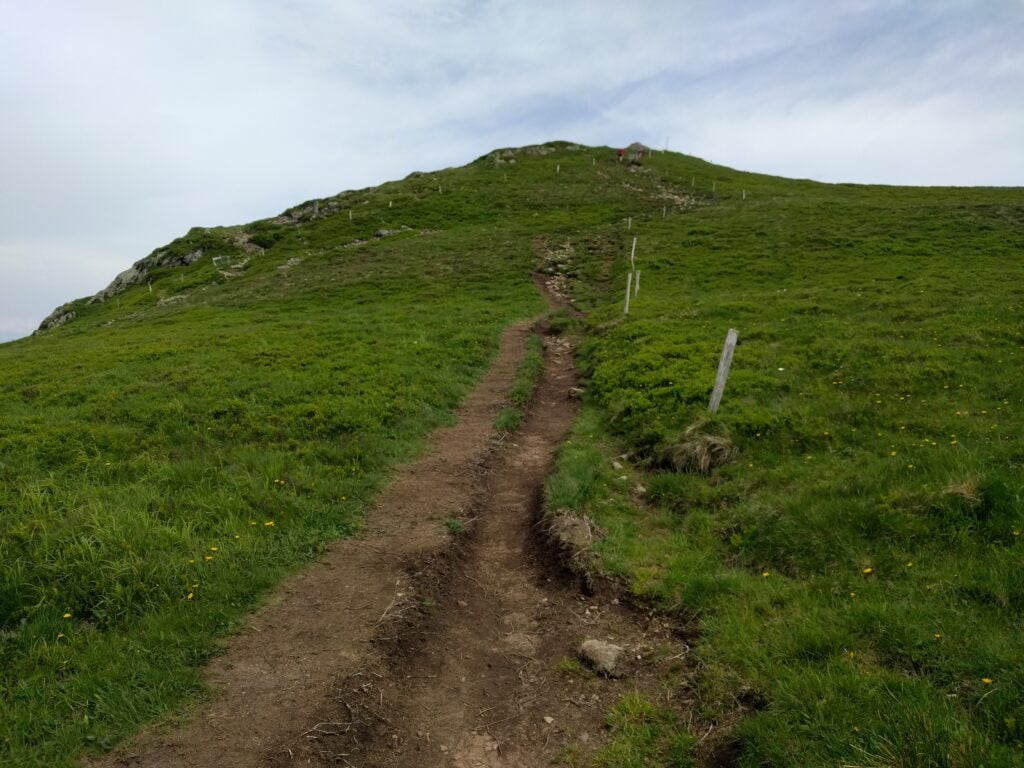
Just under 500m before the end of the walk (which has hitherto been fairly flat), there’s a more substantial ‘Casa do Abrigo’ (Shelter House) with toilets and a café. This also marks the start of the slightly steeper climb to the top. It’s not a difficult climb but it’s about 100m of ascent for the 450m of distance on a dusty path that twists up the mountain side. As I say, this is a fairly easy 10 points, and it was easy enough for my parents (who aren’t in the best of health) to make it to the Casa do Abrigo with me, before I continued to the summit alone.
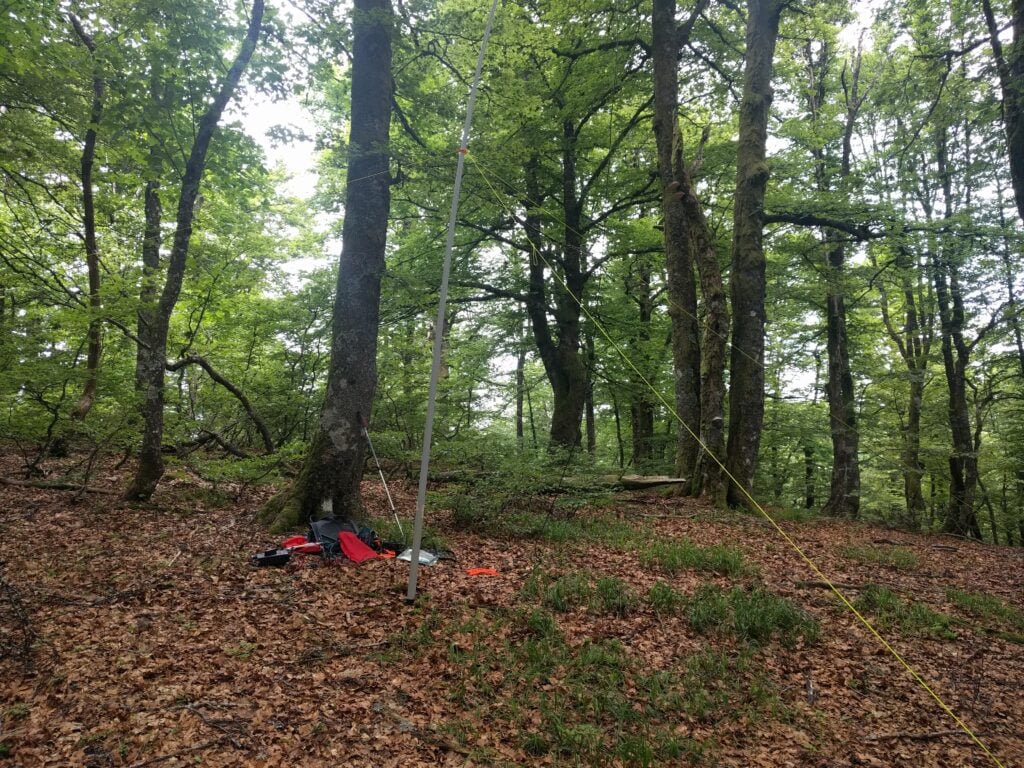
At the summit, there’s not a huge amount of space and it’s made more difficult by the number of people there. On the other hand, the mountain does have a double-peak: the main one with the trig point and another viewpoint, which is still easily in the activation zone. Since it was quieter there, I set up at the viewpoint, leaving everyone else to take photos at the trig point in peace. The available space didn’t allow me to stretch out the dipole legs fully but I did the best I good, having again been able to bungee my SOTA pole to the fencing at the top.
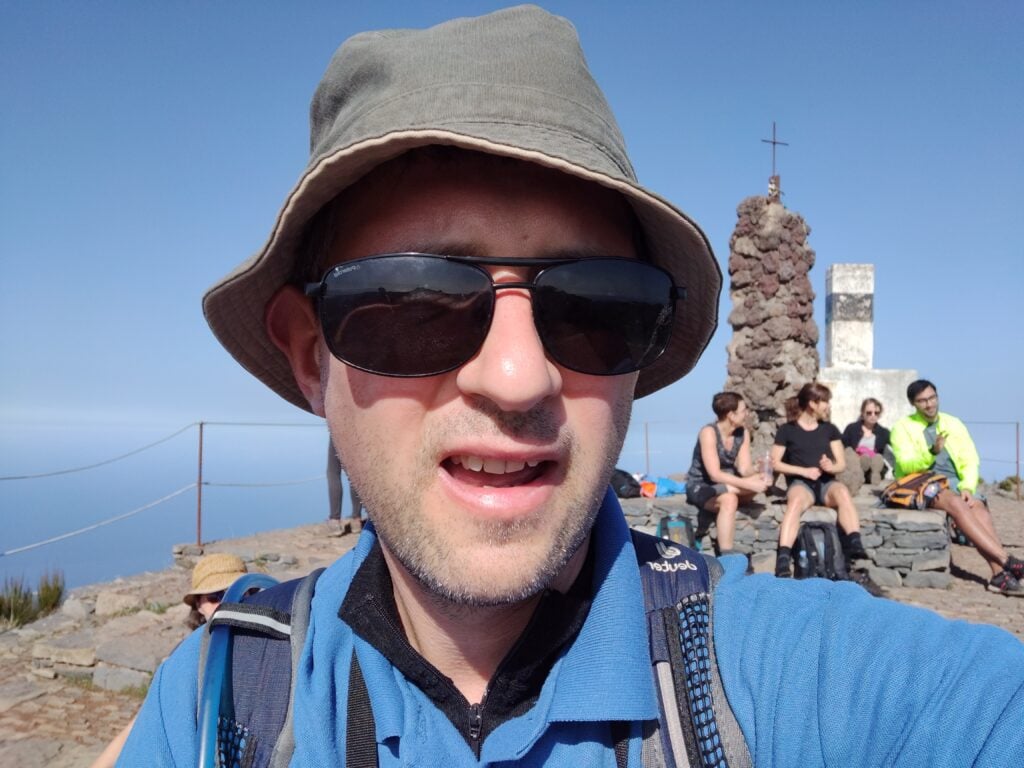
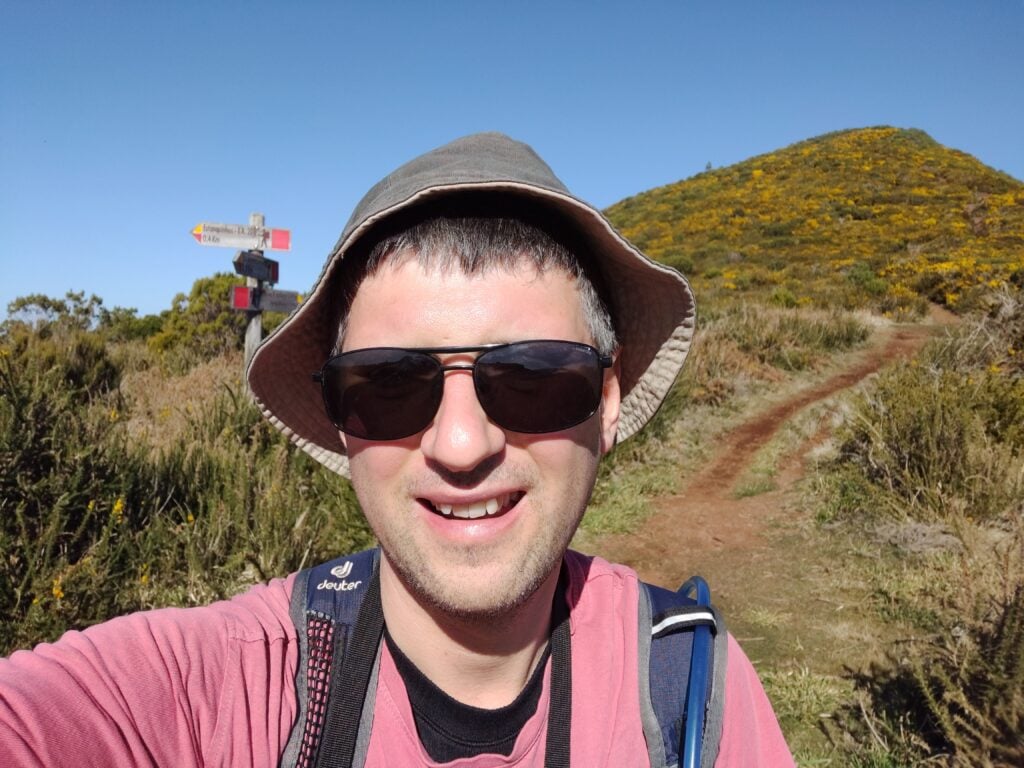
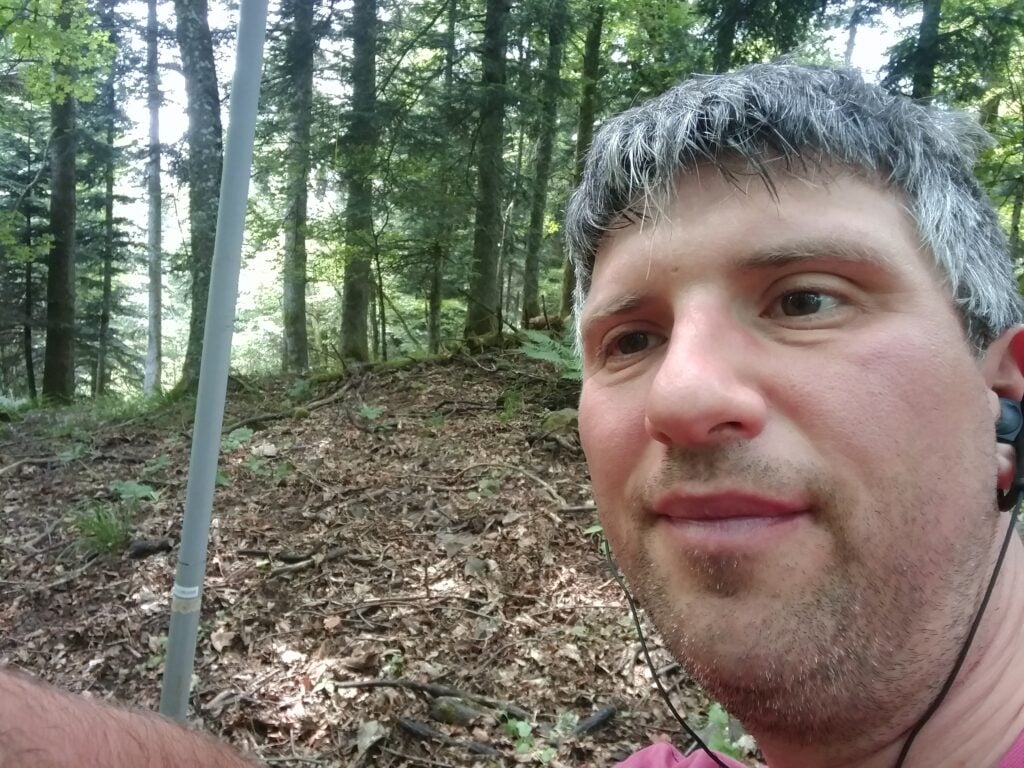
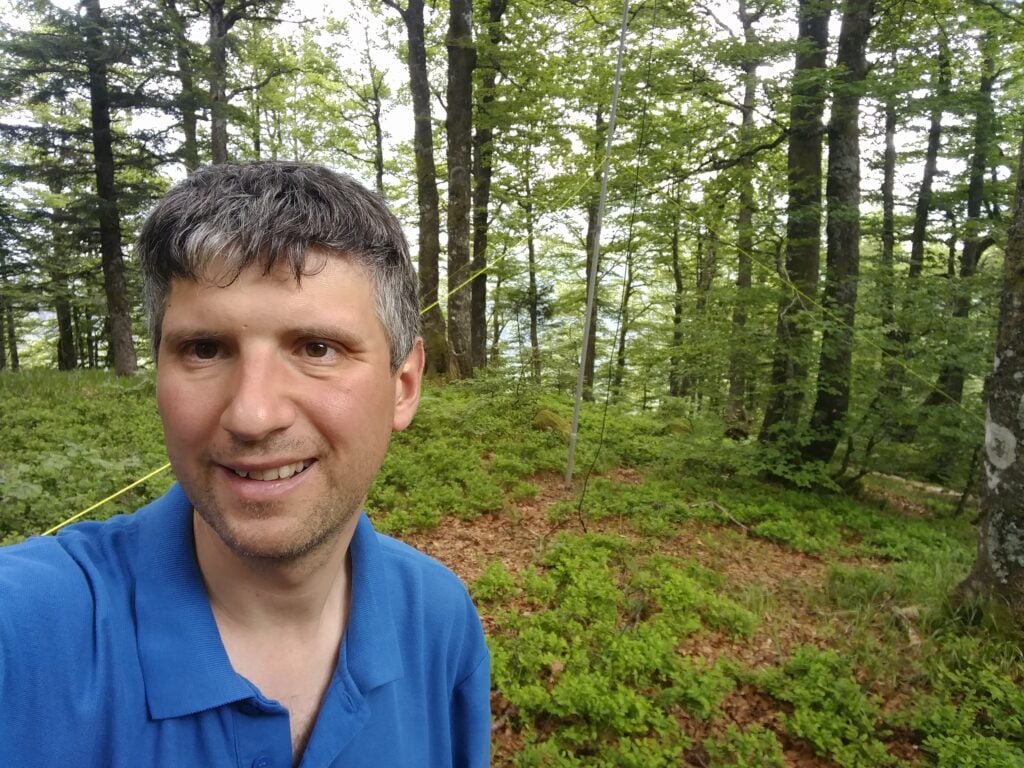
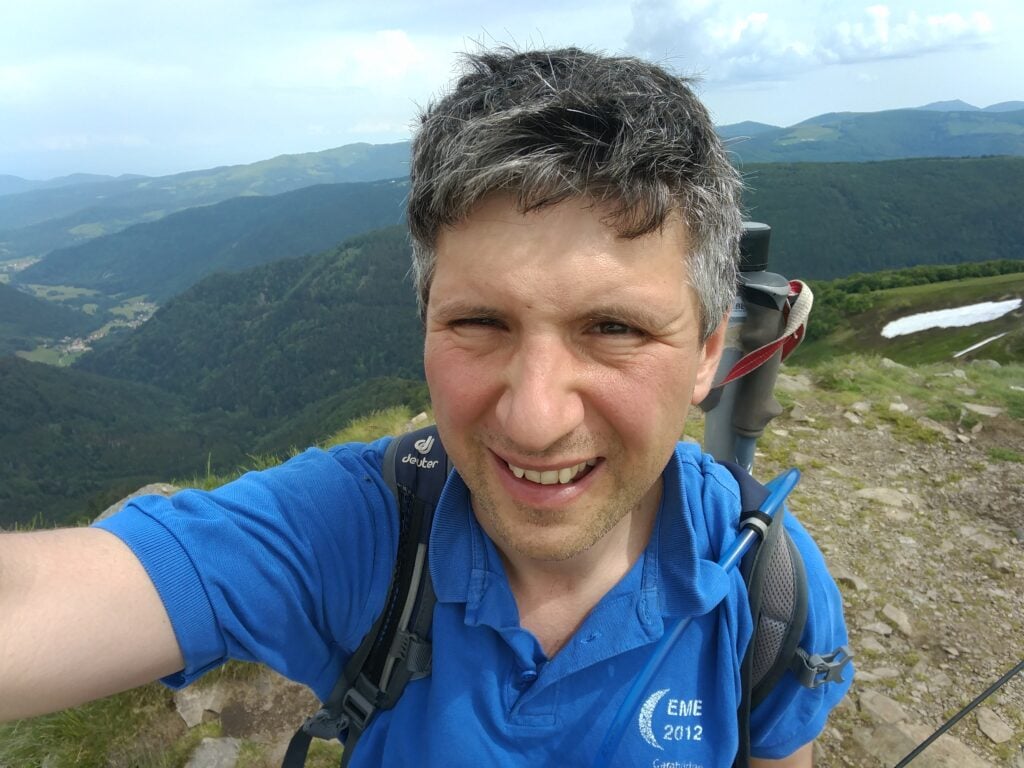
Selfie on top of Pico Ruivo
I didn’t spend too long up here but managed five QSOs including, incredibly given the aerial’s haphazard installation and the fact it was still morning, one American. It was also nice to make a QSO with G4OBK, whose writeups of these hills had formed the basis of my own trip. In fact, I contacted Phil four times on the trip, just missing him on Pico Ruivo do Paul.
The ascent for this one took about 90 minutes (allowing for my slightly slower parents), and the descent took an hour. We started the walk at about 09:30, about an 90 minutes after sunrise, and I wouldn’t have wanted to leave it any later given how busy the carpark was by the time we returned.
Loading map…Scroll or tap to load the interactive map
Distance
—
Elevation gain
—
Elevation loss
—
Max elevation
—
Waypoints
—
Elevation profile
Pico do Arieiro (CT3/MI-004)
It’s possible to walk from Pico Ruivo to Arieiro on a 6.7km path, which also takes you beneath the summit of the currently unactivated Pico des Torres. I, however, went for the easier option of driving between the peaks. It’s a long way around, however, taking nearly an hour on some fairly twisty roads.
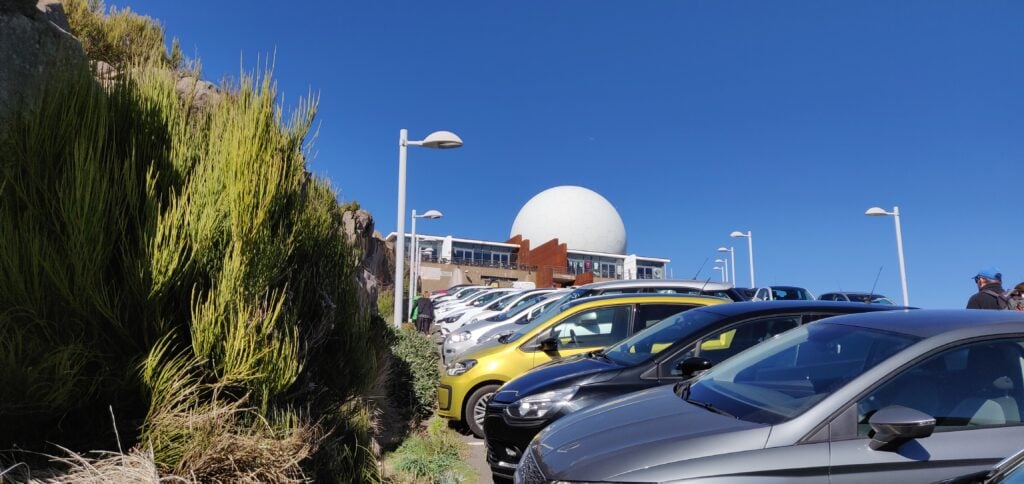
Once you’re there, however, Arieiro is possibly the easiest 8 points ever. It’s the site of a large military raydome, and so not only has an access road to the summit but it also has a large carpark and café. Despite the substantial carpark, however, it was running out of space by the time we arrived in the early afternoon.
The carpark at Pico do Arieiro
The summit itself is located behind the café, and there’s a few steps up to a trig point, near where the path from Pico Ruivo joins. There’s really not that much else to say about it. Since the actual platform with the trig point was busy, I found a spot just off the carpark but within the activation zone to operate from, and managed 9 QSOs including five Americans. It was also good to speak to Martin G3ZAY at the G6UW shack (where I often operate from) – he had also found me from GB2IWM at the Imperial War Museum, Duxford, when I was on Ruivo this morning.
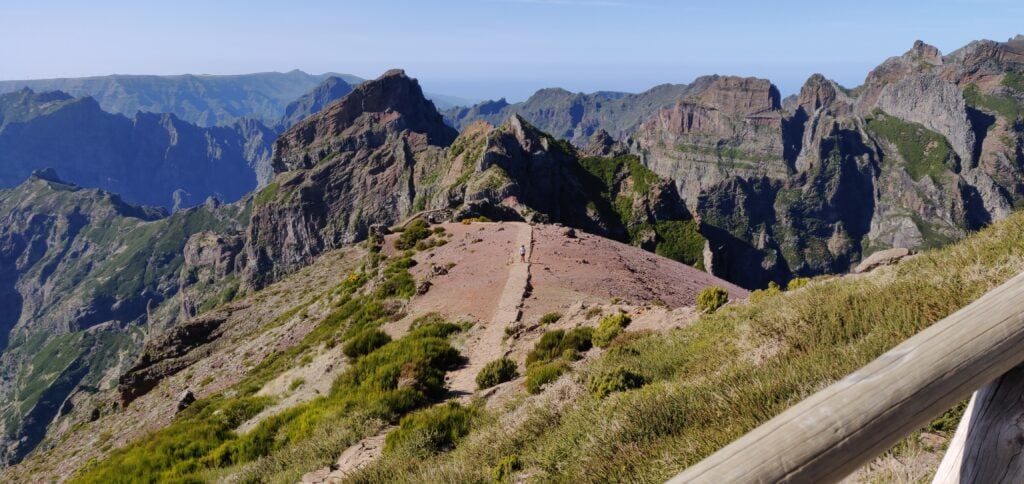
The view from the trig point at Pico do Arieiro, including the path back to Pico Ruivo
Not a bad day for earning 18 points all-in-all, but I’d have to pay for it with a cruel 1-pointer tomorrow!
Last week I spent some time on a family holiday in Madeira, during which I also spent three days in the hills doing SOTA activations.
The first thing to know about Madeira from a radio perspective is that although the DXCC prefix is CT3, that prefix is reserved for residents. The prefix authorised for CEPT visitors is CT9.
Pico Ruivo do Paul (CT3/MI-006)
The six-point Pico Ruivo do Paul is about 45 minutes drive from Funchal, along fairly quiet roads. I parked our hire car at the parking space off the road at 32.7699N, 17.0782W. Nobody else was around, as this isn’t the most frequented area of the island.
The carpark at the bottom of Pico Ruivo do Paul
From the carpark, the walk is a fairly simple matter of following the obvious path, which starts on the opposite side of the road, up to the summit. The ascent took me 40 minutes (partly as I had to wait for my parents, who are somewhat older) and about 20 minutes down. The path is almost exactly a kilometre in length for 130m ascent, the steepest bit coming just before the summit, but at no point is it hard. On the top, there’s a fairly large area of flat ground where you can set up, which has wooden fencing around it – perfect for attaching a SOTA pole with bungees!
I set up on 20m CW and fairly quickly had made 7 QSOs, enough to qualify the hill.
Me with Pico Ruivo do Paul in the background
This was a lovely start to the activation, and a fairly enjoyable easy hill.
Loading map…Scroll or tap to load the interactive map
Distance
—
Elevation gain
—
Elevation loss
—
Max elevation
—
Waypoints
—
Elevation profile
Pico Chao dos Terreiros (CT3/MI-008)
Update February 2020: I returned to this hill a year after writing this post and a lot had changed. At Boca de Corrida, the path had a chain and padlock across it and there were no indications as to whether only vehicle movement is restricted, or whether pedestrians should keep out too. The latest satellite imagery shows that the clearance I witnessed in 2019 had been extended and there is now a maze of paths in place of the old track. Given this exploitation, I decided to head north on the steep, paved path signposted to Encumeada. OpenStreetMap indicated that this would be a useful diversion, and that it is possible to turn left at around 32.7253N, 16.9938W along a track to bring you back towards Terreiros. I couldn’t see the track at this location however – I suspect it has become overgrown. With my parents in tow and nowhere else to leave them, I abandoned my trip in 2020. I suspect next time, I’d approach from Fontes, to the west, even though the route is longer and steeper. Anyway, back to 2019…
On the map, Terreiros (4 points) is not far from Pico Ruivo do Paul but the geography of the island means it’s a pretty decent drive between the two places. To make the most of the day, we drove from Pico Ruivo do Paul to the ‘skywalk’ at Cabo Girão (a glass platform overhanging the cliff), where we had lunch at the café, before heading up to Terreiros. A tip for anyone following our route: use the toilets at the café before eating – the €0.50 you pay for the toilets can be discounted against your café order. Not knowing this, we did everything in the wrong order.
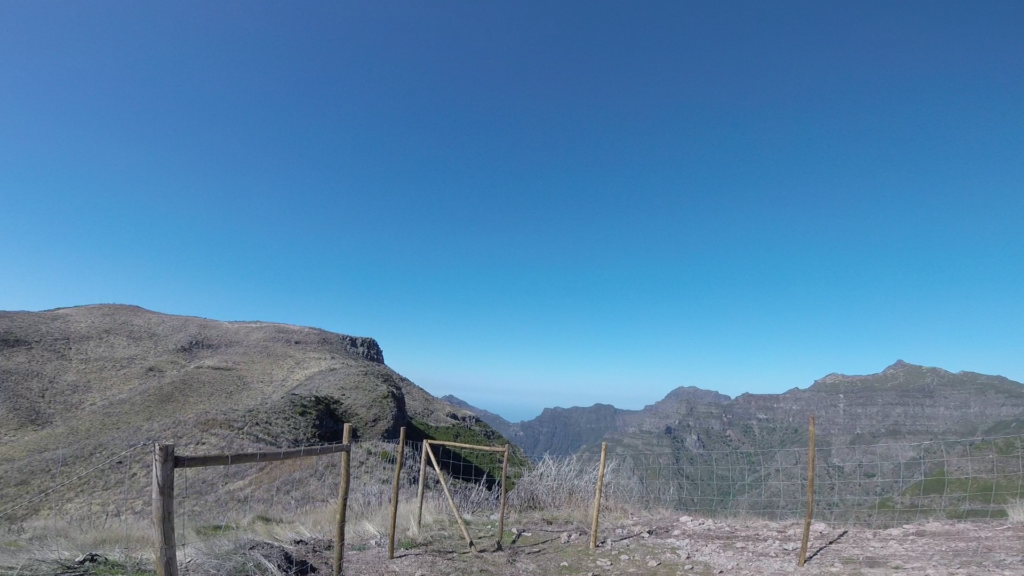
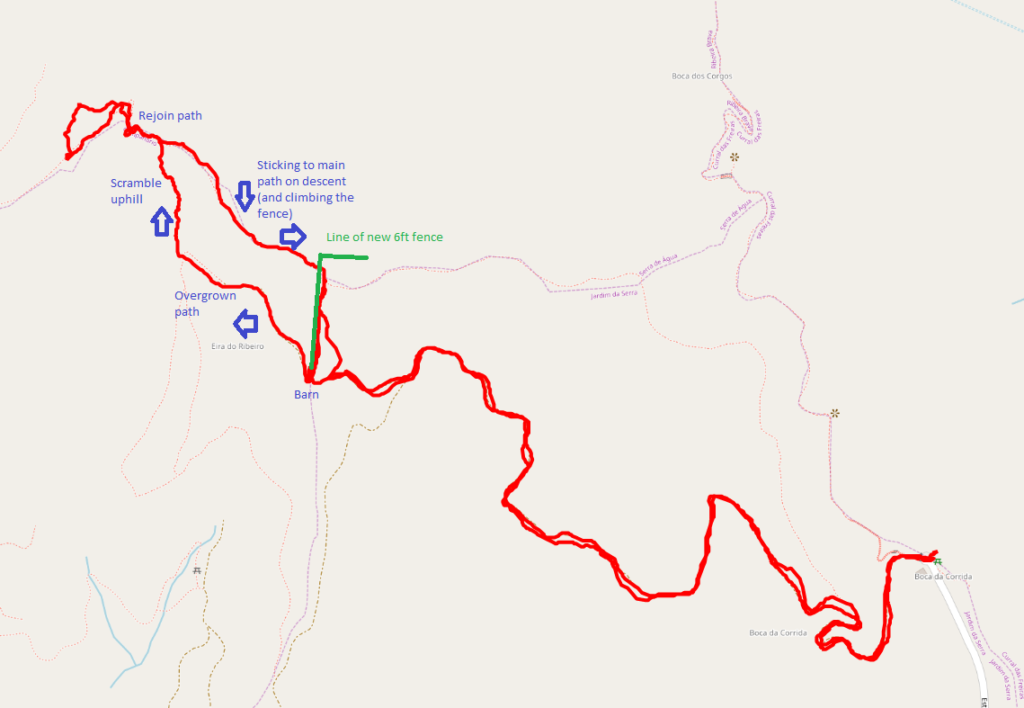
The drive to Terreiros from Cabo Girão looks really bad on the map but it’s actually fine and my TomTom got us there fine. The path starts from the end of the road at Boca da Corrida, where there’s a small car park and chapel (32.7110N, 16.9869W). At least on the map, the path is, again, obvious and wide and twists its way around the hill over the course of about 2.7km. The ascent is about 200m. It was easy enough for my parents to do with me for the first about three quarters of the walk. One note on my map indicated the path was overgrown and impassable. That was definitely not the case and in fact there were people working clearing trees on the hillside above us. And then I had a problem. At the barn at 32.7139N, 16.9970W the path divides and it isn’t clear what you are meant to do. The track continues up a steep hill, with a newly made fence on your left, but when you get to the top, you realise you need to be on the other side of the very tall (maybe 6ft) chicken wire fence. But there’s no major path from the barn on the other side of the fence. Yes, the fence has been built right across the path. It had taken me 40 minutes to get this far, and I wasn’t proposing to give up, so I left my parents somewhere safe and set out to find my own path, keeping the new fence on my right. This was a mistake. It involved fighting through some very overgrown plants, and then scrambling up a steep grassy bank with plenty of opportunity to lose your footing. It was really hard work. After maybe 15 minutes of this, I eventually came out to the path I should have been on, and continued to the summit.
The fence newly-erected across the pathThe GPS track caused by negotiating the new fence
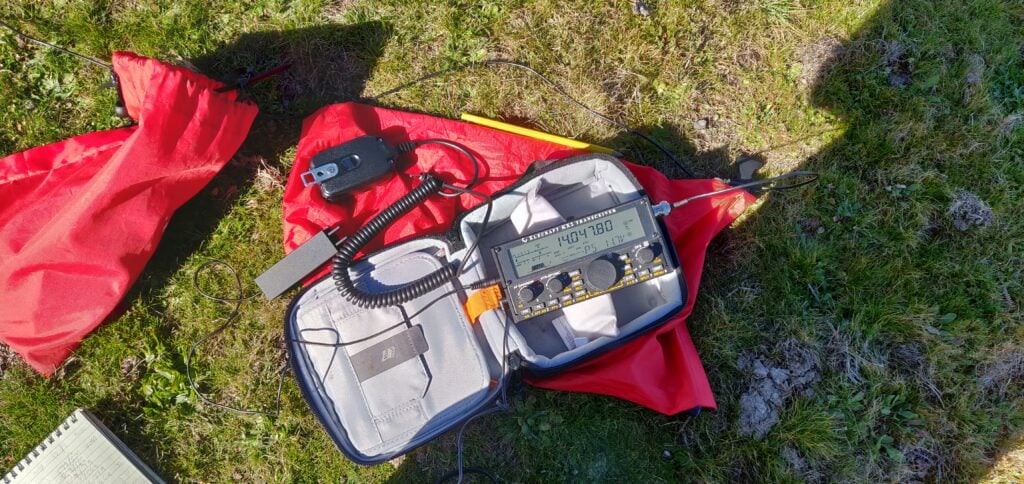
The activation zone of Terreiros is nice and large and, again, this isn’t a well-frequented hill, so it was nice and quiet. The view is also spectacular. I made 10 QSOs from here, including two Americans which was a nice surprise for 10W into a simple linked dipole.
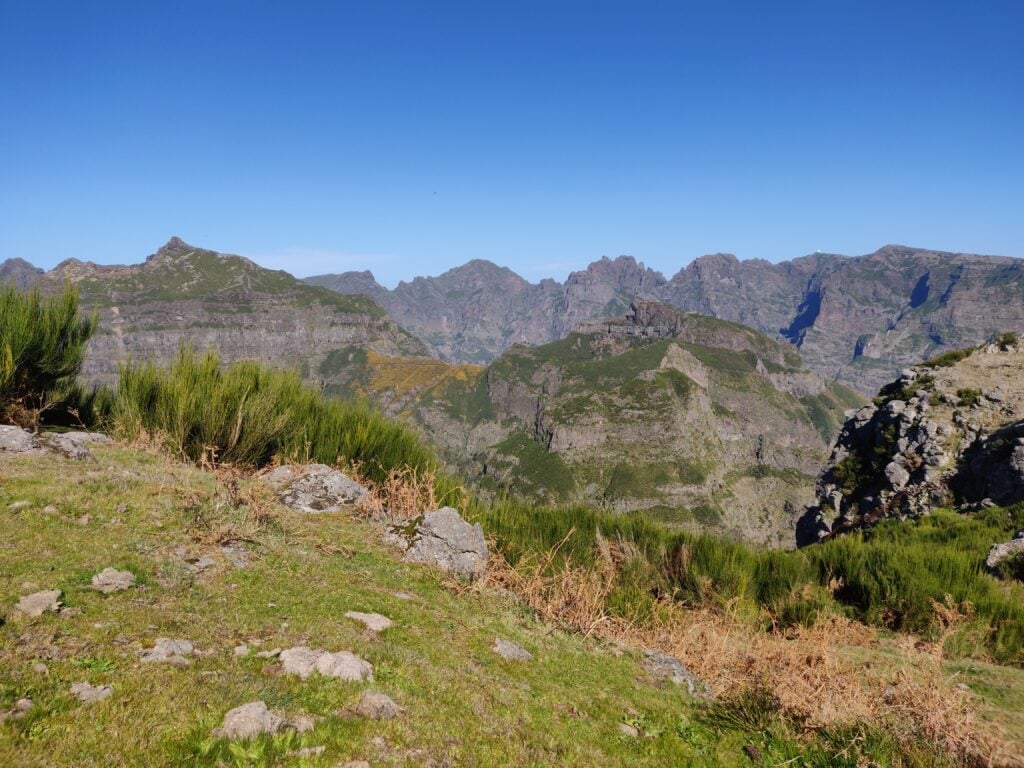
The view from Pico Chao dos Terreiros, looking towards the hills I did the following dayMy Elecraft KX2 on Pico Chao dos Terreiros
On the way back, I stuck to the path and managed to climb over the fence, rather than taking the ‘cross country’ route I had used on the ascent. This turned out to be much better. The descent, including recovering my parents from where I had left them, took just about 35 minutes.
Loading map…Scroll or tap to load the interactive map
Distance
—
Elevation gain
—
Elevation loss
—
Max elevation
—
Waypoints
—
Elevation profile
One word about the journey back to Funchal – G4OBK has mentioned how useless his TomTom was on Madeira. I didn’t have as many problems as he seemed to have but the journey back was an exception, with it continually insisting I needed to take very minor one-way streets down steep hills that were about the same width as the car. No damage was done, but it wasn’t the easiest driving.
Recently I saw a Twitter thread bemoaning the rise of ‘psychological safety’ as a phrase. Not because it isn’t important – it is – but because giving it a name has made it acceptable and risks giving a scapegoat to hide behind. There’s the possibility that just saying ‘My organisation / team doesn’t promote psychological safety’ makes it OK.
I have similar feelings about ‘Technical debt’. As a phrase
in its original sense (the fact that not keeping code clean and deployable
eventually incurs a real, financial debt that must be repaid), it is useful.
But every non-startup I have heard of has struggled with ‘technical debt’ and
it has started to be accepted as just something that happens.
Let’s not forgot that not all technical debt is bad. There
can be good reasons for taking on debt, and in fact I’d actively encourage it
in embryonic, experimental projects, provided it is monitored and quickly
repaid.
But with excessive debt, a time comes when development teams
become so crippled by the legacy code that progress slows to a snail’s-pace and
further work becomes unacceptably risky. In these situations, where should you
start with ‘debt reduction’? I’ve seen projects that have quickly spiralled out
of control into a whole rewrite project, or worse the team can become embroiled
in a long discussion about the best way to fix things.
One of the teams I work with was in such a state last year.
In fact, it was worse than that. They actively did not know which products they
had on live servers (these are all websites) and there were so many
inter-dependencies between them that it was almost impossible to know where to
start.
Fortunately, our boss understood the problem and was willing
to give some time to sort it out. Together with the Product Manager and our
Site Reliability Engineering team, I helped to set some goals for the team to
start tackling the issue, without ending up rewriting everything. Our definition
of what good looked like was:
No websites should be running on unsupported
operating systems
All sites should be deployed through our CI
pipeline
All code should be deployable at any time
Nothing should be deployed with a CVSS score
greater than seven (still high, but a reasonable, measurable start)
(This may sound unambitious, but based on where we were
starting from, it was a big challenge!)
The team then set about fixing up the most obvious candidate
products.
We soon hit our biggest issue. With the team struggling to
untangle the code – often written by contractors, and so completely unknown to
the team – progress towards these goals was slow. It was also almost impossible
to report on. Furthermore, because we didn’t even have a full list of products
or which servers they were on, any measure of progress towards an end-point
(such as burndown / burnup) would be meaningless.
In SMART terms, we didn’t know whether our goals were
achievable or realistic, and so we also couldn’t timebox them, which was
unacceptable. It was clear we needed a way to measure and to report on the
beast. This was not just for management. Part of our thinking was also that measurement
would help morale in the team. Although at this early stage, they were pleased
to have the opportunity to work on something that had been a pain for years, but
it was clear that this would not last without regular celebration.
It was time for a creative solution. Inspired by both the
term ‘technical debt’ and the product management prioritisation technique of
asking stakeholders to vote on backlog items with money, I sat down with the
team and we discussed which of the goals were ‘worth’ more, and put some values
on them. We also took the opportunity to hold ourselves to account by putting a
bit more rigour around the goals, for example, when we said ‘code must be
deployable through our CI pipeline’ we specified ‘to live’, since deploying to
UAT only might make the situation worse.
Similarly, to measure ‘deployable at any time’, we specified that there
must always have been a live deployment within the last two months. If no
development work had happened for the previous eight weeks, deploying an
unchanged build would be fine, but at least demonstrates that rot hasn’t
started to set in. It’s the little failures nobody notices while they have
other priorities that tend to add up to debt later.
The result was our new list of problems and their debt
value:
Websites running on unsupported operating systems
= £25
Websites that couldn’t be deployed all the way
to live via the CI pipeline = £50
Websites not deployed in the last two months =
£20
Websites with a CVSS score that was 7+ or which
was unknown = £40
This allowed us to take the list of products that we did
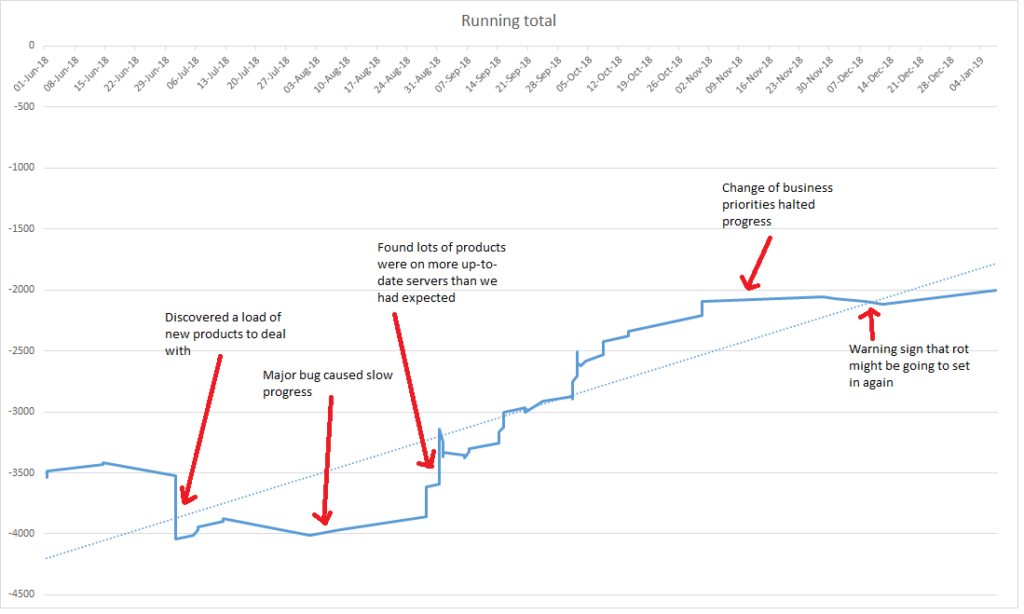
know about and calculate our starting level of debt: £3535! This approach also
meant that, as we uncovered new information (whether good or bad), we could
show this by adjusting the debt amount. In fact, five weeks after starting, our
‘debt’ figure had worsened to £4015, as the team had learnt more.
But above all, it meant that we could show our progress
graphically and set up a celebration point for the team whenever we had removed
£1000 from the debt.
To get a bit more momentum around this idea, I also acquired a load of Monopoly money and displayed it in the office, so colleagues could see money moving between a ‘debt’ and ‘repaid’ pile whenever something was ticked off the list.
Technical Debt visualised as Monopoly money
This visualisation had a mixed response in the team. In all
honesty, most developers were ambivalent about it, even if managers mainly
liked it. It also had the slightly unforeseen difficulty in not being a great
demonstration of continuous progress: The inter-dependencies tended to mean
that the graph would go several weeks without many changes and then a big
improvement as many products got deployed together. I’m not convinced that I
ever managed to fully explain that that wasn’t a problem. If you try this in a
similar context, I’d certainly recommend stressing that it shows repayment of
whole pieces of debt, not progress through the work itself.
By the way, ‘repaying’ the debt wasn’t only a development job on this team. It was
also a product management job as we managed to decommission a number of rarely-
used websites. In those cases, we repaid all the debt on those products at the
moment of decommissioning.
Recently, there has been an unexpected result of the graph. Remember that rule that everything should have been deployed in the last two months? In November and December, priorities changed, and the technical debt reduction work was paused (or rather, deprioritised) for a while. Due to this, and the fact regular deployments hadn’t been set up, the graph is now starting to head in the wrong direction, as deployments made in October start hitting the two month limit. This has served as a useful reminder that there’s still work to do if we aren’t going to have more problems in the future.
Debt graph
Are we aiming to repay the amount of debt all the way to
zero? No, probably not. There wouldn’t be sufficient value in doing this. But
monitoring this figure in the future should be a good mechanism to track where
we are, and to ensure that the products are not allowed to become bad again,
after all the investment we made during the latter half of 2018.
I’ve spent the last week with Rob M0VFC and Dan M0WUT on a DXpedition to Montserrat as VP2MUW. This post is part-diary, part-informative for anyone who wishes to follow in our footsteps.
Plymouth, Montserrat
Travelling to Montserrat
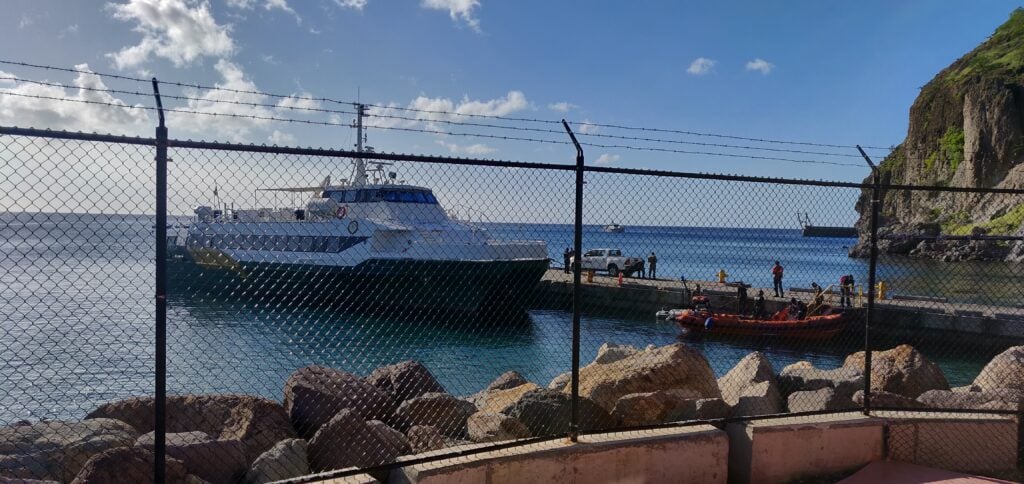
Montserrat’s main airport was destroyed by the volcano eruptions in 1997 and 2010. Today, there is just a small airstrip on the island, but it can only support small planes, so luggage allowances are limited. Instead, we flew to the neighbouring island of Antigua, took a taxi across the island, and then onto the Jaden Sun ferry (actually a catamaran) from Antigua to Montserrat. This allowed us to take all our equipment without any hassle.
Our British Airways flight from Gatwick arrived at about 3pm. It then took about 30 minutes to get through Antiguan immigration and customs before we could get into the taxi. The airport has a very efficient taxi rank, which includes giving a guaranteed price for the taxi. For the three of us with our luggage, it cost US$14 for the 25 minute journey across the island to St John’s harbour. (Note that in both Antigua and Montserrat, prices may be quoted in either East Caribbean Dollars (XCD) or US Dollars (USD). Both currencies are widely accepted, however things tend to be more expensive in USD.)
The ferry port was a fairly disorganised place. There are two separate booths, one to collect the ferry ticket and register for the crossing, and the other to go through emigration formalities. There is also a further customs booth for paying Antiguan departure tax if you are eligible to pay it (see below). You have to check in 90 minutes before the sailing but, even having done all these bits of paperwork nice and early, we still had to wait as disembarking passengers coming from Montserrat had to go through similar formalities before we were allowed to board… and Customs hadn’t turned up to process them!
The ferry crossing takes about 1.5 hours and we arrived in Montserrat at 9:30pm – half an hour late because of the Customs delay in Antigua and it then took another 30 minutes or so for us to clear immigration into Montserrat. Luckily, David from Gingerbread Hill was there to pick us up and was prepared for the wait.
A quick word about how immigration and departure tax works: in Antigua, we indicated on our landing cards that we were in transit, and we got special visas accordingly, marked MNI on the way out and LGW on the way back (airport codes for Montserrat and Gatwick respectively). You are exempt from Antiguan departure tax if you have been in Antigua for less than 24 hours and so having these special visas saved us that cost. On the return journey we did need to show our BA boarding passes in order to get the LGW visa (we had already checked in for the flight online); on the outbound journey I had printouts of the ferry reservation available but these weren’t required.
The return journey was the same but in reverse, although timings were slightly more critical. We took the risk of getting the evening ferry from Montserrat at 5pm, arriving into Antigua at 6:30pm. This didn’t leave a huge amount of time for clearing customs and making it across the island in time to check in for our flight at 7:50pm. (Especially as Friday evening is the time that Antiguans like to go en masse to the KFC drive-through, I kid you not! This led to an extra traffic jam around the restaurant, adding about 5 minutes to the taxi journey.) It all worked out fine, however, and we were glad to take the risk as the alternative would have been to get the 6am ferry and wait around in Antigua with our luggage all day. Incidentally, departure tax is also payable when leaving Montserrat. This was EC$45 each plus a EC$10 security charge. The only thing to note is that the PeliCases containing the two amplifiers were sent to outsize baggage at Antigua airport where they were manually checked thoroughly, and we did need to show our radio licences.
We flew in British Airways ‘World Traveller Plus’ (their marketing name for Premium Economy). While not the most economical use of the Avios points (the International Airlines Group marketing name for air miles) we were burning, it gave extra baggage allowance, and the extra comfort and legroom were particularly welcome on the overnight flight back to the UK.
Jaden Sun
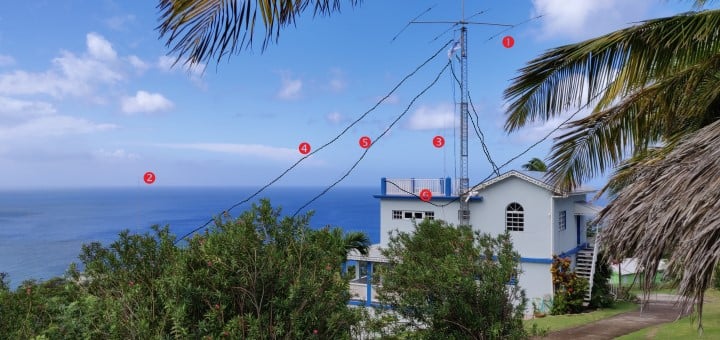
Radio from Gingerbread Hill
We stayed at Gingerbread Hill, well known among radio amateurs for the fact that the villas contain a ham station, tribander yagi and mast. It also has a fantastic sea-path take-off to the US and a reasonable take-off to Europe. We rented both the Heavenly Suite and Two Bedroom Villa (the suite being the upper floor of the same building as the villa). Both the suite and villa have double bedrooms, and the villa also has a room with two single beds. Amateurs take the Heavenly Suite as that provides roof access to the mast, but it’s strongly recommended you also book the villa – as we did – to prevent disruption to any non-ham guests in the same building.
From the equipment at Gingerbread Hill, we used the tribander and mast, some coax, 80m and 40m dipoles, and the rotator. Everything else we brought ourselves, including 3xK3s, KPA500, Juma amp, CW keys, power supplies and other wire antennas. Massive thanks, of course, to K2DG who keeps his equipment at Gingerbread Hill and makes it available to other visitors. There’s some slightly outdated information on his website, but I’d recommend anyone else emails him directly before travelling to get the latest information about the condition of the gear.
On the topic of power supplies, Montserrat uses two electrical standards and Gingerbread Hill is no exception. There are both 110V American style plug sockets, and 240V (we measured 238V) British three-pin sockets. This obviously makes using amps easier than in most other parts of North America. On the other hand, Montserrat does suffer from regular powercuts, as the entire island is apparently serviced by just one 1.5MW diesel turbine, although some experimentation with geothermal energy in association with an Icelandic company is also in progress. We had three or four powercuts over a couple of days, each lasting around 30-90 minutes. We did have a 5000mAh LiPo battery with us, so we could continue making some contacts on one station during one such event. By the way, a very modest extra charge for electricity is added to the Gingerbread Hill bill for ham operations. We were charged EC$27 per day.
Licences need to be applied for, ideally about 3 months in advance of the trip. The instructions and application form are on the MCIA website. The MCIA office is very close to Gingerbread Hill and Clover (David’s wife) kindly offered to collect the licences for us and to add the licence fee to the credit card she was already holding for the room booking, making the licensing process very easy.
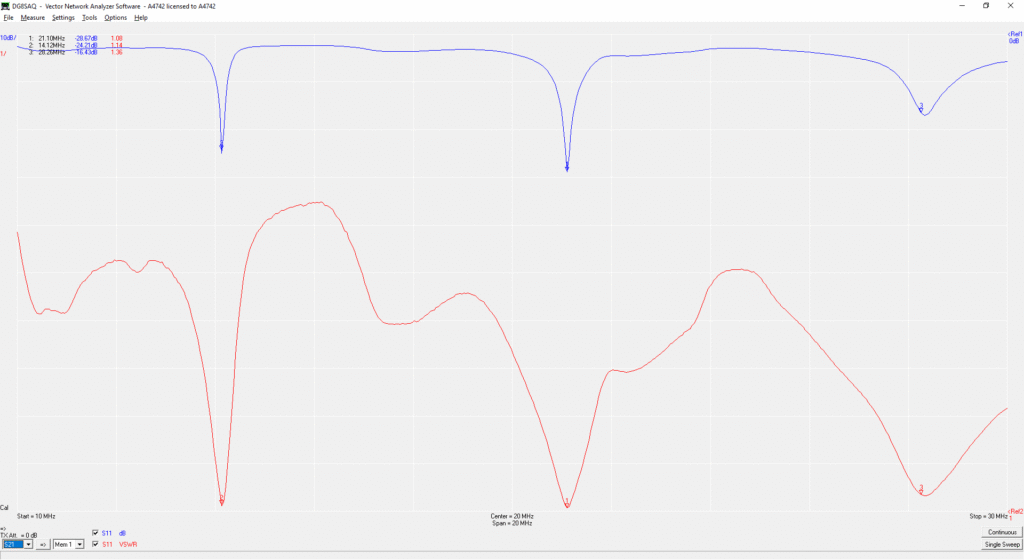
On our arrival, David from Gingerbread Hill kindly showed us where the beam (Mosley C-33-M) is kept in the store, provided tools to build it and also gave us a couple folding tables to use in the shack. We found the beam easy to assemble, although a dodgy bolt badly affected SWR at first. After replacing the bolt and liberally applying tape to the joint, the VNA plot looked like a great antenna:
VNA plot for the triband yagi
The beam is very easy to mount on the tower, because when down, the tower is at the height of the Heavenly Suite roof. It’s worth nothing that the beam is very much either on CW or SSB. With the beam tuned for the CW ends of the bands, SWR on 20m SSB was above 2:1, causing the KPA500 to complain. We therefore used a separate 20m vertical for 20m SSB, which also gave us the ability to be on 15m and 20m simultaneously. The tower itself has an electric motor, powered from outside the Two Bedroom Villa. We found it useful to use a couple UHF handhelds to talk from the rooftop to the person controlling the motor.
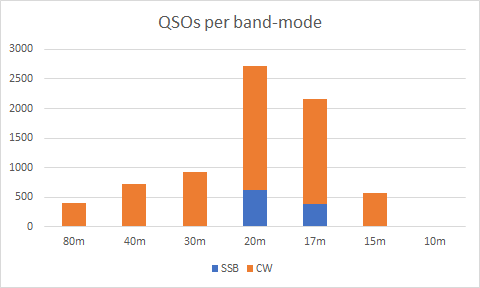
At this poor stage of the sunspot cycle, we made about 7500 contacts in the 5 days of operating between the 3 stations, mainly in CW with some SSB on 20m and 17m. We expected some backlash against publicising that we would not operate on FT8, but we actually only received positive comments about that decision.
VP2MUW QSOs per band / mode
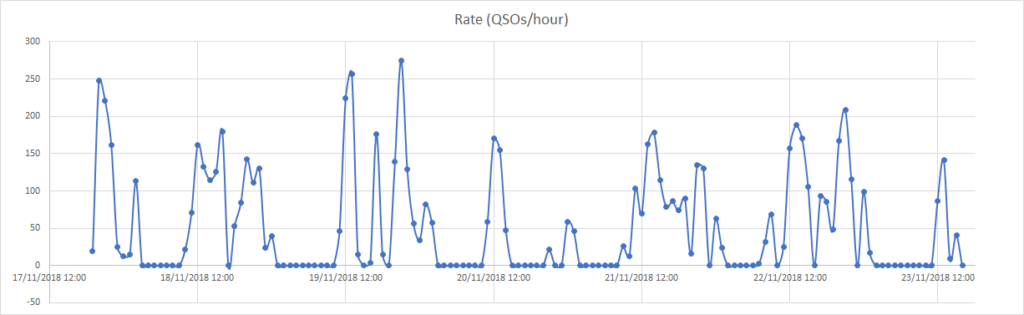
Despite the adverse conditions, we had several hours with over 150 contacts/hour, even reaching about 270 contacts/hour at the peak:
QSO rate at VP2MUW
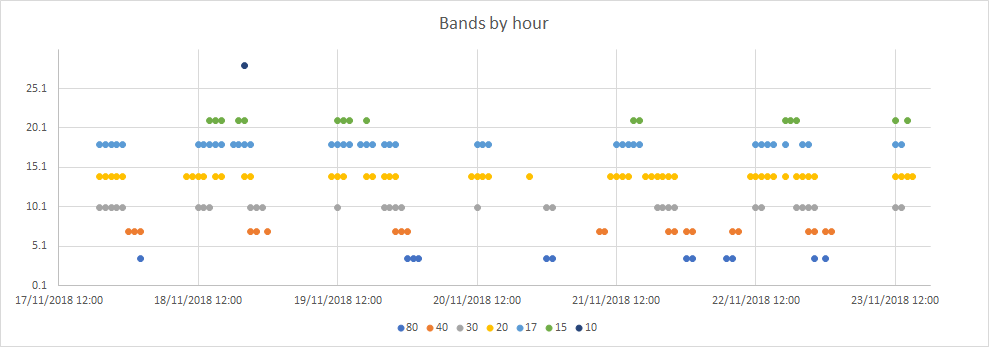
With the three stations, we seemed to be able to make the most of the bands that were open at any given time we were active. In the graph below, a dot appears for the band if we made at least one QSO on the band in the hour:
Bands we used over time
In terms of openings, we were very conscious of a good greyline path to Japan on 18MHz, 14MHz and 10MHz at our sunset, Japan’s sunrise. This was a great contributor to getting 223 JA stations in the log. We also ensured we were up at our sunrise to get the European opening on 40m in addition to the late-evening our time opening to EU on 80m. One morning, I also woke at 3:30am for the Europeans on 80m.
Into the Exclusion Zone
One of the things Clover arranged for our visit was a day-trip with Montserrat Island Tours around the island and into the Exclusion Zone. (Our tour guide was her son, Sunny.) This was well worth it. The morning tour included going to Jack Boy Hill to look out over the site of the former airport, now a flat plain of ash. We also visited a steam-powered sugar mill. (This is believed to have been an experimental feature, as most sugar mills operated fine with wind power.) After lunch at The Attic in Salem, we met with our police escort to enter the Exclusion Zone, the part of the island which is restricted due to continuing danger from the volcano. It should be noted that entry to the Exclusion Zone is not to be taken for granted. Just because you have arranged it doesn’t mean it will happen. It is only possible if the current Alert level is 0 or 1 (out of 5), and there have not been any heavy rains which could have flooded the roads in ‘mudslides’ of ash. The current Alert Level is posted on the Montserrat Volcano Observatory website.
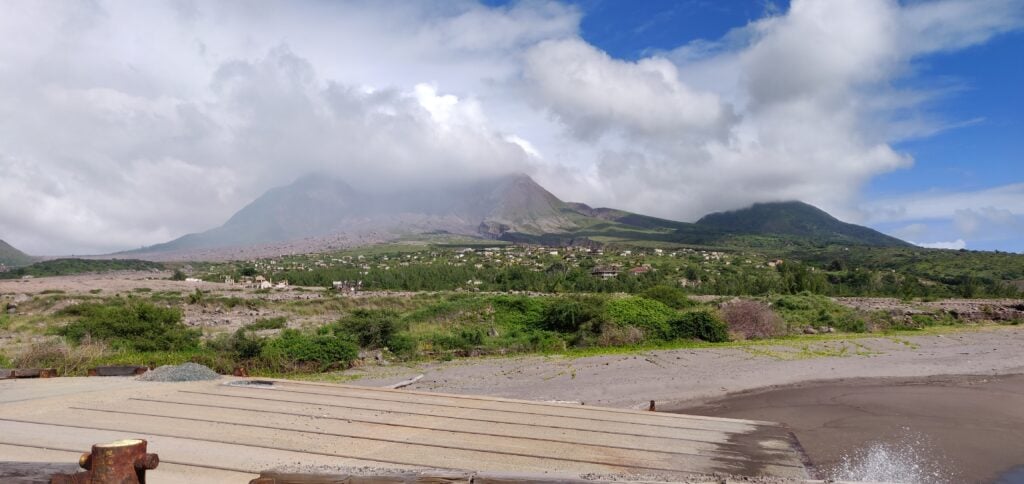
The volcanic eruption which caused the evacuation and eventual abandonment of the capital, Plymouth, happened over 20 years ago in 1997, but the island is still far from recovering from it. Besides the lack of airport and insufficient electricity supply, hospitals and schools are also somewhat limited according to our guide. Heading into Zone ‘V’ (the most restricted area), the scale of the devastation was clear.
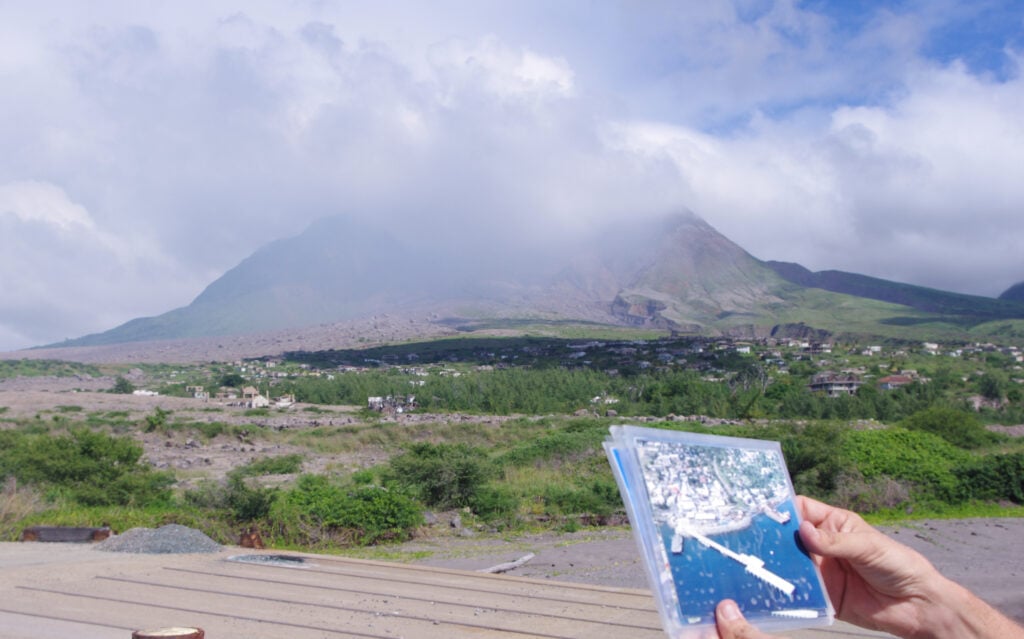
Plymouth: Before and After
Even with our police escort, continual radio contact with the Montserrat Volcano Observatory, and experienced local guide, we were still limited in where we could go within Plymouth. With so many buried buildings, many parts of the former town haven’t yet been mapped for any voids that might be under the ash, which you could fall into. Furthermore, there was a requirement to keep the car engine running while we were there and to not venture too far from the car, in case a speedy exit to the escape route were to be required.
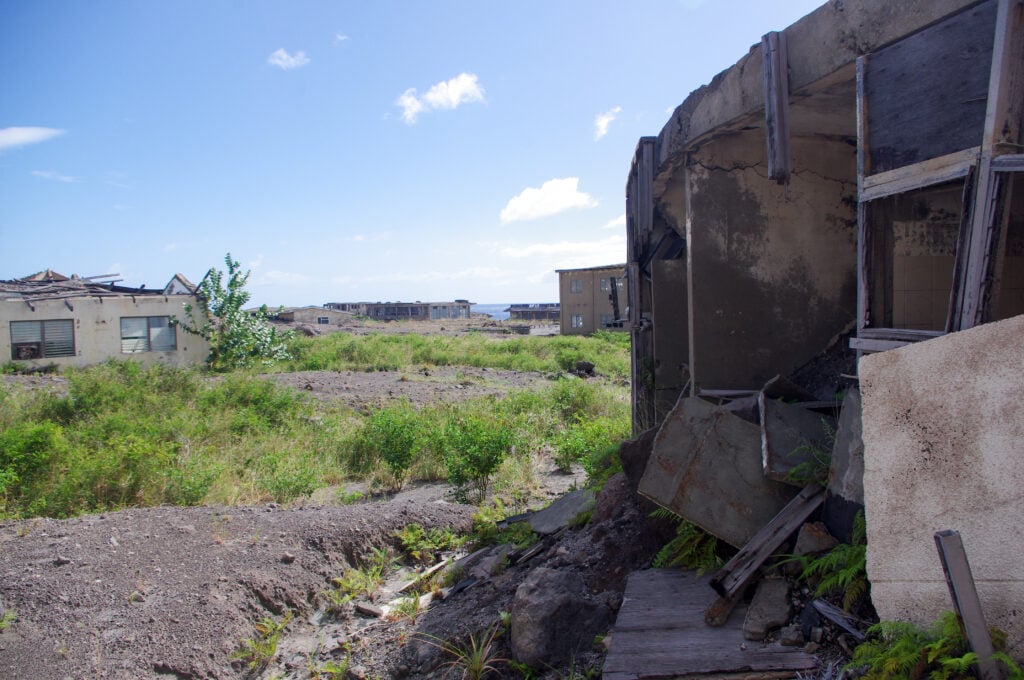
It was amazing just how much deterioration has happened in the last 20 years. Compared to photos of Pripyat (the abandoned town near Chernobyl), which has been empty since 1986, the buildings in Plymouth have obviously been affected by the salt water and hurricanes in the much shorter timeframe. It’s especially heartbreaking to realise that when the volcano struck the town had only just finished rebuilding itself following the devastation of Hurricane Hugo in 1989.
Abandoned buildings in Plymouth
While in Plymouth, our guide told us a couple anecdotal stories from the evacuation period. The first was the raid on the Barclays Bank vaults, with EC$1 million in brand new notes stolen from the branch. All that remains of the branch – and indeed the bank’s presence on the island today – is a light-blue painted fascia board rising above the ash and rubble. (Read an Associated Press report on the heist)
We were also told the story of one inhabitant of Plymouth with learning problems, who refused the order to evacuate and lived for several weeks with the whole town to himself before he was eventually caught up in a pyroclastic flow. It is believed that he was responsible for the pile of glass baby-food jars piled up in the corner of what was once the supermarket warehouse – he was eating his way through the stock while nobody was around.
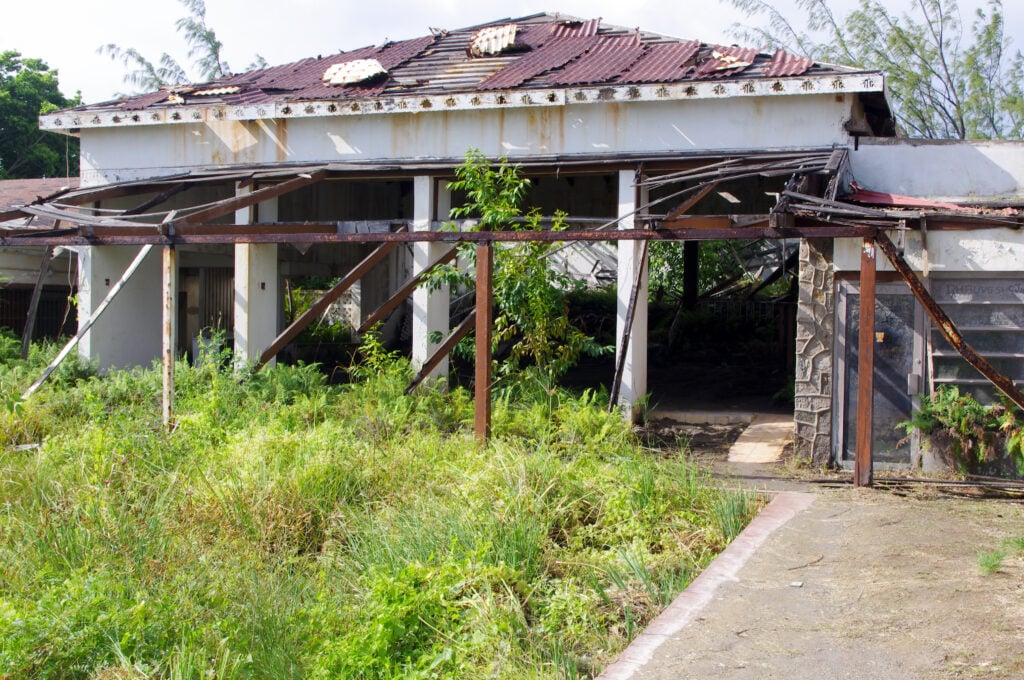
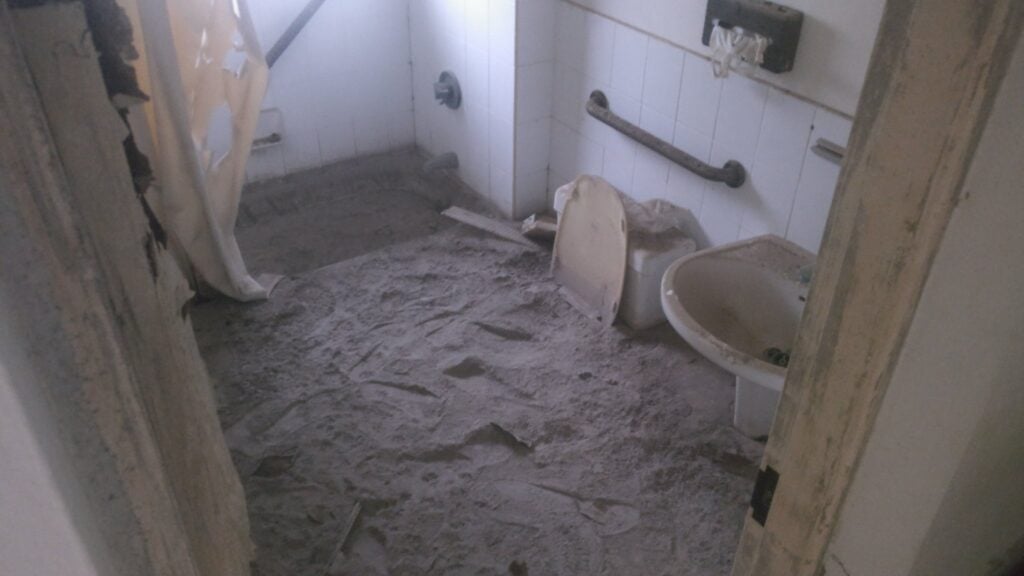
After an hour or so in Plymouth, we went to the nearby settlement of Richmond Hill, also abandoned, where the former four-star Montserrat Springs Hotel stands. We had more freedom to wander around the hotel and to see the volume of ash which has invaded the bedrooms, as well as the destruction to the exterior of the building,
Outside bar and swimming pool at the abandoned Montserrat Springs HotelVolume of ash in the bedrooms at Montserrat Springs Hotel
Other tips for Montserrat
This is an assortment of other stuff I might have wanted to know before we went:
As you’ll have gathered, David and Clover, the owners of Gingerbread Hill, were excellent in recommending arrangements for our stay. One added bonus was that they arranged a hire car for us and, after we arrived on the boat, David took us to the police station in Brades to get our driving licences – and yes, the police station was open for business at 10pm! (There’s no automatic reciprocity for driving licences in Montserrat, but a trip to the police station, showing your home driving licence and paying EC$50 gets you a Montserrat driving licence.) This was absolutely invaluable. The shops in Brades are about 8 minutes’ drive from Gingerbread Hill down twisty, hill roads. As a result, everyone drives everywhere. The video below shows a sped-up version of this journey.
Similarly, the supermarket in Brades stays open late into the evening, and David also took us there to get immediate essentials once we had got off the boat on our arrival. It’s not fantastically well-stocked (by British standards it’s more like a corner shop than a supermarket) but it has enough to get by on. The owners also make their own curries, which are kept in the freezers in the shop in unlabelled containers. They are very nice indeed!
Water at Gingerbread Hill is potable, and very nice (it’s been filtered through volcanic rock, of course!). David provides water bottles in the fridge that you can keep cool.
David and Clover have recently completed building a small open-air swimming pool at Gingerbread Hill, which is a perfect way to cool off after lunch, when the bands have closed as they tend to do at midday near the equator. It has a lovely view out over the Caribbean.
The oven and hob in the accommodation are gas-powered (fed from gas bottles), meaning you can cook during powercuts. We didn’t use the microwave oven, but there is one in both kitchens. There’s also some emergency lighting (torches) in the Heavenly Suite but I found it useful to supplement this with the headtorch I had bought with me.
Gingerbread Hill has decent fast WiFi for internet access, however outside the villa you don’t want to even consider using data on a British mobile phone. Rates are in the region of £4-£6 per MB. Instead, Rob got a Transatel DataSIM for data in Antigua and Montserrat.
As well as Gingerbread Hill, David also helps run the Hilltop Café, a community café not far from Gingerbread Hill. Opening hours are limited but the Saturday morning Belgian Waffles with tropical fruit toppings are not to be missed. The Hilltop is also fascinating for containing many relics rescued from Plymouth during the evacuation period, including road signs from outside Government House, shop signs and even a TV camera from the local TV station, which closed down after the loss of their studios.
Montserrat is a windy place! Wind was a regular feature throughout our stay but it was unexpected. There were also some heavy rain showers at the start of the week, which kept the air quite humid, but they were short-lived and not too much of an inconvenience. You soon dried off in the heat naturally.
Costs
One of the most common questions on these trips is, how much did the trip cost?
The flight was, of course, the most expensive part of the trip but was paid for using Avios points and a British Airways 2-for-1 voucher. By way of a tip, if you are a UK-based DXpeditioner – or any other regular long-haul traveller – and you don’t currently hold a British Airways Premium Plus AmEx credit card, you’re missing out. (Standard disclaimer: I am not a financial adviser. These cards may not be suitable for everyone. They have a high annual fee, currently £195, and a representative APR of 76.0%. If you want to apply for one of these cards, I can provide a mutually-beneficial referral code.)
The rest of the trip came in at about £1000 each. This includes about £595 for Gingerbread Hill, £90 each for the return ferry, £80 for our rental car, £75 for the tour, £55 for groceries (we ate fairly frugally), £20 for the radio licences, £15 for parking at Gatwick, and £15 for eating out. We took £400 as East Caribbean Dollar cash between us, which was almost exactly what we needed after the villa, ferry, rental car, tour and radio licences had been paid by card.
We’ve had some generous donations with requests for QSL cards, which help offset the cost of printing the cards. Thank you to those donors.
This weekend saw the annual SSB Field Day event and once again I took part with the Camb-Hams at G3PYE/P.
For the past couple of years, we’ve entered with a checklog because frankly life is too short for QRP and we got a lot more enjoyment from the contest by using an amp. This time, however, we decided to stick to the rules and use 100W only, so we could put in an entry.
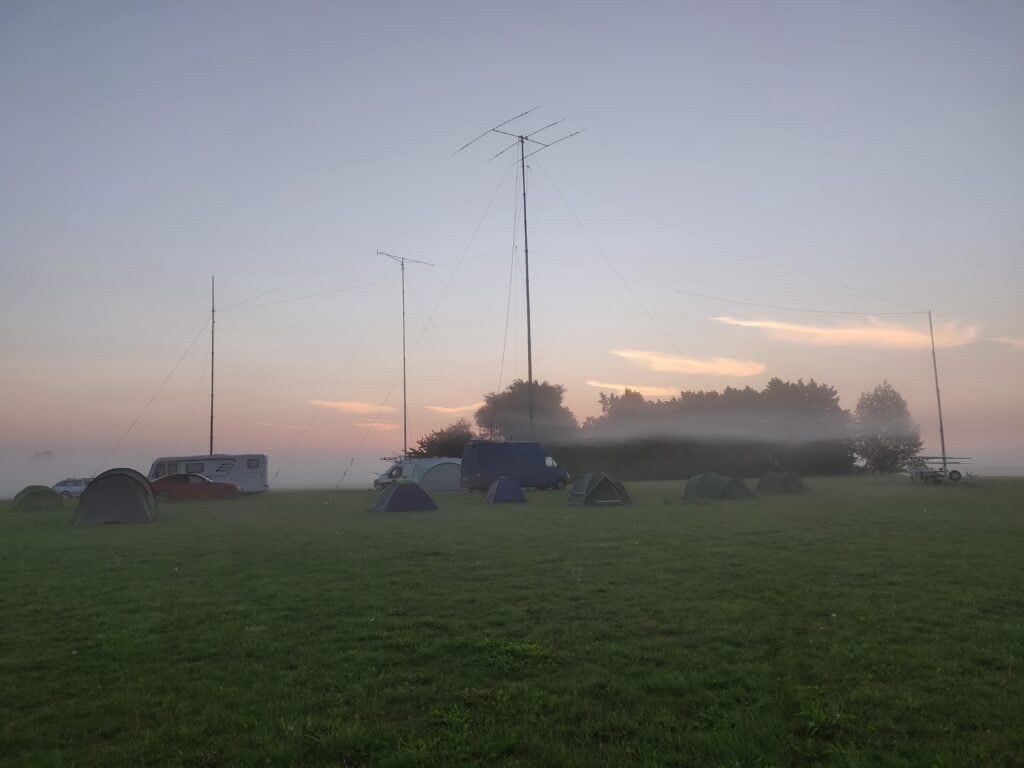
Early morning at G3PYE/P. A3S on Amy (also the centre of two dipoles), and 17-ele for 2m on Flossie. The trailer mast and campervan are just dipole supports.
On the Thursday evening before the contest, we got some bad news: our normal operating location wouldn’t be available and so massive thanks need to go to M0VFC, M0ZXA and many others who spent Friday trying to secure an alternative field at one day’s notice. Amazingly, they found a location to the north of Cambridge, only 4m ASL, but surrounded by flat fen land. On the Friday evening, we gathered at our newly-found location to start setting up some of the equipment.
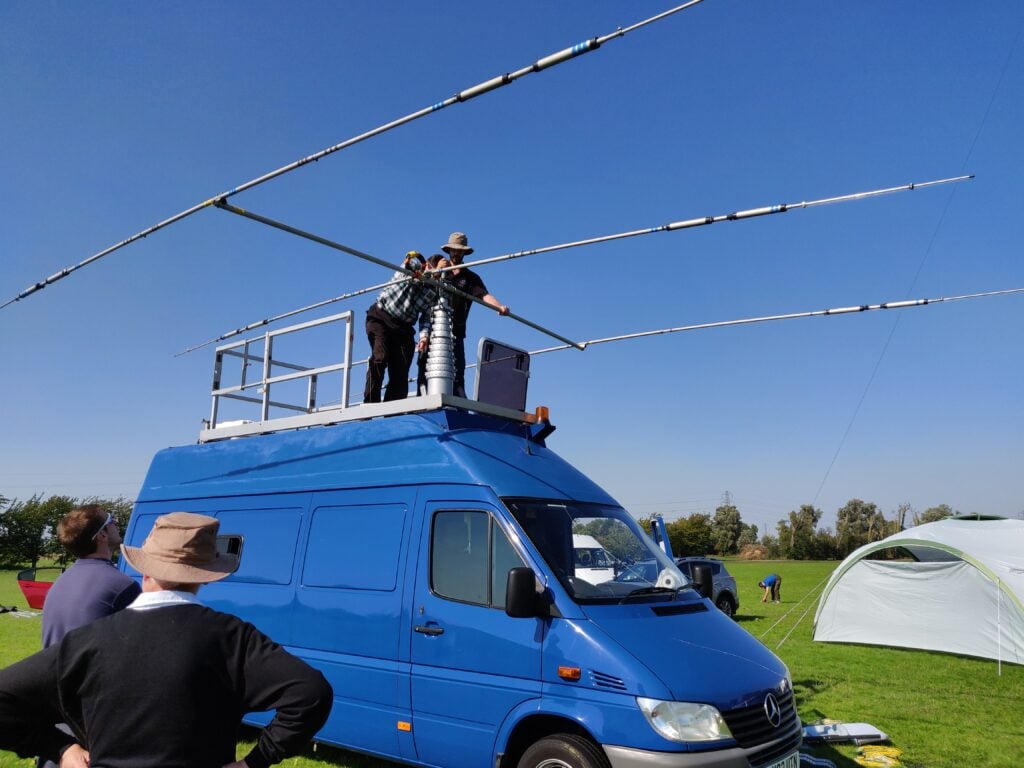
Most of the set-up, however, was done on Saturday morning. We actually weren’t only operating in SSB Field Day but also in the 144MHz Trophy contest (although given our low location and the fact we only had a single 17-ele beam, we knew we wouldn’t win on 2m). We soon had the 2m beam mounted on the Camb-Hams van, Flossie. Shortly afterwards, Flossie’s sister, Amy, arrived courtesy of G4CWH, and we installed an A3S beam for 20m-10m and dipoles for 40m and 80m on Amy’s more substantial mast.
A3S going onto Amy’s roof
I didn’t operate on 2m, but our setup there was an Elecraft K3 with XV144 transverter and a Beko amplifier.
On HF, we also used two Elecraft K3s straight into the antennas. With the K3’s clean signals, there was no need for bandpass filters. This was as well, because, in order to comply with the rule that you can only have one signal at a time, we needed to use the ACC port on the K3s for a hardware interlock (see the TX INH menu item in the K3 manual for details on how this works).
Although I’ve tried interlocked multi-station operation before, this was the first time M0VFC and I actually got it to work. The theory is straight-forward enough: each station interleaves their overs such that one station is hearing a reply while the other calls someone. It takes a lot of timing, and awareness of the stage of the other operator’s QSO, and above all competent operators on the other end of the QSO(!) but it can give some fantastic rates.
I don’t have a copy of the log to give a final summary (yet) but QSO total was in the region of 700 QSOs. We were very pleased with this, especially given the hastily found location.
As a result of the very hot weather we had during June and July, I haven’t been doing much SOTAing for the last few weeks but now the weather is somewhat cooler, I took the opportunity of the Bank Holiday weekend to travel to the Peak District to get a few more points.
Kinder Scout G/SP-001
The highest point in the Peak District (or, Southern Pennines, as SOTA puts it), Kinder Scout is also famous as the site of the Kinder Scout Trespass of 1932, which led to modern land access legislation in England. The summit is a 4-point summit for SOTA.
I followed the trespass route from Bowden Bridge, just outside Hayfield, heading east to reach the Kinder plateau.
The Bowden Bridge pay and display carpark was full when I arrived, but there’s plenty of roadside parking along the verge towards Hayfield. Leaving the car, cross the bridge over the stream at SK 0487 8692, and continue on the tarmac to Tunstead House. At a house called ‘Kinderstones’, take the gravelled track straight ahead, leading to Tunstead Clough Farm, where the path veers right around the farm buildings. At the back of the farm, around SK 0546 8671, the path becomes a more rugged track, leading to some fields.
The back of Tunstead Clough Farm, where the road becomes a track
Keep walking straight ahead, crossing the fields at the obvious gateways in the fences to SK 0646 8663, where you come out onto open moorland at the foot of Kinderlow End, a rocky outcrop that marks the edge of the Kinder plateau.
Keep walking through fields to the obvious gateways
I missed it at first, but straight ahead of you, heading almost directly up the hill, is a set of steps that take you up the face of Kinderlow End. When you get to the top, looking behind you, there’s a spectacular view looking across the countryside towards Manchester in the distance.
The stone path heading up Kinderlow EndThe view from Kinder Low, looking towards Manchester
There’s a well-made stone path heading across the plateau (even though it isn’t obvious from the 2015 OS map), and you soon reach the cairns and trig point at Kinder Low, once believed to be the highest point (633m). It is now known that a point about 700m to the north-east is slightly higher at 636m, although there is no marker there. From a SOTA perspective, it doesn’t really matter as the majority of the plateau counts as the activation zone.
The trig point at Kinder Low
Note that Kinder Scout can get busy, so it’s worth heading out off the main paths to set up. Watch for the bogs and be careful of navigation up here. The flat top all looks similar and every time I have been up here, I have (to a greater or lesser extent) ended up heading in the wrong direction.
The ascent (410m vertically over 3.7km) took me about 90 minutes, and about 60m for the descent.
Shining Tor (G/SP-004)
About 40 minutes’ drive south-west of Kinder Scout is Shining Tor, an easy 2-point summit.
The route starts from SJ 9999 7213, just off the A537. There’s parking in various laybys around the Cat & Fiddle Pub, and in fact I was able to park at the start of the path itself.
The layby at the start of the path
The path is well-made and obvious, with just two turns: a right at SJ 9984 7233 and a left at SK 0007 7315. If you get those two waypoints right, you’ll find yourself at the summit quite quickly.
The well-made path heading up to Shining Tor
There’s a trig point at the summit and a nice stone wall next to the trig point, which affords some protection from the wind for operating from.
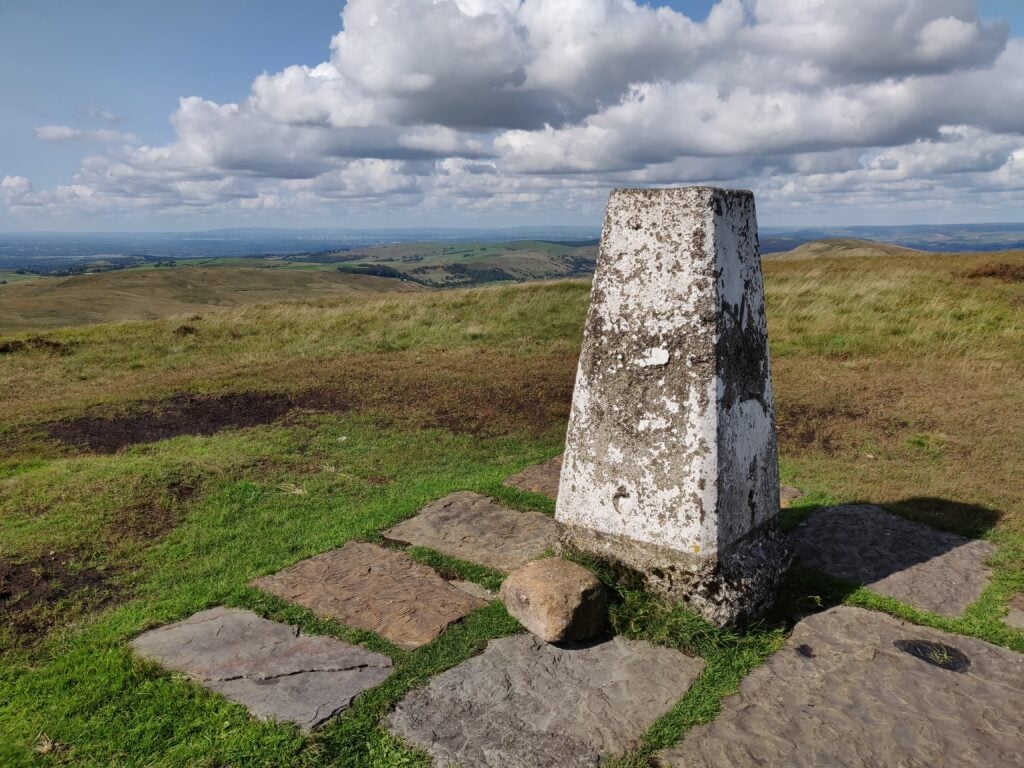
Trig point at Shining Tor
The ascent took me about 35 minutes. It’s only a 75m climb over about 2km, so a nice quick and easy location to activate.
As with Kinder Scout, I made all my contacts on 30m CW and I had more than sufficient QSOs for the activation within about 15 minutes.
Operating with my new 30m/20m linked dipole on the fibreglass pole
I’ve been pondering for a while about whether or not I should add my own opinions to the polemic about FT8, the now year-old digital mode that has taken the ham radio world by storm. A few things recently have convinced me that I should, which I’ll go into a little later in this short essay.
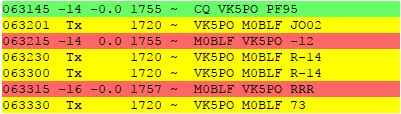
Me working VK5PO on FT8
First off, a step back: What is FT8? It’s the latest in a line of digital modes developed by Joe Taylor K1JT, that permit two-way radio contacts to be made with incredibly weak signals, often below the noise floor. Until last year, most of the modes in this family were used for specialised purposes such as EME (bouncing radio signals off the moon) or meteor scatter. This meant that they were adopted by a small subset of radio amateurs for their specific purpose.
(EDIT:Thanks to DG1TAL, who has corrected me: ‘JT65 has been used on HF for quite a few years, even though the dynamic range of RSSI reports was not suitable.’ That’s true, but because of the limitations, JT65 still used by relatively few people.)
About a year ago, FT8 came onto the scene. Its main difference over the other modes in the lineage is the speed of an ‘over’: reduced from for example 50 seconds in JT65 to just 15 seconds. This made it much more suitable for generalised use, and very quickly FT8 was adopted for general contacts. A post by Clublog author Michael G7VJR in January this year shows how exponential the popularity of this mode was in the second-half of 2017; a trend which seems to have continued.
I was certainly part of this band-wagon of FT8 fans. I logged my first FT8 contact on 16th July 2017, and to date I’ve made 118 QSOs using the mode from home.
Some people have tried to argue that FT8 isn’t amateur radio. I disagree. For a hobby founded on experimentation, technical challenge and self-training in all forms of communication, FT8 is the very essence of what amateur radio advances should look like. It’s very clever technology with some seriously complex maths behind it, that represents (technically) a significant step forward from what we had before.
I also believe that FT8 has its place in our shacks. One of the biggest threats we have to the hobby is that, particularly in sub-urban environments, noise floors can be very high from consumer electronics. Furthermore, in a globalised world, national regulators appear generally impotent to enforce the regulations that are supposed to avoid pollution of the radio spectrum from poorly-designed equipment. This was one of the reasons for my speedy adoption of FT8. Frankly, from my location on the outskirts of Cambridge, I wouldn’t be able to work as far without the support of the weak-signal error correction that’s inherent in the mode.
This is all the more important during solar minimum, which I suspect plays a large part in the quick spread of FT8. For the next few years, the stage of the sunspot cycle means that radio wave propagation will be hard, especially on higher HF bands. Having a mode available which allows low signal-to-noise ratio contacts is certainly a help to communication on those bands, which would otherwise be ‘dead’.
The other fantastic thing about FT8 is that it brings, for the first time, objective signal reports to the hobby. We all know that ’59’ is a nonsense, but in the more ‘manual’ modes, we don’t have anything better. Using actual, genuine, signal-to-noise measurements for signal reports allows more meaningful comparisons of equipment, antenna performance and propagation research.
However, in recent months a few things have happened, which started to quell my enthusiasm for the mode.
First was one day when I was working from home, doing my day-job. Since the computer was on anyway, I left FT8 running, periodically clicking the ‘Log QSO’ button when I saw it on the screen. Operating like this, I managed to make about 25 QSOs during the day without even realising it. None of those contacts were memorable. The computer made them for me, while I worked on other things. Moreover, the formulaic nature of the FT8 exchange (the facts that you have only 13 characters per over, and that changing the text of an over from the defaults can confuse the other operator) means that I felt no connection with those people at all.
You might argue that the same is true in a ‘rubber-stamp’ SSB or CW contact. To some extent, yes, but you still have some variability in what the operator has sent, any accents in speech, or quirks of Morse rhythm or spacing. In comparison, FT8 is clinical.
Then, on the GS3PYE/P DXpedition to Islay last month, I became aware of another disadvantage of FT8. 15 second overs may be comparatively fast, but they aren’t as fast as a good SSB or CW pileup, and our QSO count for the week suffered as a result. We were well down on even last year, because of the amount of time we’d spent using FT8 on bands that were open.
Similarly, the focus in the community on monitoring the main FT8 spot frequency on each band, means that other contacts seem to be being missed. I know lots of people are pouring over the stats to see whether FT8 activity is ‘new’ activity, or to the detriment of other modes. I can only speak from my own anecdotal experience: A couple of weeks ago, I was on a SOTA trip to France, and was eager to make some 6m CW QSOs. There was sufficient sporadic E propagation, and the Reverse Beacon Network heard and spotted my CQs, but in 20 minutes nobody came back to me. Tuning higher on the band, there was just one frequency with signals on it: the 6m FT8 frequency.
Which brings me to another concern: that of spectrum usage. (I’m discounting here the as-yet little-used DXpedition mode in FT8.) On a lot of bands, there is pressure for spectrum used by amateur radio to be reassigned to other, more ‘valuable’ uses. Until now, we’ve been able to demonstrate, particularly during major contests, how busy our spectrum can become, which has helped in the argument to keep the range of frequencies we current have. If we all start making our contacts in the 3kHz bandwidth above a single spot frequency, we may be doing the hobby some significant harm.
What’s the solution? As I said above, I fully support the rationale behind FT8, and particularly its use in high noise areas, and on bands where propagation is difficult. Especially if it can capture and encourage the imagination of a newcomer, or someone who has been inactive in the hobby for a while, we must celebrate and support its use.
What I’d really like is, when you start receiving signal reports with positive numbers of dB, the software should remind you to switch off and try other modes instead, as the band is sufficiently open. I doubt we’ll see that, however, so it’s up to us as operators to consider the wider effects of the mode, and when/whether it is appropriate to use.
I’m already limiting my use of FT8 at home: this Sporadic E season on 6m, I have deliberately only been using CW, not FT8, and for a forthcoming (as yet un-announced) DXpedition, we are seriously considering not taking any FT8 equipment.
With 80 SOTA points in the bag from Saturday and Sunday, by Bank Holiday Monday it was looking likely that 100 points in a weekend might be achievable.
We stayed the night t the Hotel L’Ermitage in Ventron, since this is right at the start of the path up the Haut de Rouge Gazon, the first hill for today.
FL/VO-018 Haut de Rouge Gazon
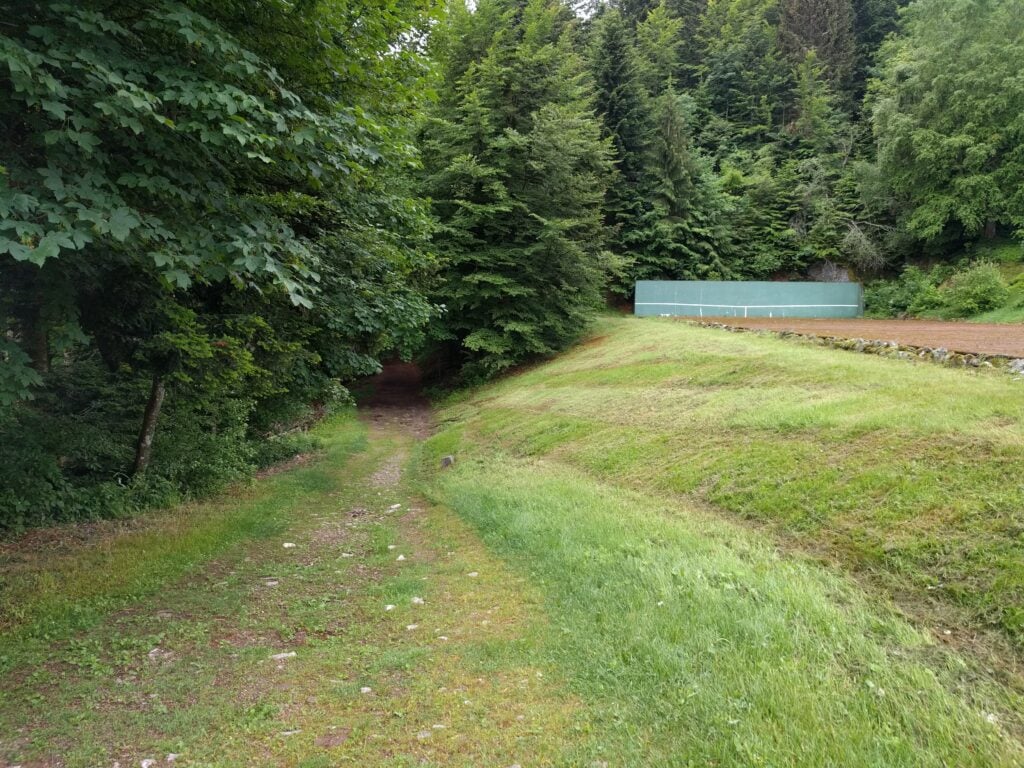
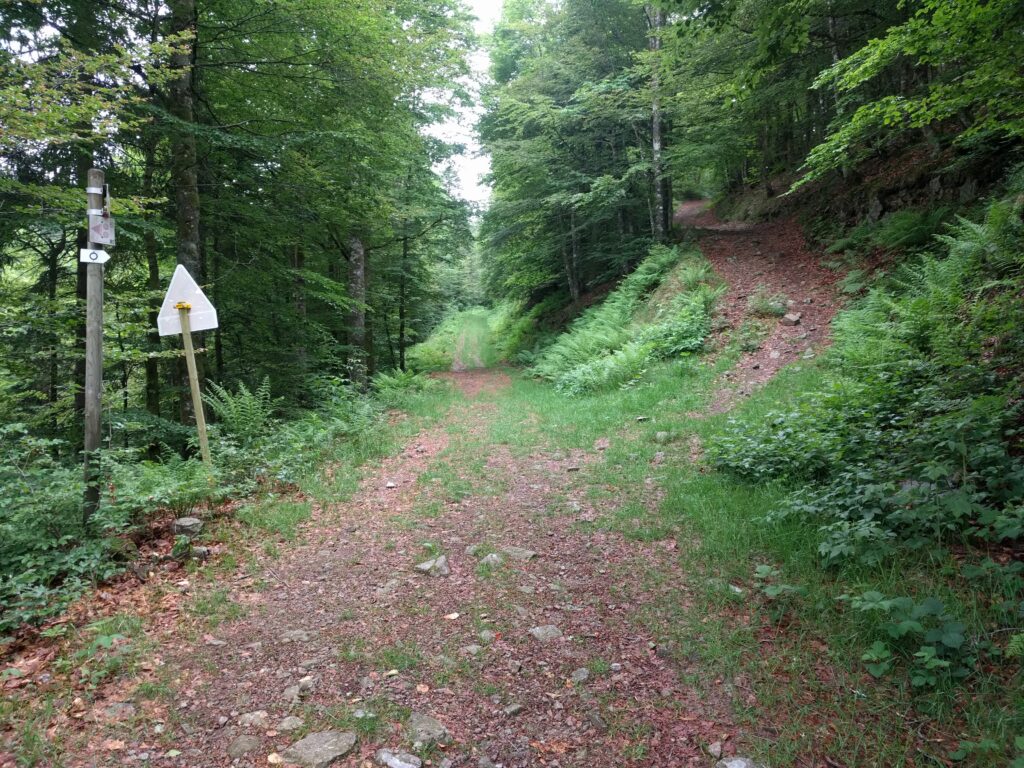
There are multiple paths up the Haut de Rouge Gazon, but at the hotel, all of the paths start from next to the tennis court. From there, you can follow either the red outlined circle signs (the ‘Route panoramique’), or the blue outlined circles. The red circles form the cross-country skiing route in the winter, and therefore the path is wider and less steep, though consequently less direct. The blue circles are suitable for walking and cut off some of the hair-pin bends, thereby making them slightly steeper but more direct. It took me a little while to work this out, so on the ascent I did a mixture of the two routes (taking 50mins) and on the descent I stuck to the blue circles (taking 40 minutes).
The start of the path up the Haut de Rouge Gazon, next to the tennis courtThe choice of paths up Rouge Gazon
Edit May 2019: Having just done the same walk the following year, there’s an omission at this point: Following the outlined blue circles up the hill, you’ll come out at a wooden three-dimensional wooden cross artwork. From here, turn right, following the outlined red circles along the wide path that’s flat along the top of the hill.
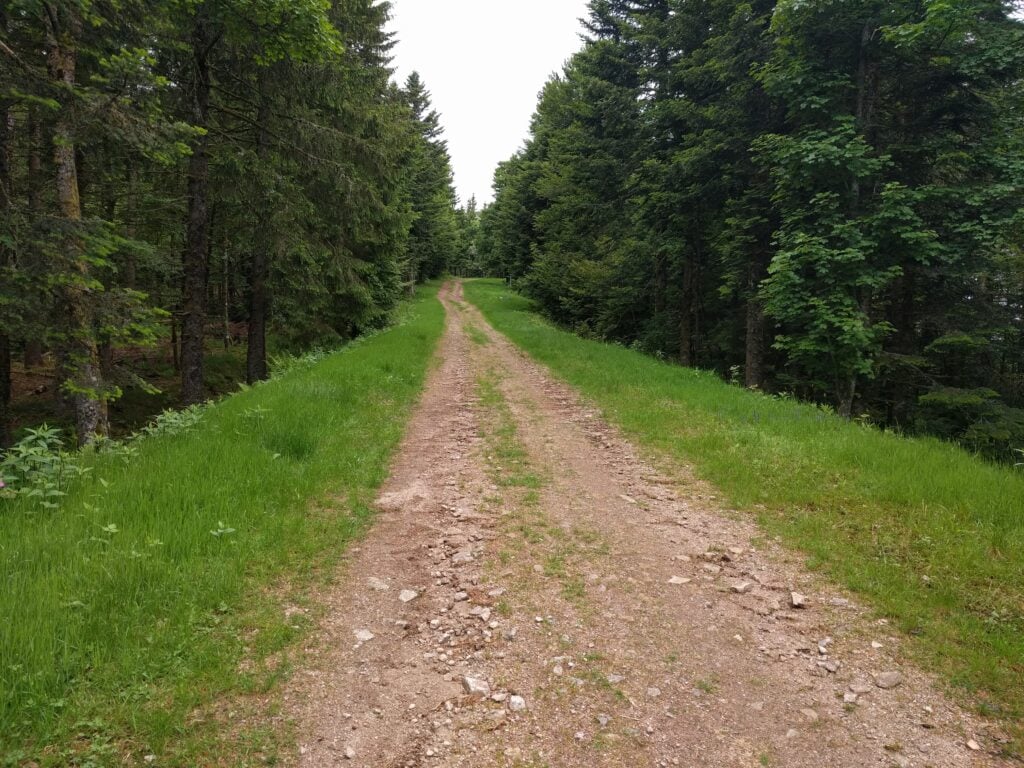
Either way, you eventually come out beside the top of the ski-lifts, where the paths turn away from the summit. At this point, quickly cut through the trees to join the wide ski-run towards the highest point. It’s a very pleasant walk, with a climb of about 120m ascent over 4.2km, making it the longest walk of the trip.
Walking along the ski run on Haut de Rouge Gazon
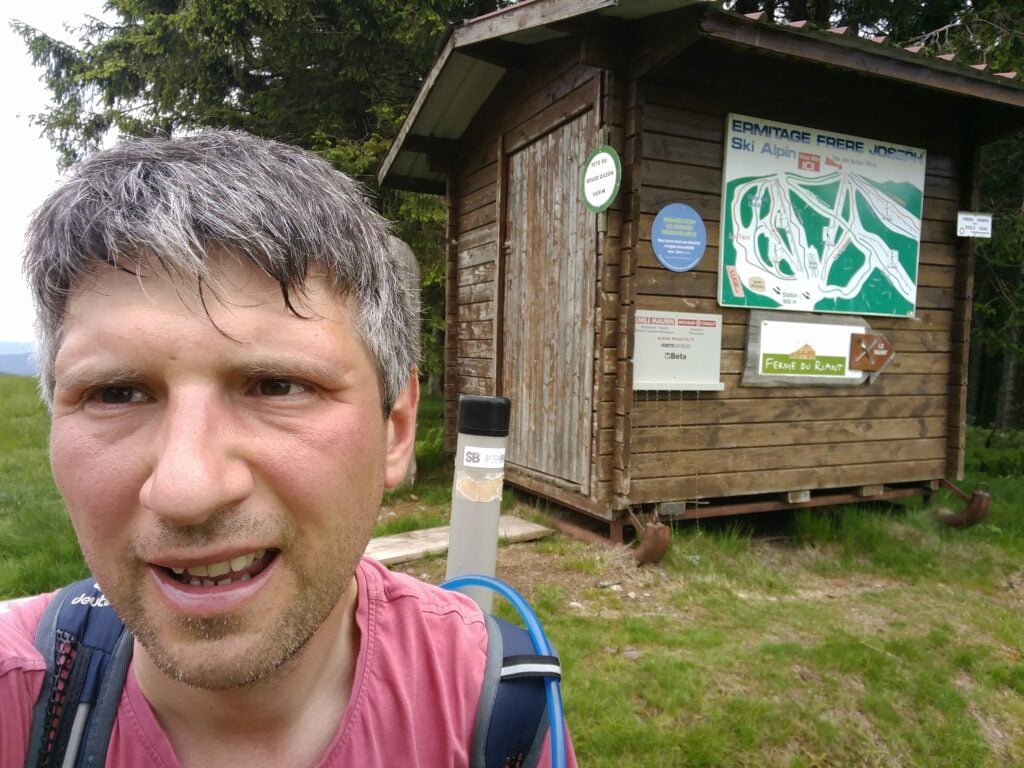
Once at the summit, and at this time of year with the skiing closed, there’s masses of space to set up and I quickly made 8 QSOs to qualify the summit on 30m CW.
Me on the summit of Haut de Rouge Gazon
Loading map…Scroll or tap to load the interactive map
Distance
—
Elevation gain
—
Elevation loss
—
Max elevation
—
Waypoints
—
Elevation profile
FL/VO-087 Haut de Brampas
And so, with 90 points for the weekend to-date, it was time to hit number 100. The path to the Haut de Brampas starts from the Col du Page, about 10 minutes’ drive from L’Ermitage Saint Joseph. As with yesterday’s hills, this is a forest walk and, again, I struggled to maintain a GPS lock, meaning that the trace below is somewhat inaccurate.
The path is wide, and obvious but, as with yesterday’s ones, it does avoid the summit, so at some point you have to cut through the trees and find your own way to the highest point. This is easy enough on the way up, but on the way down, navigating solely on paper map and compass, I took a slightly wrong turn and ended up heading in the right direction but without loosing height, meaning that I didn’t find the path for some time. Consequently, although it only took 15 minutes to get up the hill, I took 20 minutes coming back down. In terms of steepness, it’s about a 140m ascent over 1.6km.
The path up the Haut de Brampas
There’s very little else to say about this hill. It’s another, fairly boring, bit of forest, but with the addition of a load of flies, making operating uncomfortable. Sending CW cleanly while swatting flies with your other hand takes some practice!
I managed just 6 QSOs from here before packing up, having reached my goal of 100 points in the weekend.
Loading map…Scroll or tap to load the interactive map
Distance
—
Elevation gain
—
Elevation loss
—
Max elevation
—
Waypoints
—
Elevation profile
FL/VO-095 Kuppelthannkopf
Those 100 points, however, took me to an all-time SOTA score of 495, short of half-goat status by only 5 points. Luckily, there’s an easy-to-reach 8 point hill just outside Thann on the way back towards Basel airport. It’s about 40 minutes’ drive from the Col du Page, and starts from the carpark on the Col du Hundsruck.
Again, there’s not too much to say about this route. You start on the main marked footpath heading behind the hill from the Col (initially losing height) and then, around 47.8047N, 7.04984E, you take the forest logging tracks that zig-zag up the mountain to the summit. It took me 30 minutes to climb the 120m ascent over 1.6km, and about 20 minutes to come back down. The ground is rather loose in places, so I found my hiking pole useful, but it’s not a difficult climb.
Me on the summit of Kuppelthannkopf
13 QSOs, including 3 S2S QSOs, took me past the magic 500 points mark but, as with the Haut de Brampas, the flies swarming around me slightly marred the celebrations!
Loading map…Scroll or tap to load the interactive map
After a restful night, it was time to get up early for the second day of my attempt to get 100 SOTA points in a Bank Holiday weekend in the Vosges. Today would involve a bit more walking than yesterday.
FL/VO-002 Le Hohneck
Le Hohneck, about 15 minutes’ drive from La Bresse, is potentially a very easy summit as it has a carpark and restaurant at the top. I fall into the set of SOTA activators who view that as cheating, however; much like taking the train up Snowdon. Instead, therefore, I took the only slightly more energetic option of a 15 minute walk up 100 metres over a 1km, on the path that runs beside the road.
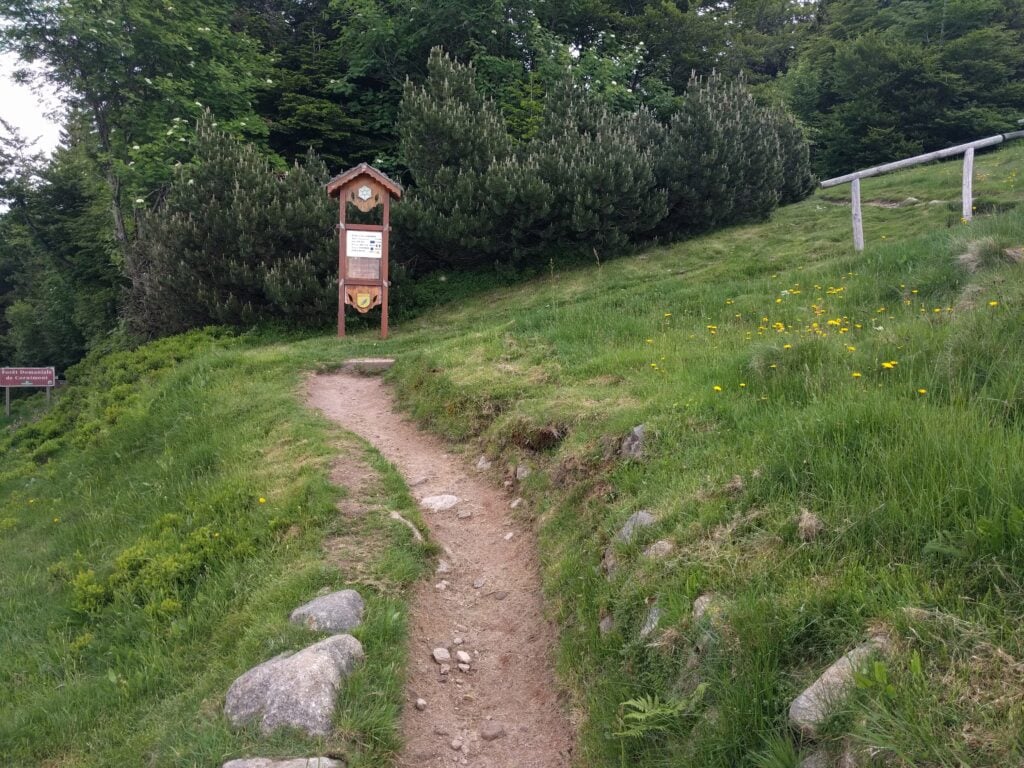
The path up Hohneck
This is a really easy path and it’s well-trodden. The only thing to be aware of is that the electric fence wire surrounding one of the fields has been routed over the top of a turnstile gate (above head height) near the start of the path, which could be a surprise if you had a metal antenna on your backpack!
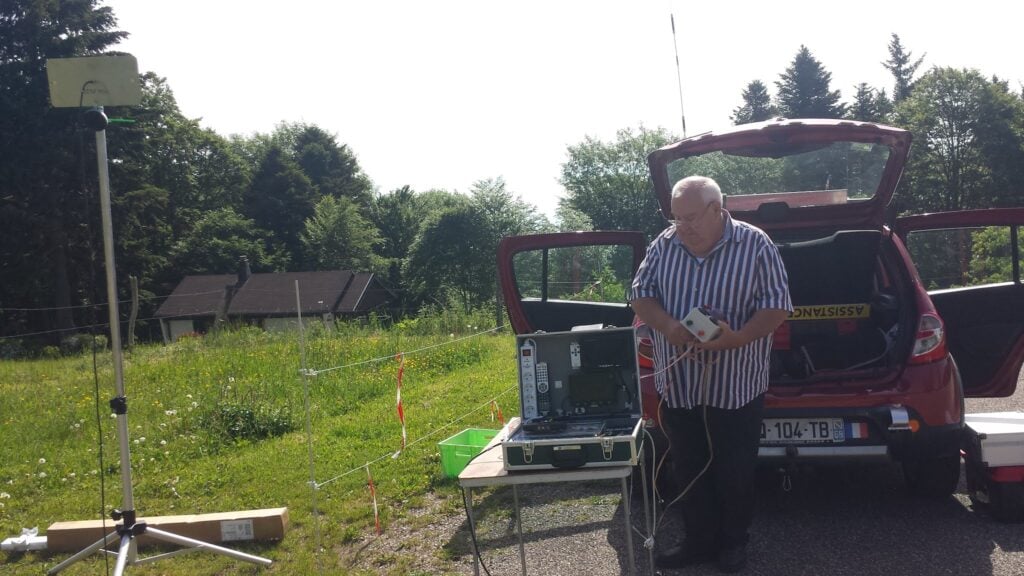
Halfway up, I spotted a van which seemed to be doing communications for a local race of some description, but I didn’t stop to find out the background.
Half-way up Hohneck… It looks like a twin for the Camb-Hams’ Flossie is up here!Me on Hohneck
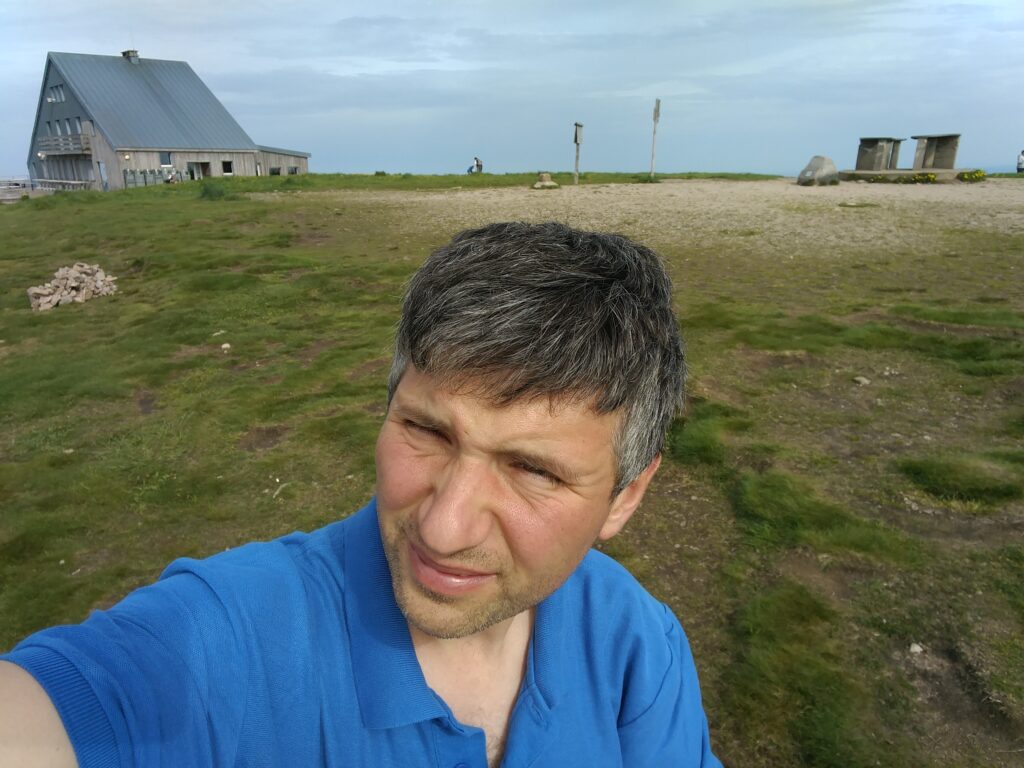
Despite my early start, it was clear that Hohneck is a popular place. I didn’t feel my dipole was in the way at this stage of the morning, but any later and it might have been more problematic. I quickly made 9 QSOs and packed up to head to the next hill.
Loading map…Scroll or tap to load the interactive map
Distance
—
Elevation gain
—
Elevation loss
—
Max elevation
—
Waypoints
—
Elevation profile
FL/VO-084 Ronde-Tête
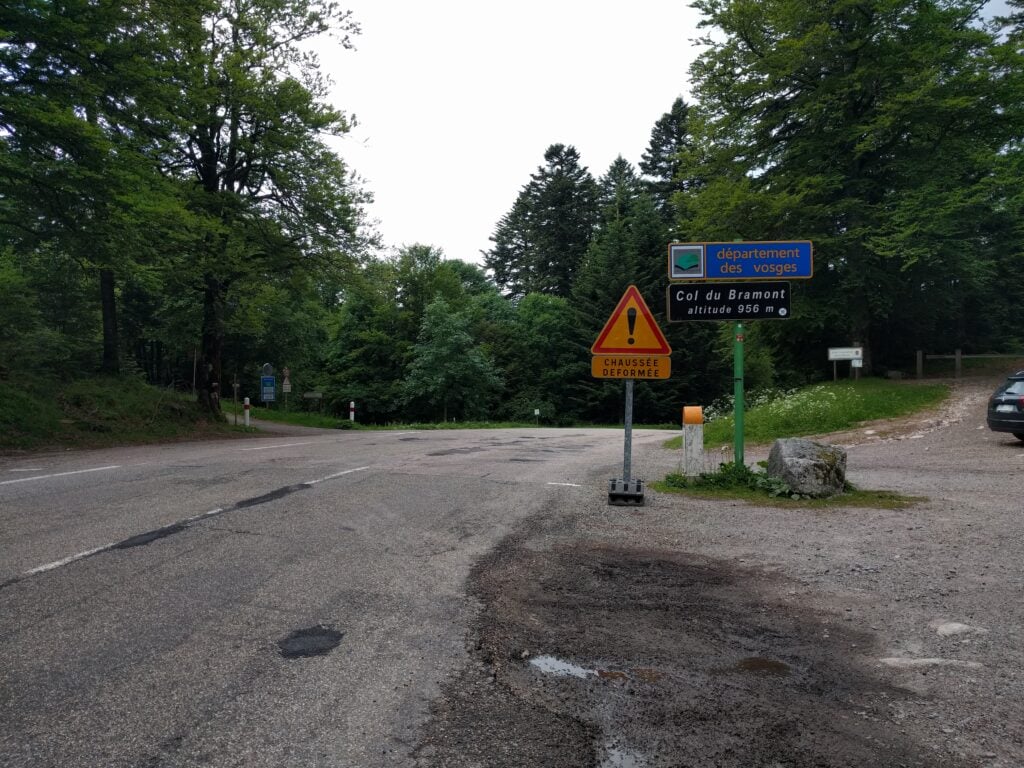
The Col de Bramont is about 15 minutes’ drive from Hohneck and it is a useful starting point for activations of Ronde Tête on one side of the road and L’Altenberg on the other. Both hills are similar, in that they are walks through forest on signed paths for the majority of the walk, before you have to leave the path to head through the trees into the activation zone. In both cases, I wouldn’t recommend doing the walks in ice or after heave rainfall, as the ground is mainly leaf-mulch which will become quite slippery.
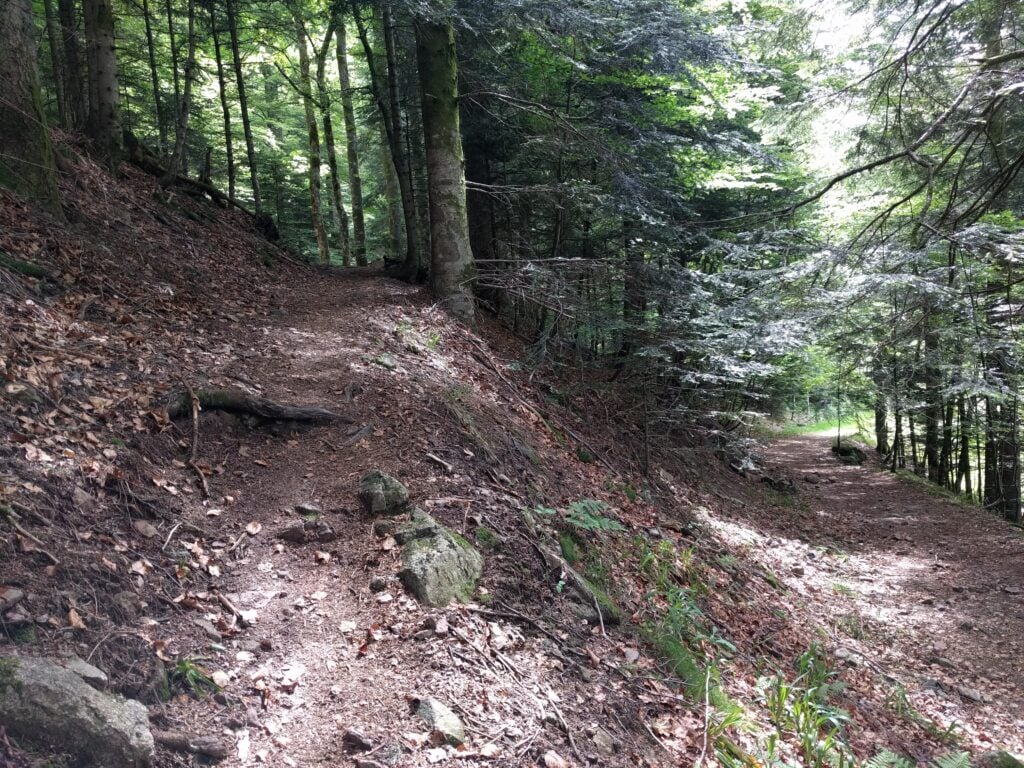
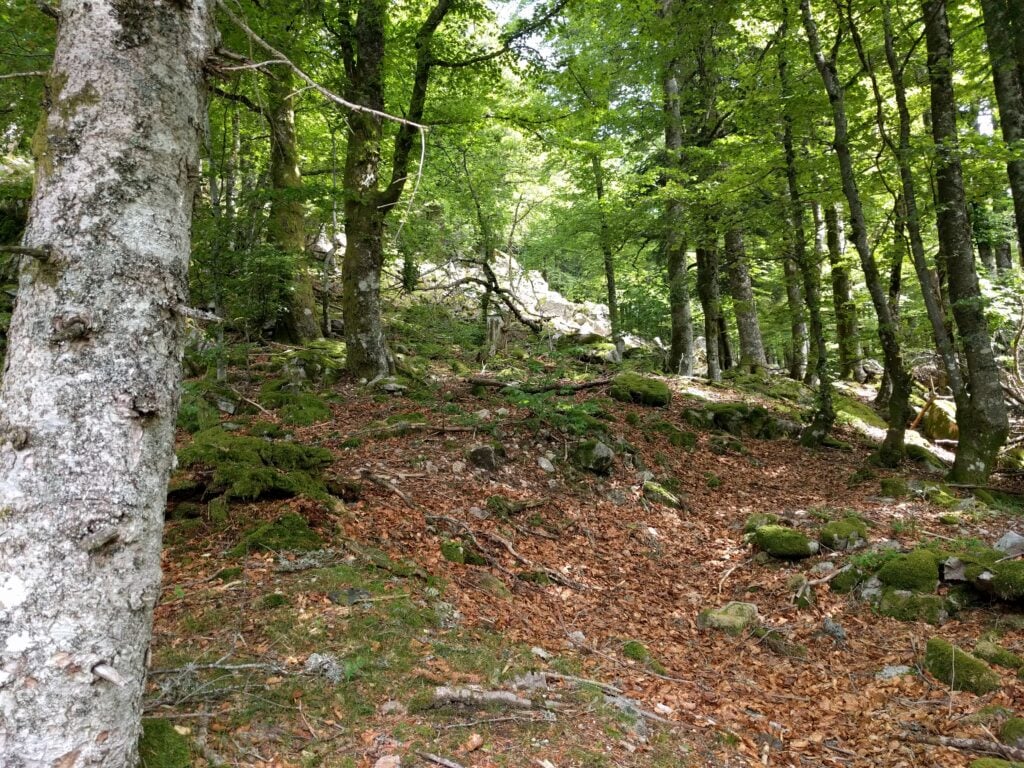
The walk up Ronde Tête is probably the marginally easier of the two walks. The path is mainly fairly wide and it’s clearly marked. The only thing to watch for is to ensure you take the route doubling back on yourself at 47.9995N, 6.9496E, rather that continuing in the same direction. Having done that, it’s just a matter of following the path through the forest to the sign marked Panoramic view of Wildenstein, situated near 47.9979N, 6.9611E, where you leave the path and head up the slope. Again, you need to watch your footing a bit here, as the leaves are deep in places and stones are covered in moss, so it would be easy to slip in wetter conditions.
Carpark at Col de Bramont
Path up Ronde Tête
Approaching the summit, you have to leave the path and pick your way through the trees to the top
My equipment set up on Ronde Tête
The walk took me about 1 hour to climb the hill and about 30 minutes back down (as I spent some time picking my way up the slope on the ascent), with about a 190m ascent over about a 2km walk. Once at the top, I made 6 QSOs on 30m CW before descending.
Loading map…Scroll or tap to load the interactive map
Distance
—
Elevation gain
—
Elevation loss
—
Max elevation
—
Waypoints
—
Elevation profile
FL/VO-012 L’Altenberg
Returning to the road, in the opposite direction, is the similar climb up L’Altenberg. As with Ronde Tête, I’d certainly recommend taking a map and compass with you for this one, as my GPS struggled to maintain lock under the tree canopy. The relevant IGN 1:25,000 walking map is 3619OT.
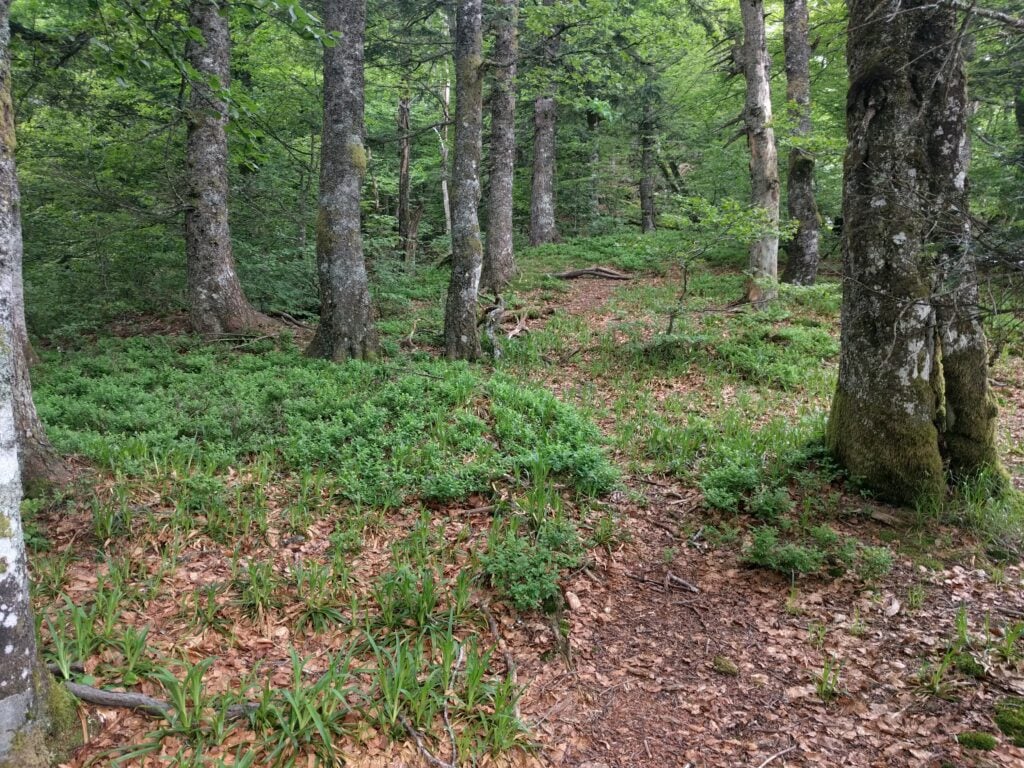
The climb up L’Altenberg is similar but slightly more challenging. The paths are narrower with steeper drops off the sides in places if you were to stumble. Walking alongside the Altenberg for a lot of the route, you wonder how you can climb some a steep slope, but keep heading south on the path to around 47.99105N, 6.94698E and there’s a less steep area, which is easier to ascend.
Path up L’AltenbergThe path through the forest to L’Altenberg
The climb took about 45 minutes (and 30 minutes down) for about 145m ascent over about 2km of walk. Again, I just made 6 QSOs before heading back down the path.
Me on L’Altenberg
Loading map…Scroll or tap to load the interactive map
Distance
—
Elevation gain
—
Elevation loss
—
Max elevation
—
Waypoints
—
Elevation profile
FL/VO-010 Le Grand Ventron
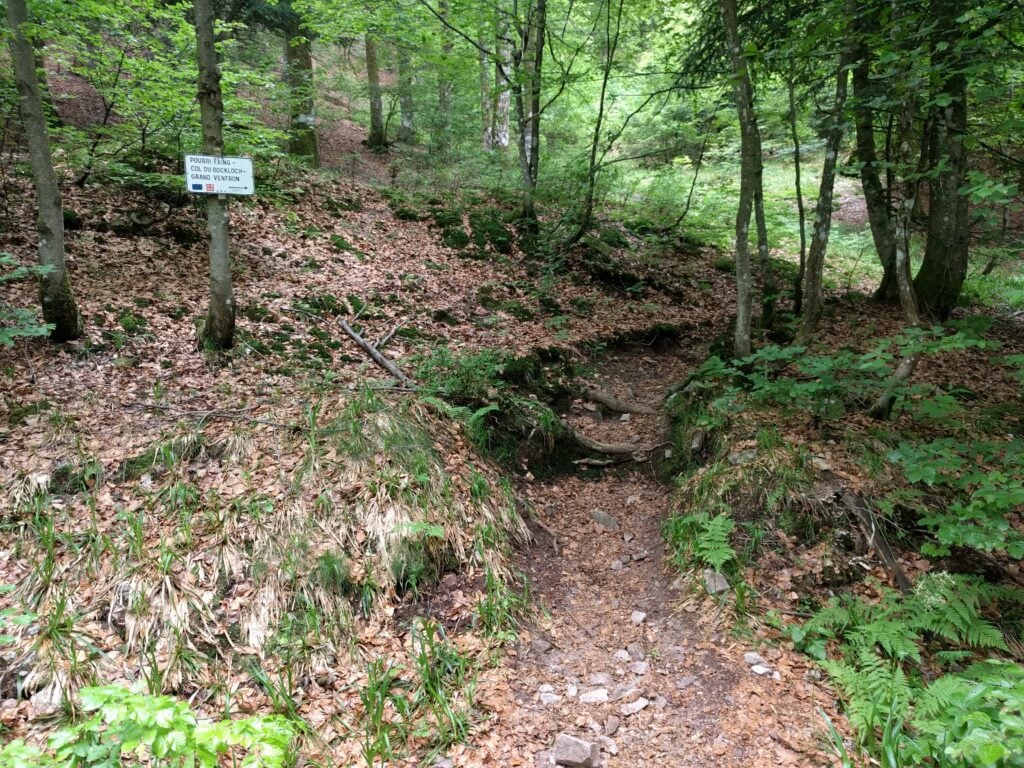
The last summit of the day, again a 10-pointer, was Le Grand Ventron. It can be accessed by continuing the path from L’Altenberg (though this is quite a substantial hike), or by taking the easier option of driving to the Auberge, from which it’s basically a quick step along a field edge to the summit.
The ascent to Grand Ventron
There really isn’t that much more to say about this walk. It’s literally 10 minutes’ walking, and not very steep, ascending just 150m over about 0.5km (most of which is done in the immediate climb up from the road). At the summit, there’s a chart showing all the nearby peaks and even on a muggy afternoon with a storm brewing, it was still quite popular. Luckily, the activation zone is quite large as the summit has a flat top, so I set up just a bit away from the highest point to make 8 QSOs, again on 30m CW.
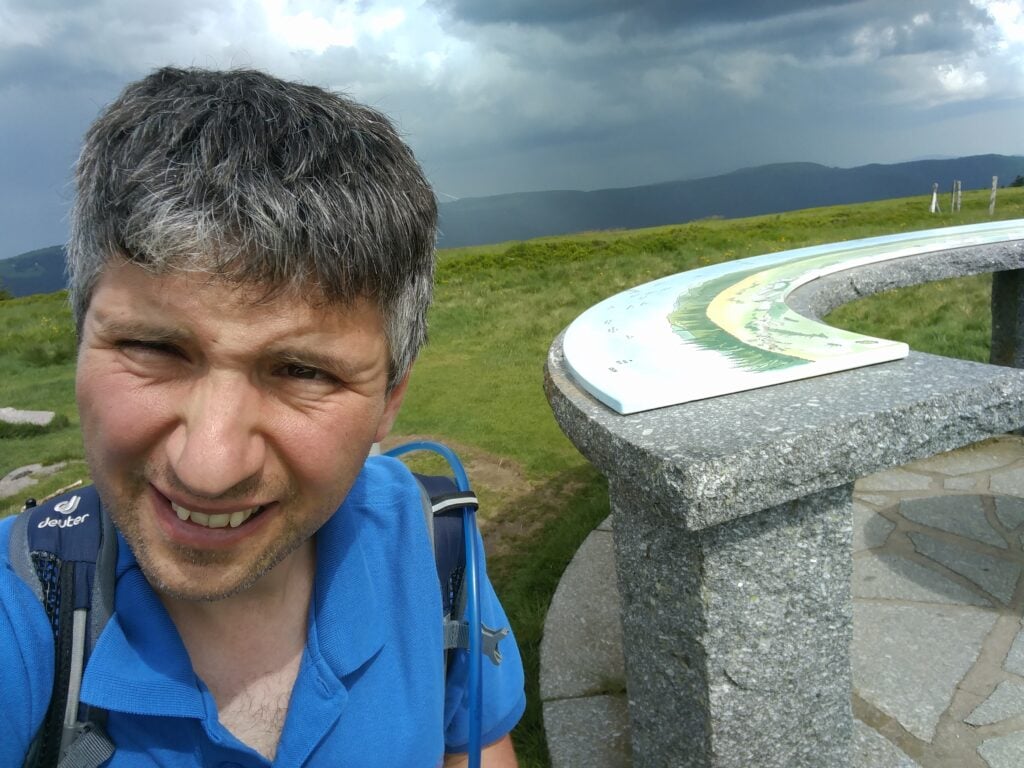
Me on Grand Ventron (with a storm brewing behind)
Loading map…Scroll or tap to load the interactive map
Distance
—
Elevation gain
—
Elevation loss
—
Max elevation
—
Waypoints
—
Elevation profile
With 80 points so far this weekend, can I complete my 100 point challenge tomorrow?
Before I post about the hills I’ve been climbing this weekend, I should probably explain why I’ve come to the Vosges, a very beautiful hilly area in Eastern France.
As you are probably aware if you’re reading this page, I participate in Summits on the Air (SOTA), an amateur radio award scheme for making contacts from summits. SOTA has a de-centralised administration model: so that a single team doesn’t have to classify hills globally, different ‘Associations’ administer the rules in their area, with that area often being a country or politically-recognised region.
Generally, for a hill or mountain to count for SOTA, it has to have at least 150 metres of distinguishable drop (‘prominence’) from the summit point, such that rolling hillocks don’t count. This is the so-called P150 rule. But some Associations are in flatter areas, that wouldn’t have many qualifying P150 summits, and so those Associations may opt to adopt an alternative P100 (100 metres of prominence) rule instead.
France is an interesting case in this regard, because the large mountain ranges (the Alps, Massif Central and Pyrenees) are all in the South and East, and so there’s a second Association (‘France – Low’), which is a P100 Association covering the North and West of the country. Due to the way the boundary between France and France – Low was drawn, the Vosges has ended up in France – Low, resulting in loads of easy 10-point P100 summits in a smaller area.
Bear in mind that if you travel to other Associations, your earned points accumulate towards your score in your home Association. By travelling from England (A P150 Association) to France – Low (A P100 Association), therefore, any summits I activate here will count towards my English score, even though they are easier.
When I first spotted the Vosges anomaly on the map, I had to come here in a Bank Holiday weekend to see whether I could achieve what I thought was possible: 100 SOTA points in one long weekend. That would be almost impossible to achieve at home.
I’ve come in late May not only because it’s a Bank Holiday but because many mountain roads in the area are closed in the winter by snow, so it needs good weather to attempt this challenge!
Getting here
I flew from London Heathrow to Basel Euroairport, which is actually on the French-Swiss border between St Louis (Mulhouse, France) and Basel, arriving on Friday evening. I hired a car from Avis via their tie-up with BA. If you try this too, it’s worth being aware that BA’s website can’t cope with the fact there are two Avis desks in two different countries in a single airport and so you get allocated the desk on the Swiss side of the airport. That’s fine but a recent EU customs rule apparently means that there are significant customs charges to take a Swiss-registered rental car into the EU, so you need to put in a special request for an EU-registered car. It sounds bureaucratic, but it worked fine for me, and just after 11pm we had a car. Because of the time, we stayed in the very nice surroundings of the Airport Hotel Basel, and then drove into France the following morning.
FL/FL-017 Molkenrain
My plan was to tackle four hills today, all of which are 10 points for SOTA. Le Molkenrain is the nearest to Basel, about 45 minutes of easy motorway driving from the border, and then just some twisty mountain roads for the last bit.
On arriving at the carpark, we found a local F4 station setting up some ATV equipment, aiming to get cross-band pictures on 13cm and 23cm to a repeater in Germany.
ATV from the carpark at Molkenrain
The walk itself is easy, and took just over a quarter of an hour. It’s only about a 125m vertical ascent over about 1km horizontal and I reached the summit at about 10:30. The path starts on the road, walking past the auberge (where public toilets are available), then cuts on a gently upwards path along the field boundary to the walker’s refuge. At the refuge, you turn right and follow the obvious path to the cairn.
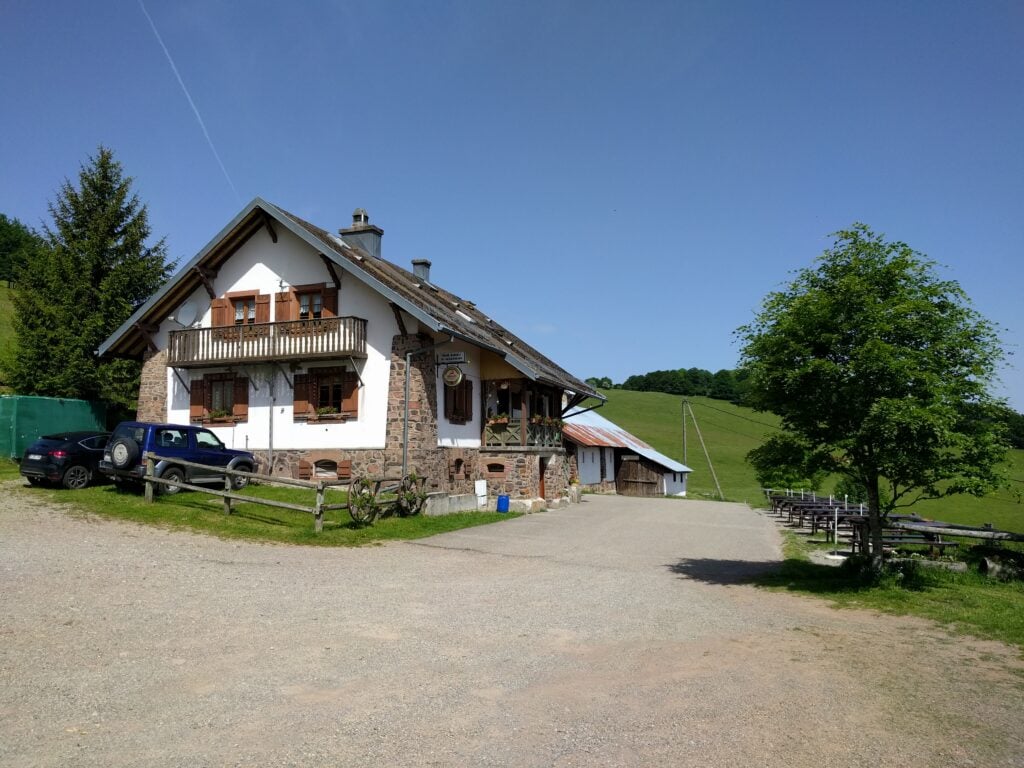
Molkenrain Auberge
I set up on 30m CW and easily made 8 QSOs within ten minutes. A quick pack-up, and I was back at the car by 11:15.
Molkenrain summit
Loading map…Scroll or tap to load the interactive map
Distance
—
Elevation gain
—
Elevation loss
—
Max elevation
—
Waypoints
—
Elevation profile
FL/VO-001 Le Grand Ballon
The Grand Ballon is about 30 minute’s drive from Molkenrain. It is a very busy site, with numerous restaurants in the carpark below the summit and, today, a lot of motorbikers using it. You certainly had to be alert when driving the hairpin bends, in case of a motorbike in the middle of the road around the corner.
There’s building work taking place in the carpark at the moment, meaning that the start of the path was a bit hidden but I followed the sign to ‘Sommet Gr. BALLON par G.R.‘ (Summit via the walking route). The path is short, only taking about 20 minutes to climb the about 70m vertically from the carpark, over about 0.65km. The views over the surrounding hills are quite spectacular, and half-way up you get a nice view towards the Storkenkopf – the next hill on the route.
The Storkenkopf, seen from the ascent of Grand Ballon
On top of the Grand Ballon, turn left towards the cairns, rather than towards the golf ball. The cairns area is sadly a fenced square, with no access beyond the fence. On a busy day like today, there were lots of families taking photos within that fenced area, and so this made operating a little difficult.
With some Sporadic E around, I chose to try 6m first as it needs less dipole length than 30m, but although the RBN saw my calls, I didn’t get any replies sadly. I think everyone was on FT8.
While I was wondering what to do, the area became a little quieter, so I took the opportunity to move to 30m and made 6 QSOs. In total, I was on the summit for about an hour, taking me a little behind my planned schedule.
On the summit of Grand Ballon
Loading map…Scroll or tap to load the interactive map
Distance
—
Elevation gain
—
Elevation loss
—
Max elevation
—
Waypoints
—
Elevation profile
FL/VO-078 Storkenkopf
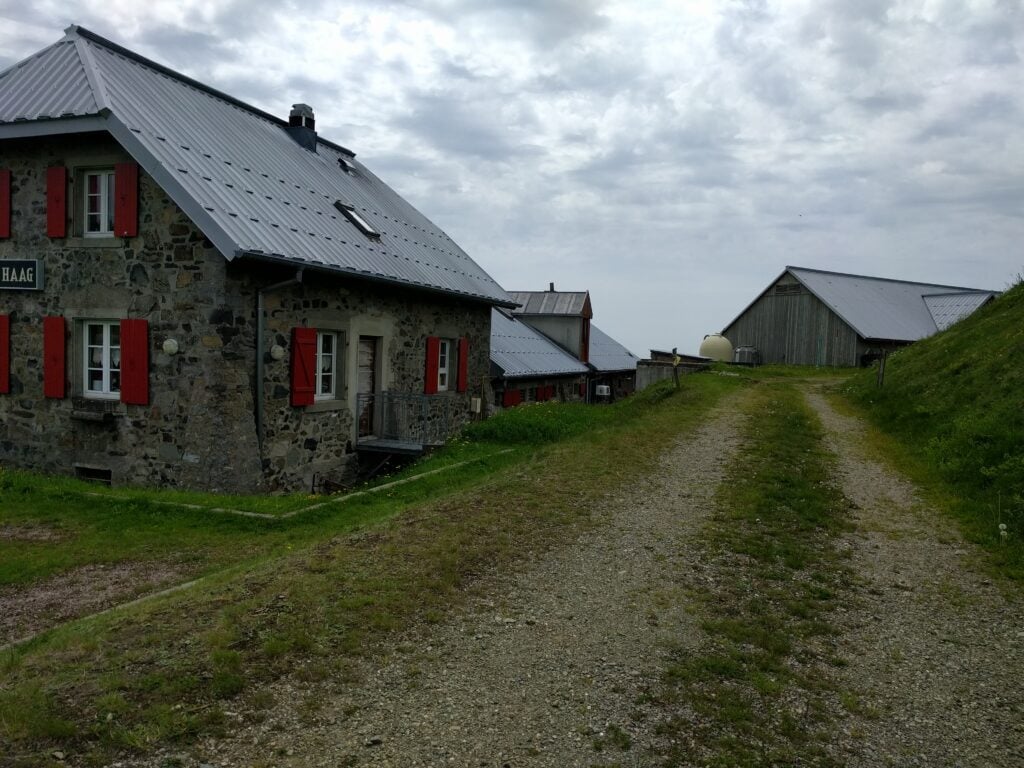
Storkenkopf is just around the corner from Le Grand Ballon. It would be easily walkable to go between the two, but since we would be driving past anyway, we parked at the Auberge de Haag at the bottom of the hill and I walked up from there.
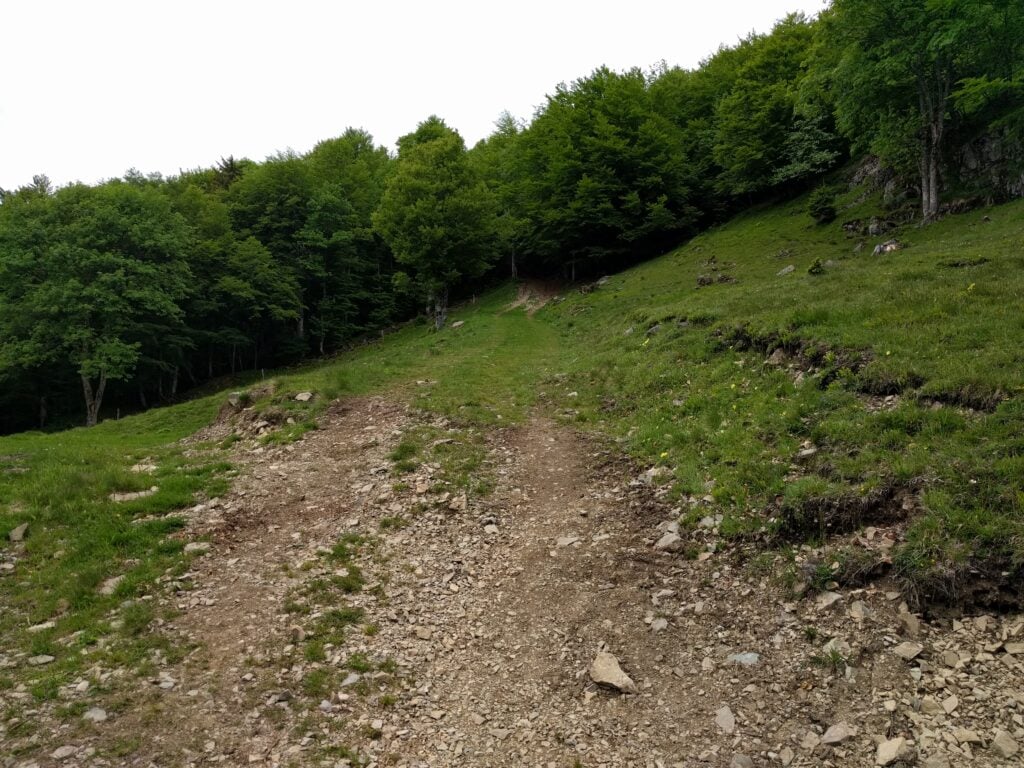
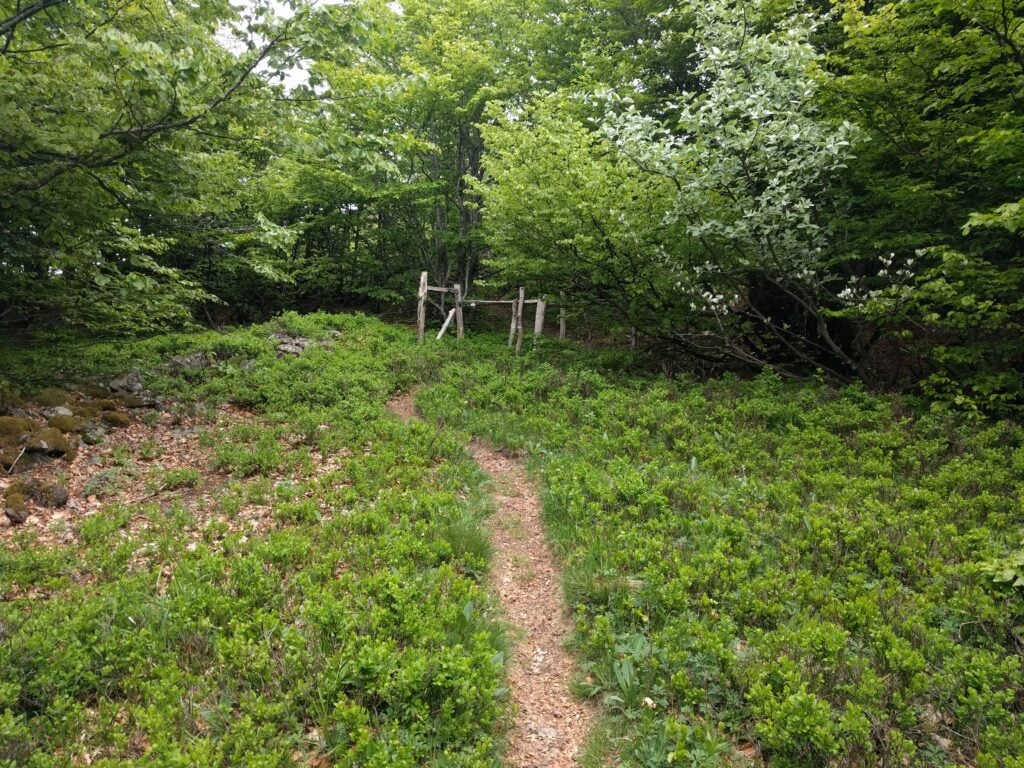
The path starts from behind the Auberge Haag, which is also a working farmPath heading into the forest, StorkenkopfThe small path approaching the summit on Storkenkopf
This is another fairly easy climb, starting from behind the farm and then you follow the marked path up the hill. When you come to a clearing in the forest, turn right and head to the far corner of the clearing, to pick up a smaller path to the summit. The journey up took me about 20 minutes, and the descent about 15 minutes. This hill is similar in steepness to Molkenrain, with 130m of ascent over a 1km.
This was a very good location for HF – much quieter than Grand Ballon – with plenty of space for my dipole. I managed 15 QSOs in 20 minutes from here.
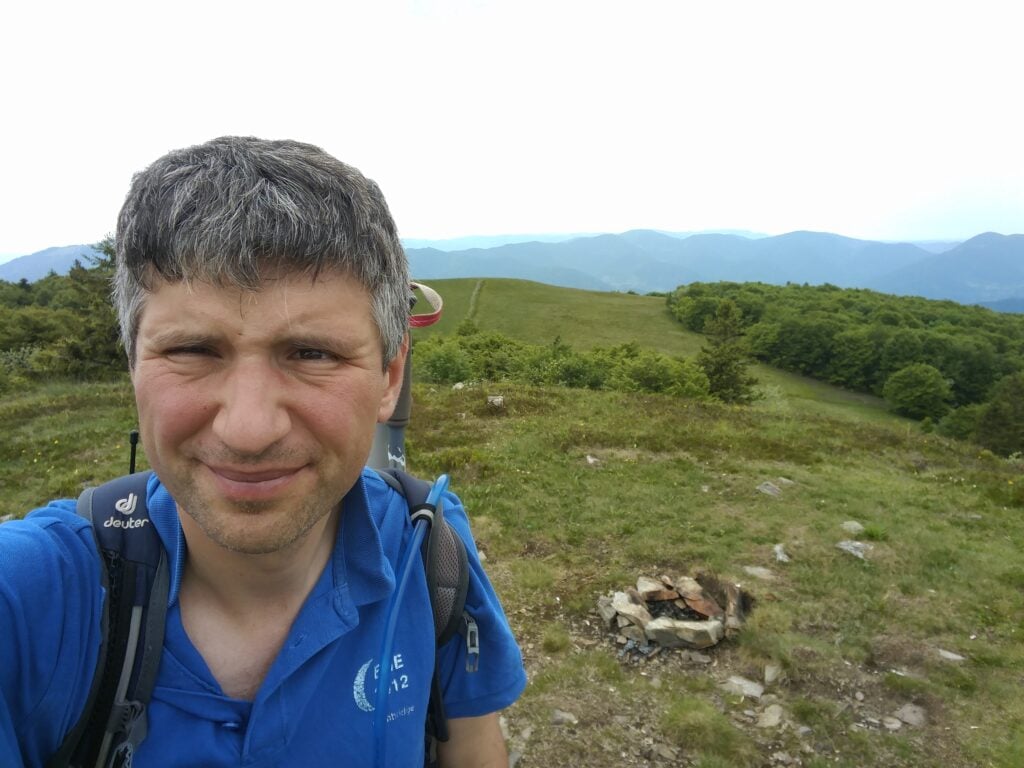
Me on the summit of Storkenkopf
Loading map…Scroll or tap to load the interactive map
Distance
—
Elevation gain
—
Elevation loss
—
Max elevation
—
Waypoints
—
Elevation profile
FL/VO-080 Rothenbachkopf
About 30 minutes’ drive North of Storkenkopf is Rothenbachkopf. This is another easy walk, with a nice footpath starting at a carpark by the road, from where it’s about a 20 minute climb, ascending 100m vertically on a well-made path over about 0.8km, with a few steps leading up to the summit.
The carpark and road from RothenbachkopfThe path to the summit, Rothenbachkopf
There’s sufficient flat ground around the summit to erect an HF antenna, and I quickly made the six QSOs I needed to qualify the activation, again all on 30m CW.
Me on Rothenbachkopf
Loading map…Scroll or tap to load the interactive map
Distance
—
Elevation gain
—
Elevation loss
—
Max elevation
—
Waypoints
—
Elevation profile
All-in-all, a successful start to my challenge, with 40 points amassed so far, from four very easy 10-pointers. We retired to the nearby town of La Bresse, where we stayed at the Ibis Hotel, before a slightly more strenuous day tomorrow…