Pyrenees SOTAs 2022: Day 2 – EA2/NV-022 Urkulu & F/PO-251 Mont Arrokagaray

After yesterday’s successful and sunny climbs of Pico de Orhy and Arthanolatze, I was looking forward to another easy day in the mountains on 31st August 2022 but it was somewhat more difficult.

Urkulu EA2/NV-022

Overnight, there had been a substantial thunderstorm with rain in the Pyrenees and the drive into the valley from St. Jean Pied de Port was rather wet. My first problem was that I only had an underpowered Fiat Panda for my hire car, and on the slippery roads which had just seen their first substantial rain for months, there was no way I could get up the tiny steep roads from the D933 at Arnéguy that my sat nav wanted to take me on. After several false starts, I made it back to St. Jean Pied de Port and onto the much better D428. This back-tracking already made me substantially behind schedule, but as I climbed, the low cloud and rain turned, of course into fog. The reduced visibility in itself would have been bad enough but this was compounded by the fact that the D428 forms part of the Compostela pilgrimage route and my route was packed with pilgrims walking in the middle of the road, even on the hairpin mountain bends, with little to no visibility. By the time I reached the Refuge Orisson, on the way towards Urkulu, I decided that the drive had become too dangerous for me to be comfortable, and I pulled in for a while to see if the fog would lift. It didn’t. After 30 minutes pulled in, and still surrounded by pedestrians, I took advantage of a brief spell of extra visibility to continue uphill, hoping that I would eventually break out of the fog. Luckily, my hope was correct and a couple of kilometers further on, I found myself able to see again.

Eventually, I made it to the car park at the foot of Urkulu. Like Ori yesterday, the car park itself is on the border with Spain, but unlike Ori, there is no way to cross the border by car as the D428 continues on the French side.

It was in this car park that I had my next problem. A herd of horses took a strong interest in my hire car and started licking it and one even tried to sit on the bonnet. Luckily I was still in the car at this point and reverse gear was swiftly engaged before any damage was done, but I certainly left the car with some unease about the state I would find it in on my return!

As I started climbing Urkulu, the fog had caught up with me and started to envelop the road I had just driven up.
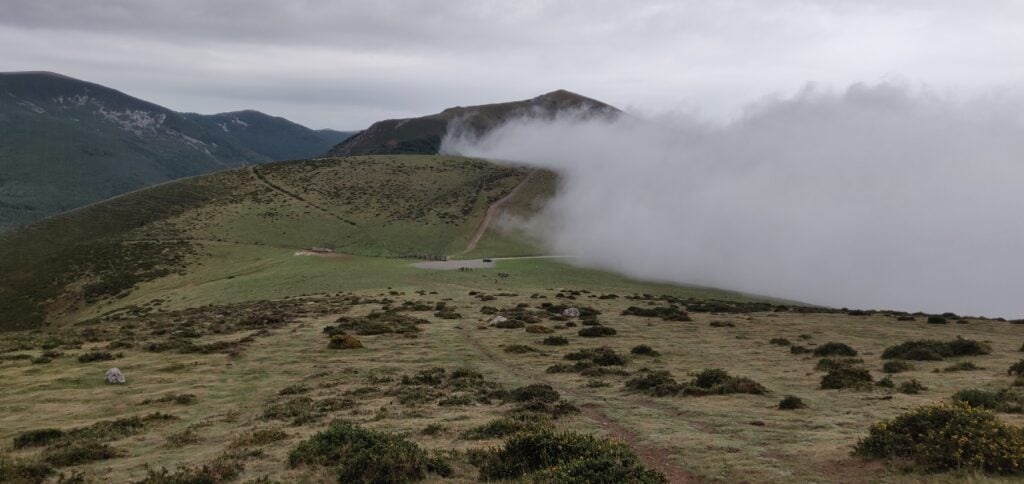
The ascent of Urkulu, looking back at the car park and the fog

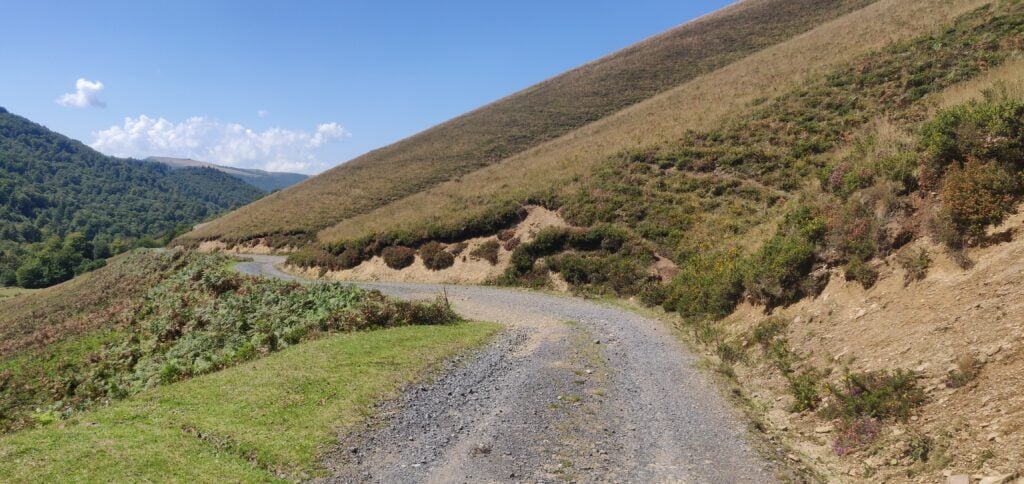
The walk up Urkulu itself is pretty much trivial. It isn’t very steep and it is directly uphill. This was very welcome given the likelihood that I might have had to descend with no visual aids!

Once at the top, you are rewarded with the Roman fort that Urkulu is famous for, believed to date back to the year 28 BC. Apparently there are views from here over the whole of the Aquitaine plain but I’ll need a future return visit to confirm that.
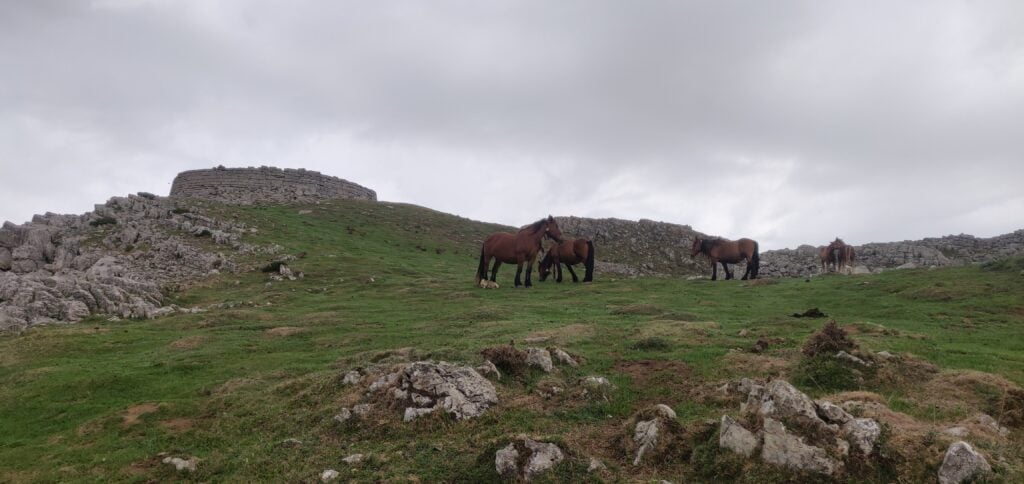
The Roman hill fort on Urkulu

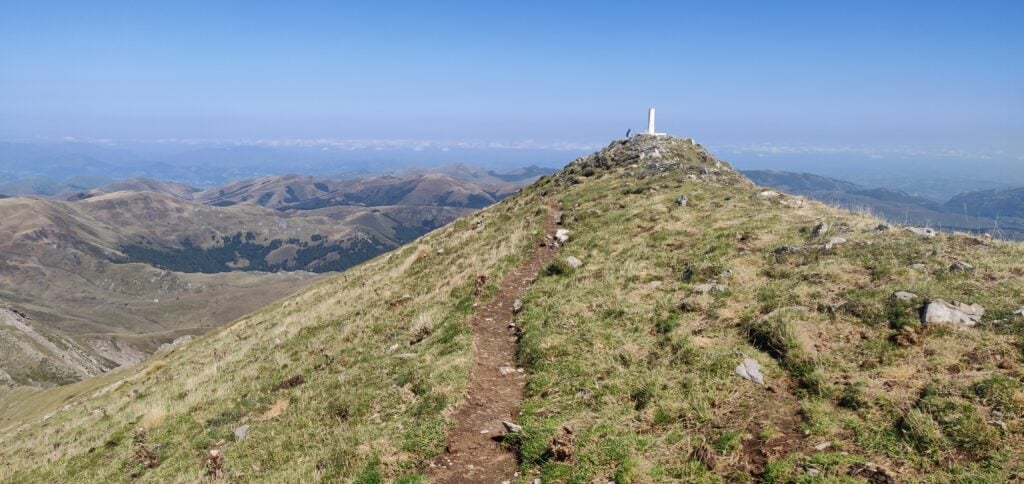
The summit is only a few tens of metres further on from the fort and has ample space for antennas, although it is quite rocky.
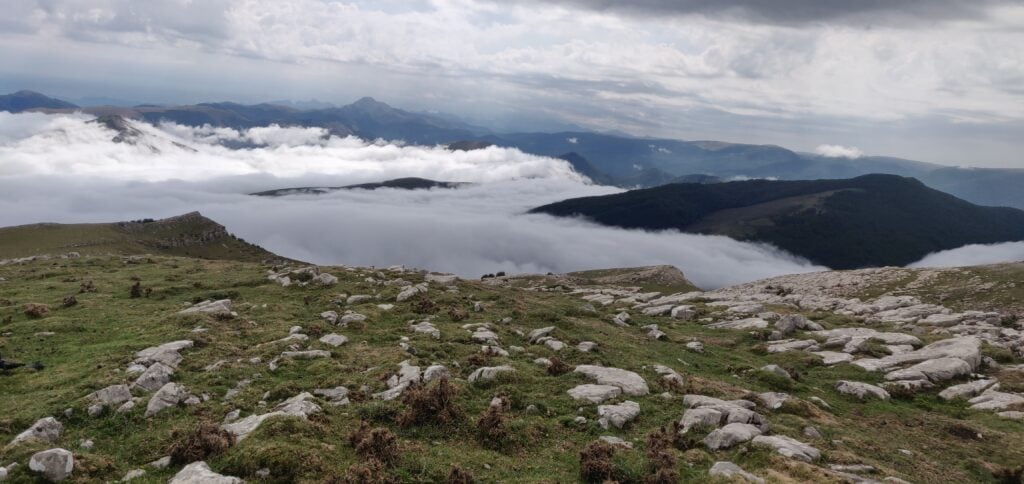
The summit of Urkulu

Urkulu is a 6-point summit for SOTA purposes, and I was able to make some 18 QSOs from here (all but one on 20m CW). I would have made more but, in the middle of the pile-up I started to hear thunder not too far away. Not wishing to be caught on a mountain in a thunderstorm with an antenna and with cloud hindering my ability to descend, I decided that a quick evacuation would be required.

Fortunately, I reached the car safe and sound and the horses seemed to have lost interest in the vehicle too, which was undamaged. Visibility was only about 20m though, so the decent down the mountain was very slow and was made additionally dangerous by a very stubborn horse that decided to stand right across the single-track road on a hairpin bend. Only after five minutes of revving the car engine did I eventually persuade it to move.

I had, by the way, hoped to climb Txangoamendi EA2/NV-170 at the same time as Urkulu since both routes start from the same car park but with the delays and inclement weather I didn’t have time.

As I said, the climb up Urkulu is fairly gentle: it’s only 200m ascent in 800m of walk. It probably took about 30 minutes to walk up (although I didn’t start my GPS until I was part of the way up the hill, as there were lots of other things on my mind!) and about 20 minutes to walk back down.

Loading map…
Distance
—
Elevation gain
—
Elevation loss
—
Max elevation
—
Waypoints
—
Elevation profile

Mont Arrokagaray F/PO-251

Mont Arrokagaray is a small one-point hill in the Pyreneean foothills near Cambo-les-Bains, on the way back from Urkulu heading towards the coast at Biarritz. As a much smaller hill out of the mountains, it was unaffected by the fog I had on Urkulu, and the rain had stopped by now also.

I parked at the start of the track at 43.316°, -1.379°, which is not where I’d actually planned to park. This initially took me down what turned out to be a private driveway before I corrected that, so if you repeat this route you want to head north-east from the road as you will be going back behind the hill.

The only really notable thing to say about the climb is that a sign (in French and Basque) at the start of the path requested walkers not to climb the hill 8th May – 31st July or 1st September – 30th November. This was due to a scientific study to capture and tag the local vulture population. Luckily, today was 31st August so it was the last opportunity to climb the hill before the winter!
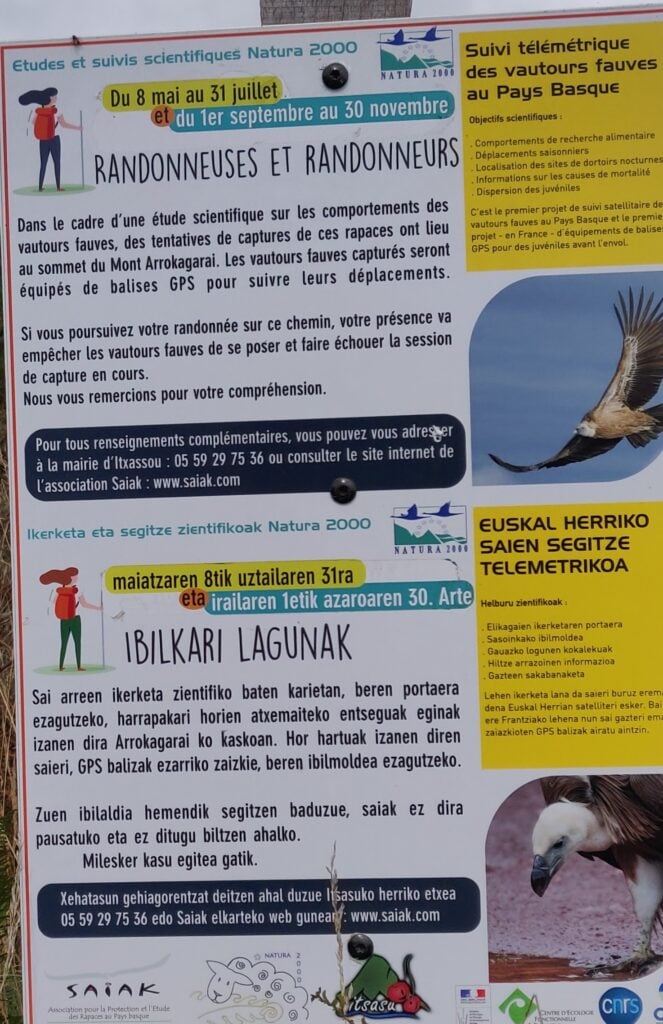
The request not to climb the hill

The path itself is a gentle grass track with pretty views over the local Basque countryside. The summit has a rounded top and the activation area is very large. Conscious of the local flora and fauna, I was careful to try to avoid setting up my aerial off the path, so I went a bit beyond the summit itself to set up in a slightly more open clearing. Luckily, there was absolutely no-one else around, so I wasn’t in anyone’s way.
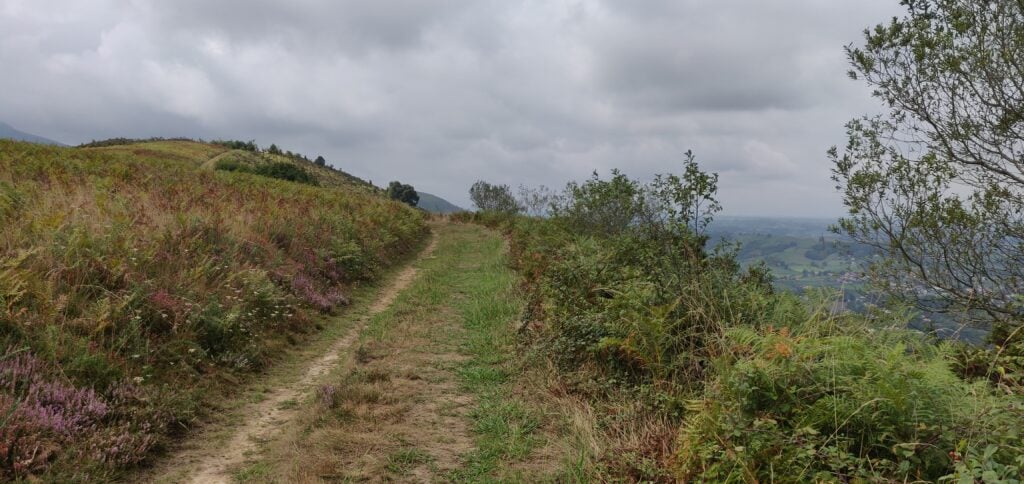
The ascent of Mont Arrokagaray

This was a lovely spot to operate from and I was able to make 19 QSOs without having to descend in any hurry. Again, all but one of these was on 20m CW. I must take this opportunity to thank Christian F4WBN who made a QSO with me on 2m FM from every one of the four summits I activated, and who was clearly watching me on APRS as he was already ready to call me as soon as I reached the top! Christian is a well-known SOTA chaser who lives nearby in Bayonne.

The climb (once I went the right way) took me about 20 minutes and the descent took about 15 minutes.

Loading map…
Distance
—
Elevation gain
—
Elevation loss
—
Max elevation
—
Waypoints
—
Elevation profile

Pyrenees SOTAs 2022: Day 1 – EA2/NV-003 Pico de Ori (Pic d’Orhy) and F/PO-173 Arthanolatze

At the end of August, I was able to return to the Pyrenees to do a few new (to me) SOTA summits over a couple of days. On 30th August 2022, this trip started with a couple of mountains, the Pico de Ori and Arthanolatze.

Pico de Ori EA2/NV-003

The ten point Pico de Ori (the Spanish name) is easily reached by the Puerto de Larrun, where there is ample parking space, and is located right on the border between France and Spain. From a SOTA perspective it counts as being in Spain, hence the EA2/NV-003 reference number representing Navarra. In French, the same mountain is called the Pic d’Orhy, and when I was researching the climb, most of the websites I found used that name, so it’s worth being aware of both.

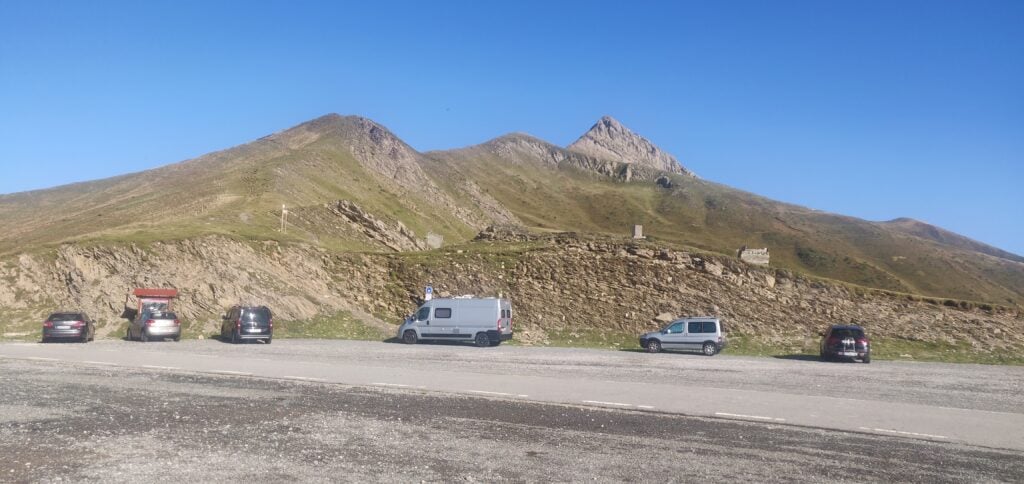
The Puerto de Larrun, forming the border between France and Spain. Pico de Ori is the tall, pointed, summit in the background

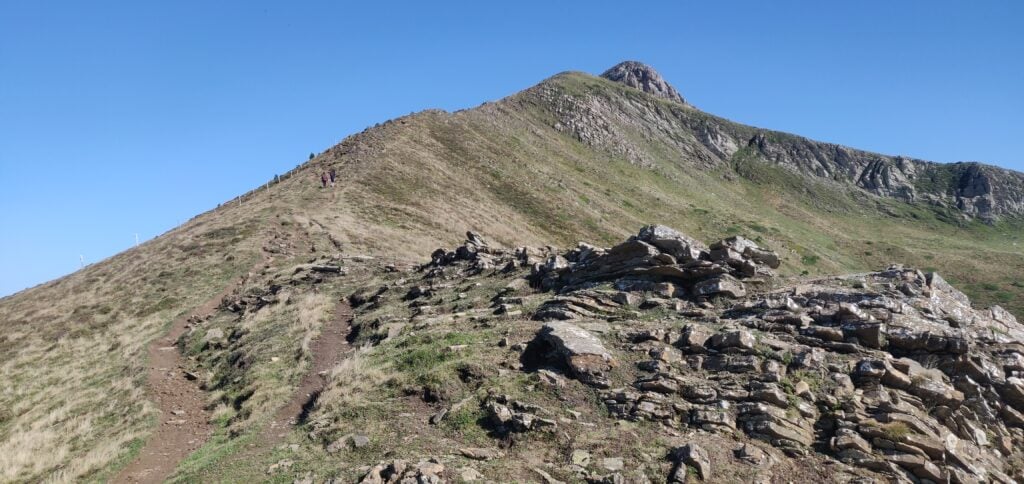
The ascent starts as a fairly easy walk on a path that runs behind the first two summits in the image above. This was a fairly easy walk and not excessively steep.

The start of the path is relatively easy

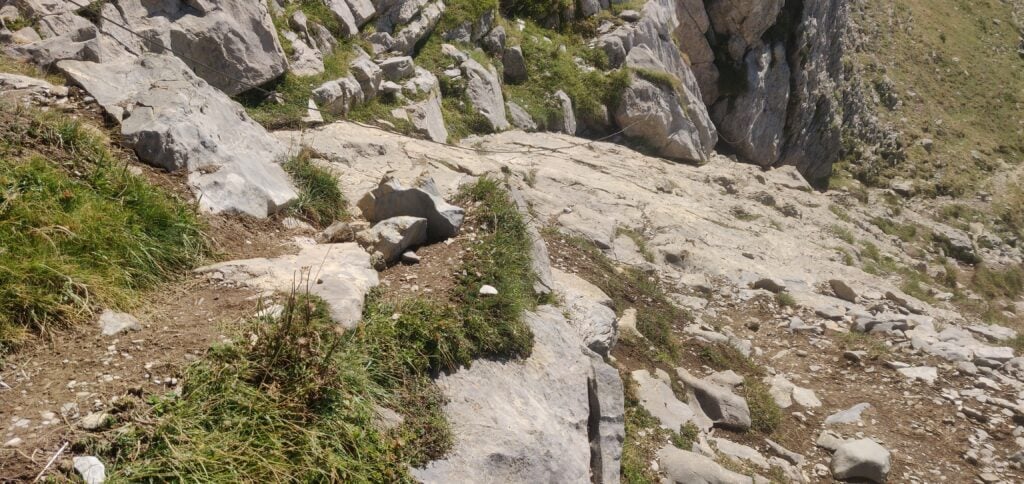
There is, however, one very short section that was slightly more of a challenge for me, where the path crosses a piece of fairly smooth rock. Some thunderstorms the previous day had made this rather slippery. A steel rope has been anchored into the rock to provide a bit of a handhold, but it is fairly slack. Fortunately, some fellow walkers were able to help tension it for me, so I could hoist myself up.

The one tricky section crosses some slippery rock

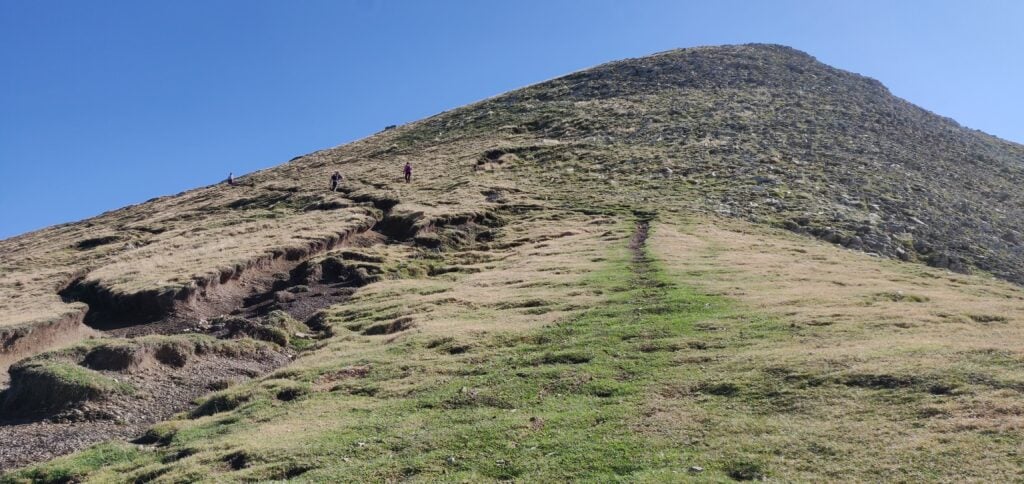
Once past that section, the path again flattens out and comes to a col at the back of the Pico de Ori. From there, it is a fairly steep climb straight up the summit, but no scrambling required.

The path from the col to the summit

The summit is in the form of a cliff face. Although it is quite long, there is a steep drop on the French side and the Spanish side, where the path is, also drops away quickly, meaning that there isn’t much space for HF antennas. This is also a very popular summit as it’s the western-most mountain over 2000m in the Pyrenean chain and a fairly easy hike. Consequently, I just made 5 QSOs as quickly as possible (two on 2m FM, and three on 20m CW, with a low antenna to keep it out of the way as much as possible) and left the summit as fairly quickly.

The summit of Pico de Ori

The ascent, which is about 400m of climb over 2.8kms, took me about 75 minutes. The descent took about 65 minutes.

Loading map…
Distance
—
Elevation gain
—
Elevation loss
—
Max elevation
—
Waypoints
—
Elevation profile

Arthanolatze F/PO-173

About fifty minutes’ drive north of Pico de Orhy is Arthanolatze, in the hamlet of Iraty in the Ossau valley. (Lovers of French cheese will probably recognise Ossau-Iraty from the sheep’s cheese that is produced here.)

This is a four-point summit and a very pleasant walk. One post I read recommended parking at 43.041°, -1.024° but there is now signage here saying that this is an emergency access route for ambulances. I therefore parked at the Col de Bagargi, where there is a café/restaurant and other facilities. However, this does mean that the walk is about 500m longer than the one starting from the recommended parking and, furthermore, it starts with a steep downhill on road, and therefore a steep uphill section on the return.

Once you make it down that road you reach the recommended parking point where a gravel track leaves the road and heads into some trees. Once through the trees, continue on the flat gravel track heading west.

The gravel track

This track brings you slightly downhill to a stream running in a valley. Continue along the track and you then have a choice. If you are very observant, on the right, there is a small path heading away from the track at 43.0435°, -1.0324°. You can take this path to head directly up the hill (which is the route I took on the descent). I, however, missed this turn on the ascent and so the other option is to follow the main gravel track which zig-zags up the hill.

It is easy to miss the small path heading directly up the hill

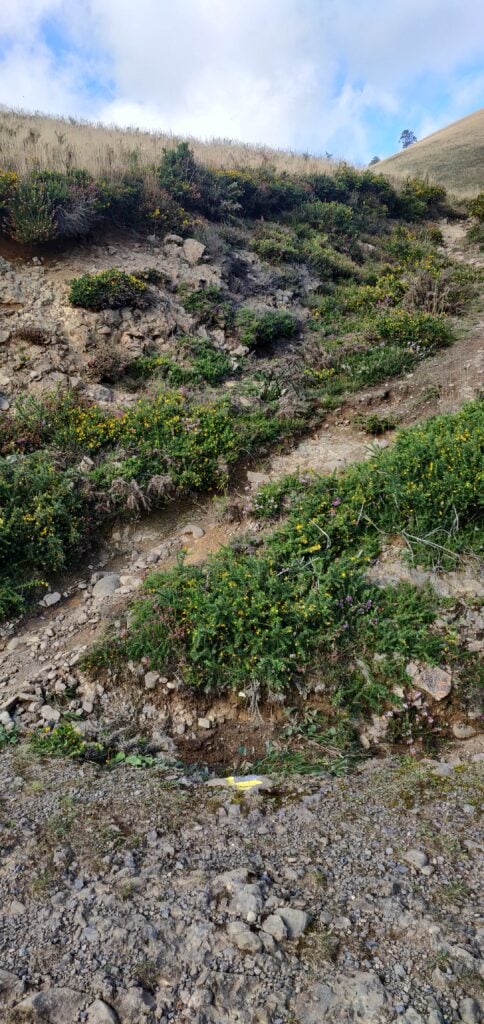
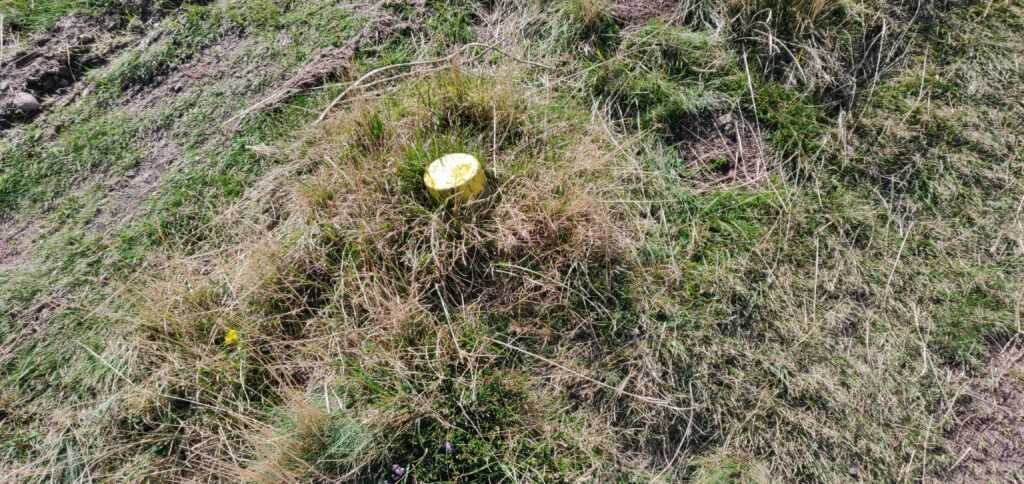
Either way, you come out to a small refuge just below the summit. At this point turn off the main path and follow the path on your left marked with yellow posts. Again, many of these are barely visible and some are more trip-hazards than obvious markers!

The posts marking the way are barely visible above the ground

Again, I got this wrong on the ascent and incorrectly continued on the main path past the hut, meaning that I then had to scramble up the side of the hill on tracks made by animals rather than the much easier ‘official’ route.

Once on top of Arthanolatze, there is a lot more space for antennas, and it’s much less busy or well known than Ori, meaning I had the place pretty much to myself.

My aerial on the summit of Arthanolatze

I was able to make 12 QSOs from here (11 on 20m CW and one on 2m FM) before I had to back up for the drive back to my hotel.

The ‘ascent’ took me 80 minutes over the sub-optimal route, including about 100m of descent and 200m of ascent over about 4.3km. The ‘descent’ was only about 3.6km and took me about an hour.

Loading map…
Distance
—
Elevation gain
—
Elevation loss
—
Max elevation
—
Waypoints
—
Elevation profile

Mont Afrique, Bois de Pierre Saux, Montagne de Saint Laurent: Three quick SOTAs around Dijon

With only a couple of exceptions, I haven’t been able to get out to activate any SOTA summits for nearly 2 years. Now only have we had the Covid lockdown, but then over the winter I have faced another (non-Covid-related) medical issue, which stopped me getting out.

Now that I am recovering, and with some of last year’s leave needing to be used before the end of April, I decided to take a quick city break to Dijon via the Eurostar. While I was there, I hired a car for a day to do a circuit of three of the very easy SOTA summits in the area.

Mont Afrique FT/VL-040, 4 points

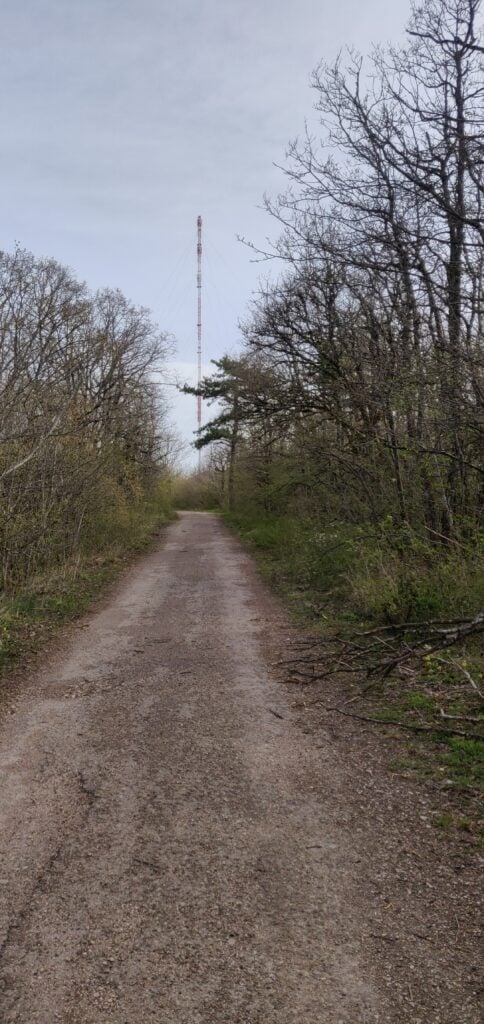
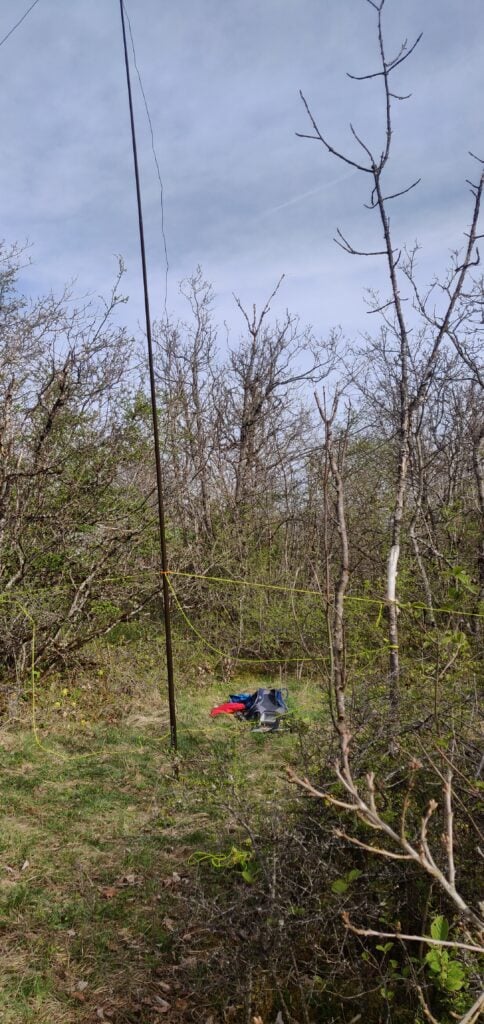
Mont Afrique lies just to the west of Dijon and is only about 20 minutes drive from the train station. The hill overlooks the town and is the site of the main radio and TV transmissions for the area. There is ample parking at the foot of the main concrete mast and from here it’s just a 10 minute walk along a surfaced path to towards the summit itself (although the hill has a fairly flat top with a large activation area, so there is hardly an ascent involved). You walk past another mast, this time for civil aviation, and the summit area is just beyond that. There is woodland all around the path but there are occasional clearings forming firebreaks, which have some space to set up. It would be a challenge to erect a low bands antenna, however, and the ground is very rocky so I had to gently tie off on trees, rather than using tent pegs. However, the bands were surprisingly quiet given all the other services in the vicinity.

The path from the main concrete mast to the smaller civil aviation tower on Mont Afrique
Set up in a small clearing just off the path

I made 9 QSOs very easily from here on 20m CW, all within a few minutes of setting up, so this was a nice easy start to the day.

Bois de Pierre Saux FL/VL-007 (6 points)

The Bois de Pierre Saux is a large expanse of forest just north of the hamlet of Détain-et-Bruant. The quickest way to get here from Mont Afrique takes you north, around the A38 motorway, and then south to Détain, but I opted to take the slower and more scenic route through the Burgundy vineyards and the iconic places such as Fixin and Gevrey-Chambertin. This takes about 45 minutes to drive but allows you to make the day into a circuit.

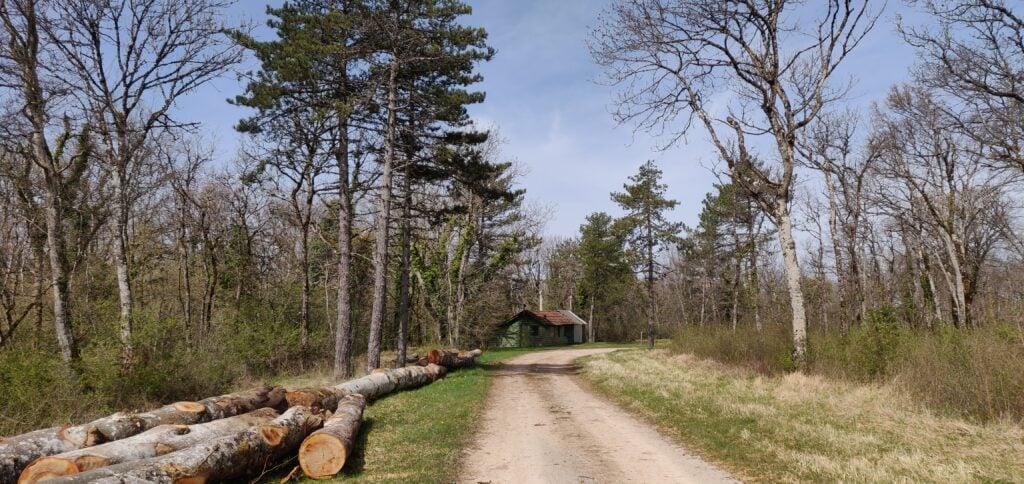
There isn’t much to Détain-et-Bruant. I didn’t see a single business, and it’s just a rural farming community. I parked on a grass verge near the start of the path at 47.1738N, 4.7936E. The walk through the forest is on a well made forestry track and it took me about 30 minutes to reach the highest point. The ascent is gentle and you are only climbing about 60m. There is a barrier near the start of the path but this is only to prevent unauthorised vehicles on the forestry track. Pedestrians are encouraged.

The path through the forest to Bois de Pierre Saux

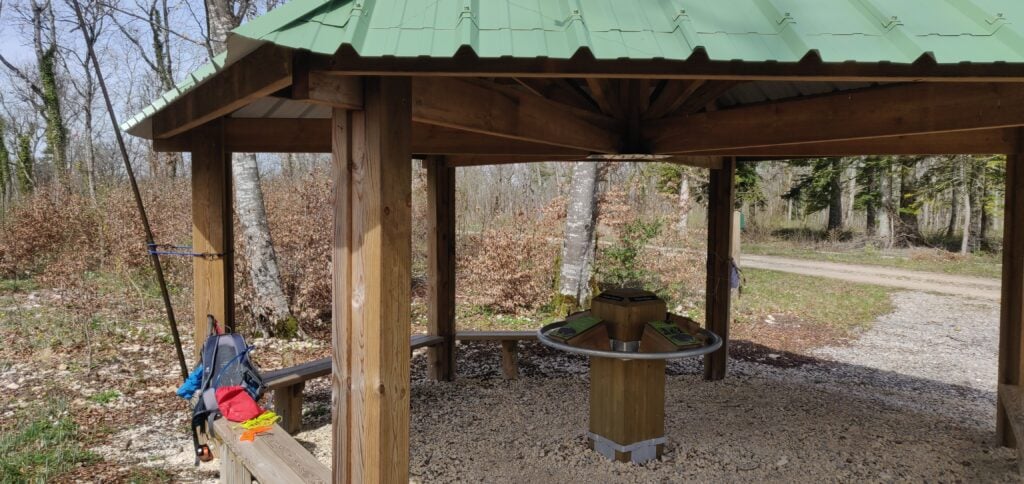
The summit itself is probably the most civilised SOTA summit I have been to: a shelter complete with benches and a roof to protect you from the sun has been constructed around the wooden trig point. On a weekday with nobody around, I was even able to use bungee cords to attach my mast to the shelter.

The shelter at the summit of Bois de Pierre Saux

Again, I was able to make 7 QSOs very quickly on 20m CW before having my lunch in the shelter and returning to the car.

Montagne de St Laurent FL/VL-052 (4 points)

At only 557m ASL, calling this a mountain is a bit of an exaggeration. It is, instead, a hill just outside the village of Mesmont. You can reach the village via the decent D8/D33 roads from Détain-en-Bruant in about 20 minutes, and there is sufficient parking on the verge in Mesmont itself.

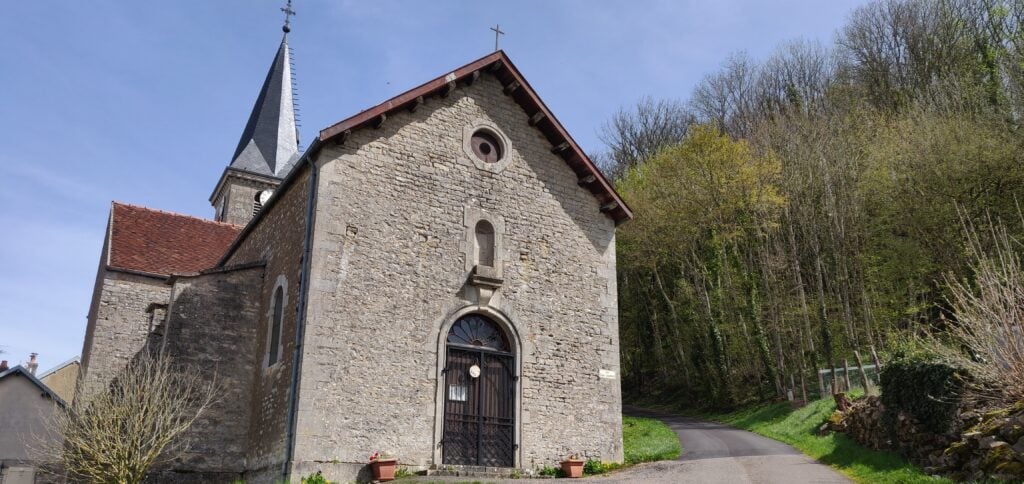
Once you have parked up, find your way to the church and, at the back of the church, the start of the road up the hill. This is only a short road but actually relatively steep: you climb about 75m in the 10 minute walk to the top on the tarmaced surface.

The start of the road at the church in Mesmont

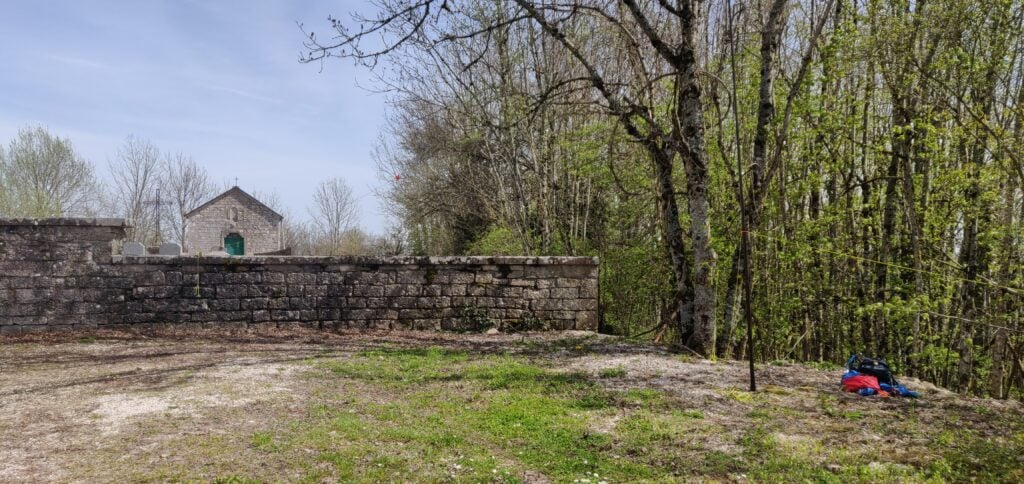
At the top there isn’t very much space. There are densely packed trees, a chapel and graveyard and a carpark. I set up my kit just at the edge of the carpark and used a couple of the trees to tie the antenna off. This was a surprisingly busy carpark with a couple different cars arriving during the half-hour I was on the hill.

I set up on the edge of the carpark, just outside the cemetery wall

The main notable thing here was just how noisy the band was on 20m. There seemed to be an S6 noise floor, which I assume must have been something in the chapel. Nevertheless, I was able to work another 7 stations to pick up the 4 points for the hill before heading back to the village and along the A38 motorway to Dijon.

CQWW CW 2021 as CT9/M0BLF

Equipment and category

After months during which we haven’t been able to travel because of Covid-19, and with a load of annual leave to use up at work, I thought it would be good to get away for a bit of a break at the end of November. I booked a hotel in the main town of Funchal, on Madeira’s South coast and then, a few days after booking, realised that the dates I had chosen included CQWW CW.

Madeira itself should be a good location for the contest. Plenty of sea paths to both Europe, Africa, North and South America, and with the island counting as in Africa for DXCC purposes, most QSOs are worth 3 points. On the other hand, Funchal is clearly not a good radio location. It’s very built up and is in a bay facing south, with take-off to everywhere interesting blocked by steep hills rising to the high part of the island. If I wanted to operate, it would have to be a portable affair.

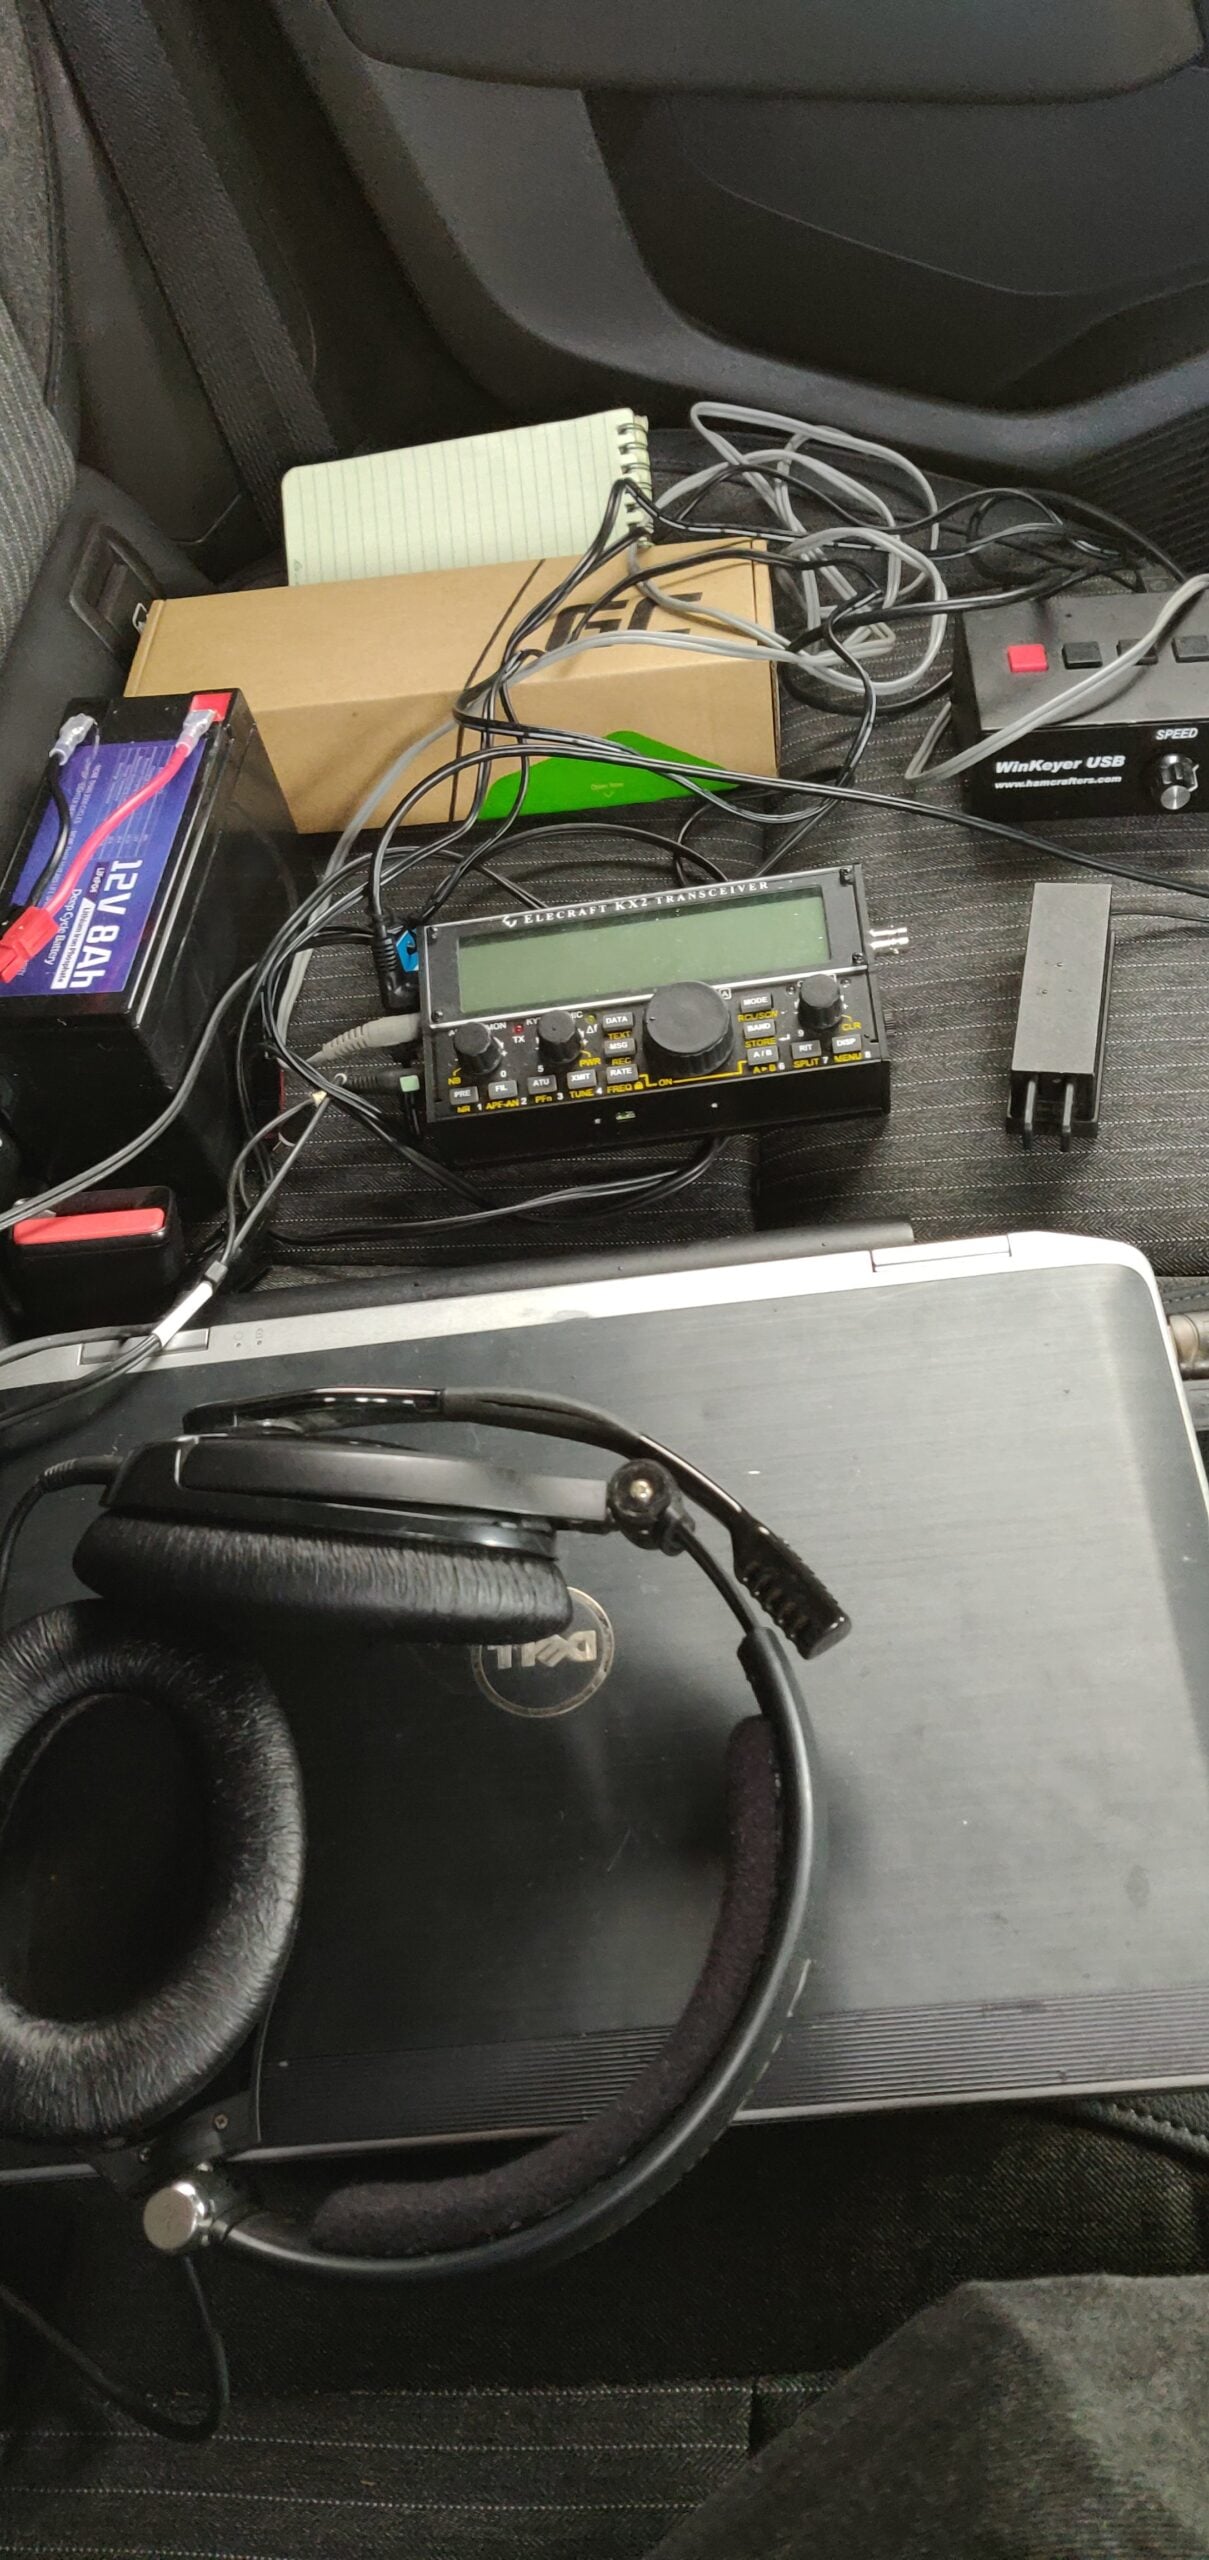
Power was clearly going to be my main limiting factor. I would have no access to make electricity and as I was arriving by plane only the day before the contest, I would have no ability to carry large batteries or obtain a generator. After some quick calculations, I realised that a lightweight 8Ah LiFePo4 battery (which usefully falls just under the 100Wh airline limit) would allow me to operate for at least 5 hours per day using my KX2 on 5W. The problem then was a laptop battery. I had only about 2.5 hours of power on my laptop’s internal battery, so I bought a spare (again having checked the plane would allow it), which would allow me to operate for 5 hours or so on that too. My plan was to return to my hotel room overnight to charge everything, giving me about 10 hours’ maximum operating time in the contest.

It was clear that this limitation meant I’d need to operate in a QRP section and single band seemed most appropriate. During the SSB contest in October, 15m had performed much better than expected and so this became the natural choice as it would mainly be open in the afternoons, matching my 5 hour operating limit well. To use the power available as best as possible, I’d need a resonant antenna, so I built a 1/4 wave vertical with elevated radials and disabled the ATU in my KX2. I chose this particular antenna design because I’d experienced great DX performance from it on previous DXpeditions. Finally, I opted to keep life as easy as possible for myself given the compromised setup, so I chose to operate in an assisted category. Because I wasn’t sure I would have a good mobile phone signal, which would form the basis of my DX Cluster access, I set a filter on my preferred DX Cluster node, so that the Cluster would only send me spots on 15m that did not contain ‘FT8’. This massively improved the throughput.

During the LZ DX Contest at the start of November, I then tested all the gear from home on battery power only to check whether it would work and was amazed to get quite a few contacts. This was a promising start.

The full equipment list:

  • 1/4 wave vertical with elevated radials
  • 10m fibreglass pole and guys
  • RG8 mini coax
  • Elecraft KX2
  • LiFePo4 12V, 8Ah battery and DC lead
  • Palm mini paddle
  • WinKeyer USB (CW interface for the computer)
  • KX2 USB control cable
  • Laptop running DXLog
  • Spare battery for laptop
  • Headset
  • Mobile phone for internet access via tethering
Equipment

Location

Now that I knew which category I would enter, I needed to choose a location. Clearly Funchal itself was not suitable because of the geography, but I knew from my previous SOTA trips to the island that there’s a large, high plateau rising to around 1800m in the centre of the island, from which you can get great sea views. I chose a spot near Fanal but as the weekend of the contest approached, the weather forecast started to suggest that operating outdoors wouldn’t be possible. I therefore chose a backup location, which was the carpark from which I had previously started the ascent of Pico Ruivo do Paul. The take-off wouldn’t be so good from there but it gave me the option of operating from inside my hire car.

It was lucky I had this backup plan. As I drove to the site on the Saturday morning of the contest, the weather became steadily worse. A number of rockfalls had caused a couple of cars to get punctures, and as I climbed, the mist became thicker. By the time I reached the carpark, visibility was almost nothing, there was a strong wind with gusts rocking the car, sheets of heavy rain and the temperature was an unseasonably cold 4c. This contest was going to be quite a challenge!

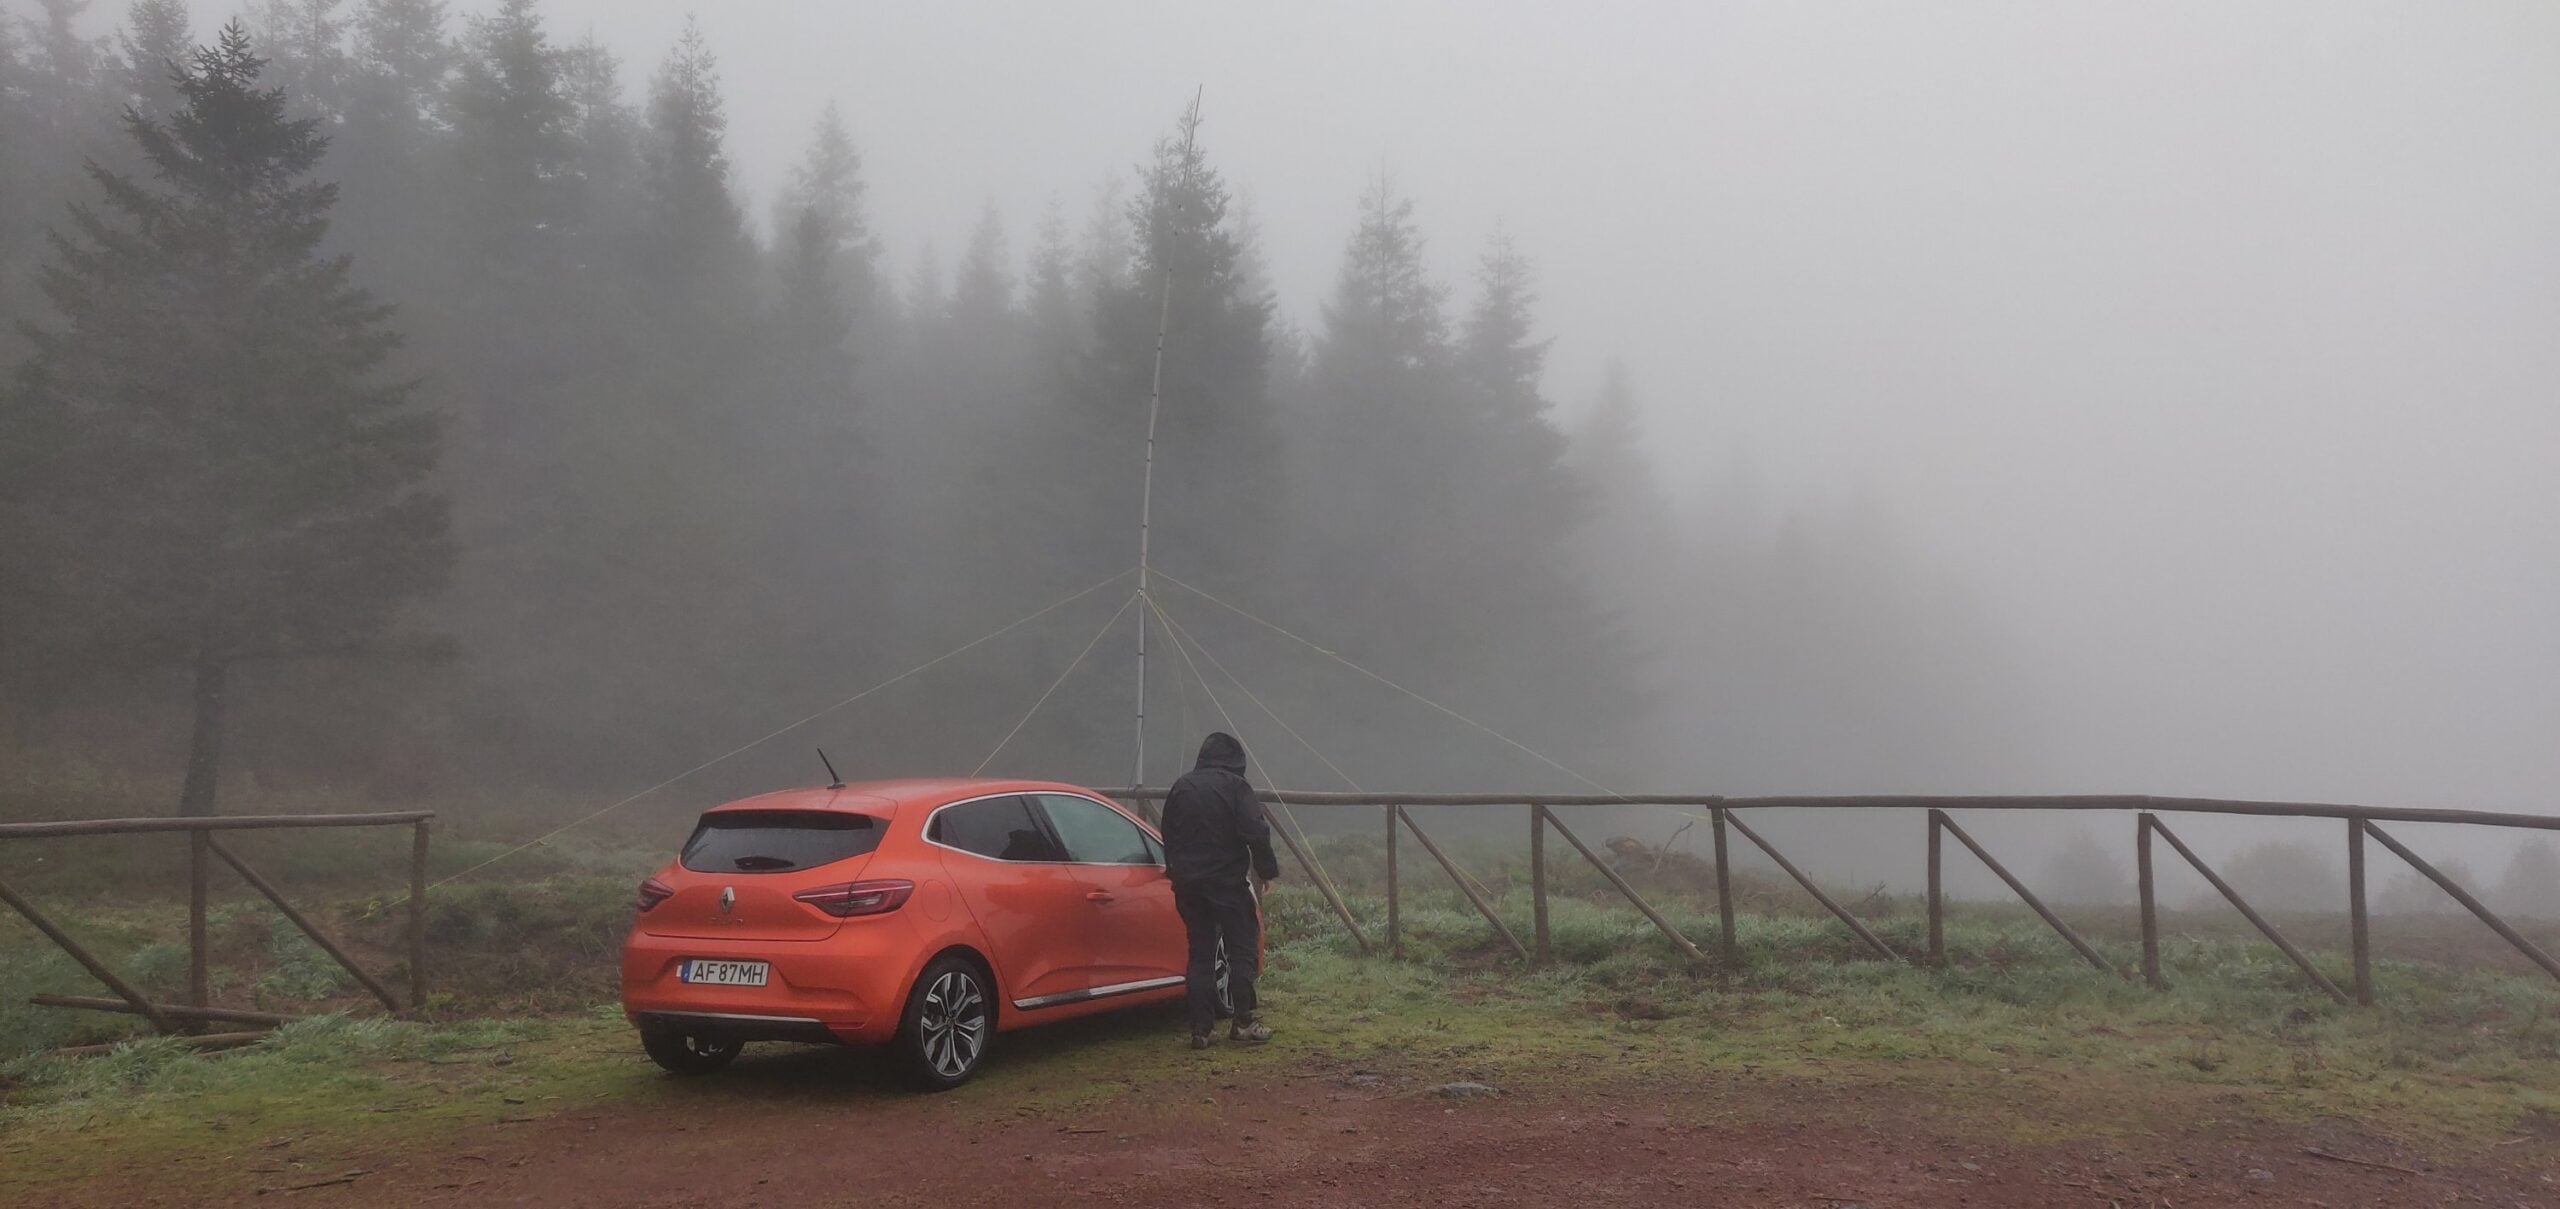
Using the wooden fence in the otherwise empty carpark, I tied on the antenna pole, used a guy set and deployed some bungee cords too, and somehow that was sufficient for the pole to survive.

Operating from the car’s back seat was a little cramped, but with the laptop on my lap, and KX2 by my side, I managed to get comfortable. I was glad I was only planning to do about 4.5 hours each day, though (to give me a little spare battery power).

The weather was awful!

The contest

The contest itself went quite well. Take-off to Europe wasn’t quite as good as I had expected, but South America and North America were quite easy. By the time I was packing up at 4pm on the Saturday with little battery power left, the Americas were coming in easily, so on the Sunday I adjusted my start time to allow myself to stay a little later, though at the expense of some of the morning opening to Eastern Europe. I was particularly pleased that a lot of the Americans, even the Zone 3 ones, seemed to copy my call first time, which indicates the antenna and sea-path take-off were doing their job. However, with just one exception, my CQ calls weren’t seen by the RBN, and so all but handful of contacts were made S&P, which clearly limited my rate. Interestingly, I tried multiple different CW sending speeds and found 25wpm to be most likely to get my long callsign (CT9/M0BLF) copied accurately.

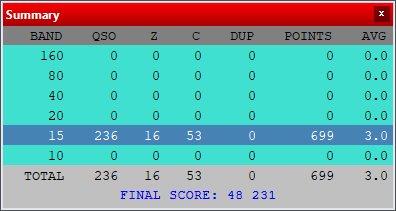
Final score: 48231 points claimed

Using Waterfall Bandmap as a panadapter with the K3

For the CQWW SSB contest this month, I wanted to be able to use a panadapter and found that I could use a FunCubeDongle with the Waterfall Bandmap and DXLog.NET contest logging software to do this.

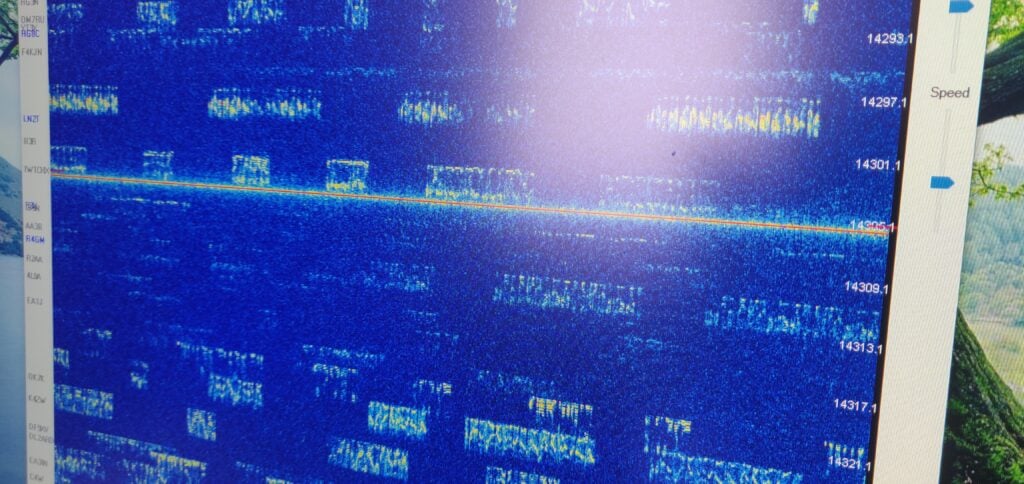
Signals in CQ WW SSB shown in Waterfall Bandmap

Why do you want a panadapter?

First off, something on why you might want panadapters in amateur radio and why they are useful especially in busy contests. Panadapters are typically bits of hardware that connect to a radio and give a visual indication of the spectrum beyond just the bit you can hear. Elecraft sell the very nice P3 as the official hardware add-on to the K3, but it has always felt to me rather overpriced for what it is.

Panadapters are particularly useful in busy contests because they allow you to see what you can hear on the band. You can use this to:

  • identify possible gaps where you might find a CQ (‘run’) frequency
  • see which multiplier stations (scoring the most points) are strong with you, so you can focus on working them quickly
  • find out where splatter is coming from

One thing that the P3 can’t do, and which is becoming increasingly popular with software panadapters, is to use DX Cluster spots to overlay callsigns on the signals you can see, making finding multipliers to work even easier. With this set up, Waterfall Bandmap even colour-codes the spots so you can quickly distinguish which signals you have already worked and which are multipliers.

The equipment I used

I soon realised that I had all the kit required to set up a panadapter quickly, but the instructions for using this specific combination were spread around the internet and also needed some guesswork – hence this post. Other sources will be more useful to you if you aren’t using this exact combination.

  • Elecraft K3 with KXV3 board (which gives IF out on a BNC connector)
  • FunCube Dongle Pro+ SDR receiver
  • DXLog.NET contest logging software
  • Waterfall Bandmap

Instructions

Connecting it together

  1. Connect a BNC-SMA lead from the K3 IF out to the FunCube
  2. Connect the FunCube over USB to the laptop
  3. Connect an RS232-USB lead from the K3’s RS232 port to the laptop and then use Device Manager in Windows to identify the COM port that will be used for the rig control

Set DXLog.NET to communicate with Waterfall Bandmap

  1. Start DXLog.NET and ensure rig control is working
    There are plenty of instructions online for doing this, but it’s outside the scope of this post.
  2. On the Options menu, choose Broadcast and then select both Radio information and Receive Broadcasts
  3. On the Options menu, choose DX Cluster and then select Send spots to SmartSDR
  4. On the Options menu, select Configure network

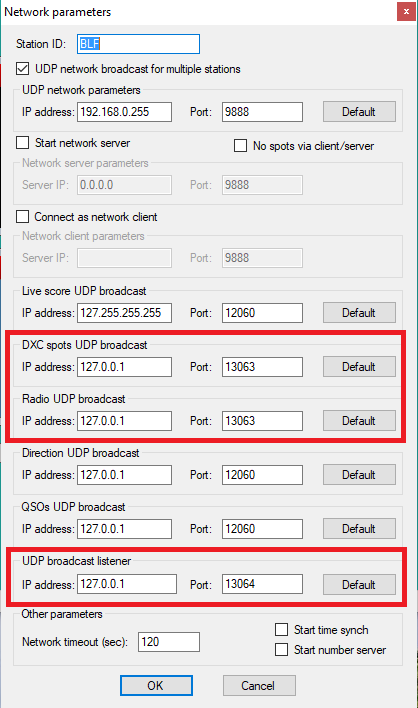
You now need to set three specific settings. In each case below, I’ve assumed that Waterfall Bandmap will run on the same computer as DXLog.NET. If that isn’t the case (which may be especially true in a multi-radio environment) you’ll need to replace 127.0.0.1 with the IP address of the computer running Waterfall Bandmap.

  • Set DXC spots UDP broadcast to IP address 127.0.0.1 and port 13063
  • Set Radio UDP broadcast to IP address 127.0.0.1 and port 13063
  • Set UDP broadcast listener to IP address 127.0.0.1 and port 13064
  • Then click OK
Settings in DXLog.NET

Finally, on the Options menu, ensure Enable network is checked.

Prepare Waterfall Bandmap to use the FunCube Dongle Pro+

Go to the FunCube Dongle Pro+ downloads page and get copies of two things:

  1. The latest FCD+ Frequency Control Program
  2. The EXTIO file

Copy these into the folder where you have unzipped the Waterfall Bandmap program.

(You may already have copies of these for working with other programs on your computer. If so, you can just put a copy of the EXTIO file in the Waterfall Bandmap folder.)

Putting it all together

  1. Start Waterfall Bandmap
  2. Allow the program if prompted by Windows SmartScreen, and also allow it to communicate on Private Networks if prompted by Windows Firewall.
  3. You’ll see an error message saying ‘SDR program not fully supported!‘
    That’s OK – these instructions work around this error.
  4. Check that ExtIO_FcdProPlus.dll is selected in the middle dropdown menu
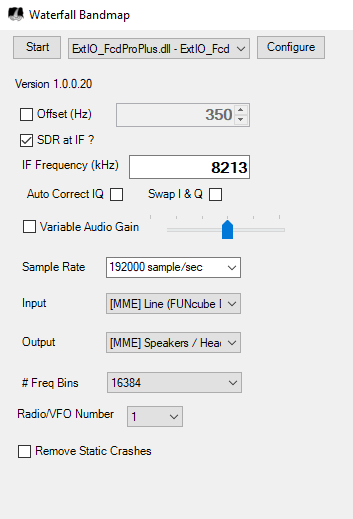
  5. Check SDR at IF?
  6. Set the IF frequency to 8213kHz (although this doesn’t actually matter, as Waterfall Bandmap can’t actually do frequency control itself)
  7. Set the Sample Rate to 192000 sample/sec
  8. Set the Input to [MME] Line (FUNCube Dongle V2.0)
Waterfall Bandmap settings

As I say, Waterfall Bandmap can’t actually control the frequency of the FunCube Dongle Pro+, which is why we got the error message at the start, and why the frequency we set above didn’t actually matter. To resolve this:

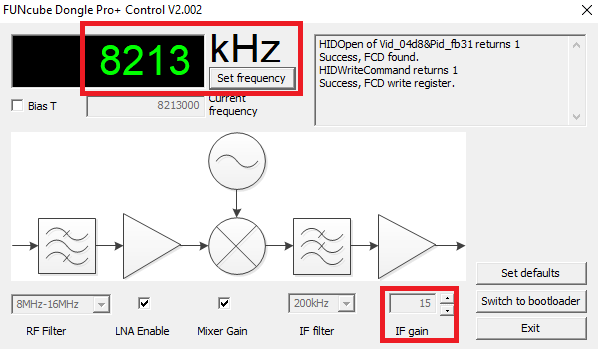
  1. Start the FCD+ Frequency Control Program
  2. Set the frequency to the K3’s IF frequency, 8213kHz and click Set frequency
  3. I found I also had to increase the IF gain to around 15 to see decent results on the waterfall; your settings and contrast preferences may vary.
  4. Back in Waterfall Bandmap, click Start
  5. Set the Zoom, Contrast and Speed to your preference
FUNcube Dongle Pro+ Control settings

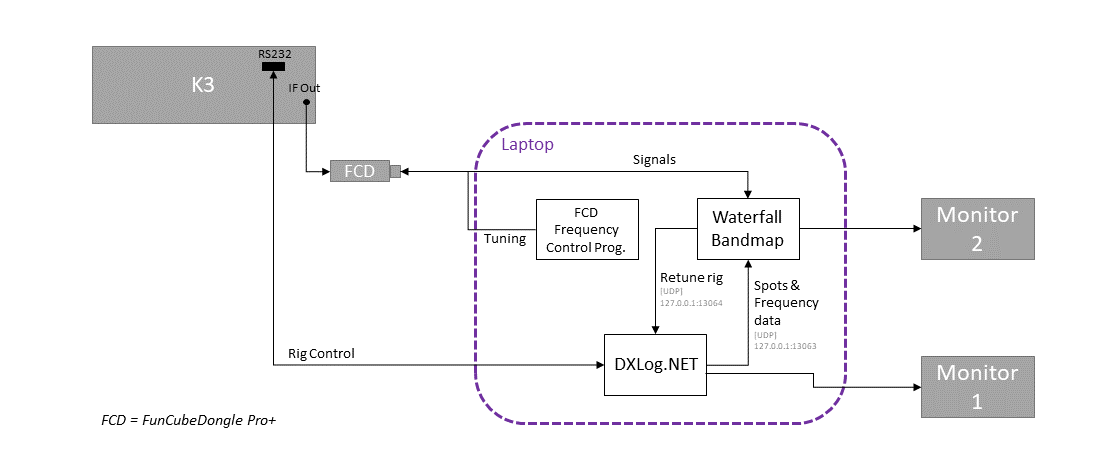
The setup should now look like this:

Block diagram showing the setup (Click to enlarge)

You should now be seeing signals displayed on the waterfall, and DX Cluster spots will appear to the left of the spectrum display.

Fine tuning

Having done this, I found that the receive frequency shown in Waterfall Bandmap was slightly incorrect, which would have meant that clicking on a signal wouldn’t have tuned the rig correctly if this was left.

Using another rig set to minimal power, I generated a constant CW tone and then set the Offset value in the Waterfall Bandmap settings until the signal was correct. In my case, the correction value I needed was 350Hz.

Conclusion

It’s not too difficult to set up Waterfall Bandmap, a FunCube Dongle Pro+ and the K3 to give a useful bandmap alongside the DXLog.NET software, but it does take a bit of configuration.

I certainly found it very useful during CQ WW SSB, although the one annoyance was that the bandmap doesn’t expire cluster spots, meaning you have to click Clear all spots periodically to tidy up the display.

CQ WW SSB 2020

For the last 15 years I have almost always operated CQWW SSB from M4A in the multi-single or multi-two categories. It’s one of the highlights of my year. However, with the current coronavirus situation limiting our ability to meet up, I found myself limited to a single operator entry this year.

I decided to go for the SOSB(A) on 20m category, both since I can fit a 20m dipole into my garden and also the fact that 20m is closed overnight, thereby allowing me the chance of at least a bit of sleep! And (controversial opinion follows…) of course I went for the assisted category, because I don’t see why you’d want to make life hard for yourself by denying the existence of the DX Cluster!

Running just 100W into a dipole hastily constructed the day before the contest, I set myself a modest target of 200 QSOs for the weekend. That wouldn’t be enough to win anything but I could at least feel that I had made a meaningful contribution.

Equipment

  • Elecraft K3
  • 20m dipole at about 7m AGL
  • DXLog.NET for logging
  • Waterfall Bandmap, fed from a FunCube Dongle Pro+, taking the K3’s IF feed, for panadapter (My set up instructions)

The entry

I was actually very surprised! Although it was certainly hard going with relatively low power, I had made my target of 200 QSOs by Saturday late afternoon. This was entirely search-and-pounce, and I spent a lot of time chasing multipliers. That said, by the end of the day, I was still missing entities and zones that should have been fairly easy, like Asiatic Russia.

I didn’t expect to get very many more QSOs on the Sunday as I suspected I had worked all the easy ones, but to my surprise there were plenty of Europeans still to work. I quickly decided to adopt a strategy of trying to get as much of a rate as I could S&P, so that I could optimise my score after focusing on DX the day before. This strategy paid off, and by the afternoon I even found a clear frequency where I could try running. I could only hold a frequency for about 15 minutes at a time, but it was enough for a few countries I might otherwise not have got (such as 9H and GI) to call me.

I was somewhat surprised how late after sunset the band stayed open on Sunday evening (I didn’t declare the band dead until 21:30 UTC) and this allowed me to get several more US stations and even to get my best DX of the contest, PX2A. Thanks to all the stations who struggled to pull my weak signal out.

As for the dipole’s performance, I was very impressed. Although I didn’t manage to work them, I heard VK3, YB and 9G, so it certainly worked well. I didn’t manage to hear any JAs, even though I was aware from the cluster of a good opening to them on Sunday morning. I suspect this was because I’d deliberately orientated the dipole to fire to the North-West and South-East to optimise paths into Europe and the US. As you’d expect for my low power setup, 82.2% of my QSOs were in Europe, with Italy and Germany the main countries.

Results

Contest : CQ World Wide
Callsign : M0BLF
Mode : SSB
Category : Single operator
Overlay : ---
Band(s) : 20
Class : Low
Grid square : JO02BG
Operating time : 29h 10m

 BAND QSO  Z  C DUP POINTS  AVG
-------------------------------
  160   0  0  0   0      0 0.00
   80   0  0  0   0      0 0.00
   40   0  0  0   0      0 0.00
   20 493 14 62   2    667 1.35
   15   0  0  0   0      0 0.00
   10   0  0  0   0      0 0.00
-------------------------------
TOTAL 493 14 62   2    667 1.35
===============================
      FINAL SCORE: 50 692

Operators : M0BLF
Soapbox :
Created by * DXLog.net version 2.5.0 by 9A5K *
http://www.dxlog.net

My WordPress Blog